Mastering the Art of Semi Truck Clutch Adjustment: A Step-by-Step Guide for Smooth Shifting!
Adjusting a Semi Truck Clutch: A Step-by-Step Guide If you’re new to the world of semi-trucks or just looking to sharpen your skills, adjusting the clutch can be a daunting task. But fear not, this step-by-step guide will walk you through the process and have you shifting gears like a pro in no time. First and foremost, it’s important to understand the function of the clutch.
Essentially, it’s a mechanism that disengages the engine from the transmission, allowing you to shift gears or come to a stop without stalling the engine. An improperly adjusted clutch can lead to excessive wear on the clutch and transmission, decreased fuel efficiency, and difficulty shifting gears. To properly adjust the clutch, start by locating the adjustment rod.
This will typically be found near the clutch pedal, but may vary depending on the make and model of the truck. Use a wrench to loosen the lock nut on the adjustment rod and adjust the rod until there is approximately 1/2 inch of play in the clutch pedal. Next, start the engine and engage the clutch.
The truck should immediately start moving forward. If not, adjust the clutch until it does. With the vehicle in gear, release the clutch pedal slowly.
The truck should start moving forward without stalling the engine. If the engine does stall, adjust the clutch until it doesn’t. Repeat this process until you’re able to shift gears smoothly and without any difficulty.
Keep in mind that an over-adjusted clutch can cause excessive wear, so aim for the sweet spot where the clutch engages smoothly without too much play. By following these simple steps, you’ll be able to adjust the clutch on your semi-truck with ease. With a properly adjusted clutch, you’ll enjoy a smoother ride, better fuel efficiency, and extended life of your transmission and clutch components.
Signs Your Clutch Needs Adjustment:
- Gear Grinding: Difficulty shifting gears or grinding noises during gear changes are classic signs of clutch issues. This indicates the clutch isn’t fully disengaging, causing the gears to clash.
- High Engagement Point: The clutch “grabs” too high in the pedal travel, making it difficult to find the friction zone (the sweet spot where the clutch engages smoothly). This can lead to jerky starts and stalling.
- Low Engagement Point: Conversely, the clutch engages too low in the pedal travel, requiring excessive pressure to shift gears. This can cause premature clutch wear and leg fatigue.
- Burning Clutch Smell: A burning rubber smell after driving can indicate excessive clutch slippage, which is often a symptom of improper adjustment.
Before You Adjust: Essential Considerations
- Consult Your Manual: Every truck model might have slight variations in clutch adjustment procedures. Always refer to your truck’s owner’s manual for specific instructions and safety precautions.
- Hydraulic vs. Cable Clutch: Trucks can have hydraulic or cable-operated clutches. The adjustment process differs between the two. Identify your truck’s system type before proceeding.
- DIY vs. Professional Help: While clutch adjustment is possible for some DIY enthusiasts with mechanical knowledge, it requires precision and can be time-consuming. If you’re unsure about your abilities, consider seeking help from a qualified mechanic.
Understanding Clutch Adjustment:
The goal of clutch adjustment is to ensure the clutch pedal has the correct amount of free play (travel before resistance is felt) to allow for smooth engagement and disengagement. Here’s a simplified overview of the adjustment process (refer to your manual for specific steps):
- Locating the Adjuster: The clutch adjuster is typically a threaded rod or cable connected to the clutch linkage. It’s often located near the clutch pedal or underneath the truck near the transmission.
- Making Adjustments: Using wrenches or pliers, carefully loosen or tighten the adjuster according to the manual’s instructions. Small adjustments are key to avoid over-adjusting, which can lead to clutch problems.
- Testing and Refining: After each adjustment, test the clutch pedal travel and engagement point. Repeat the process in small increments until the desired free play and engagement point are achieved.
Safety First!
- Park on Level Ground and Engage Parking Brake: Always ensure your truck is parked on a level surface with the parking brake securely engaged before attempting any clutch adjustments.
- Block the Wheels: Use wheel chocks to prevent the truck from accidentally rolling.
- Disconnect the Battery (Optional): While not always necessary, some mechanics recommend disconnecting the battery as a safety precaution to disable the starter motor.
Preparation
Adjusting the clutch in a semi-truck can be a daunting task, but with the right preparation, it can be a relatively simple process. Before beginning, it is essential to gather the necessary tools and equipment, including a torque wrench, a pressure gauge, and a manual for your specific make and model of semi-truck. It is also important to ensure that the engine is turned off and that the truck is in neutral before starting the adjustment process.
Once you are ready to proceed, it is helpful to have an assistant available to assist you with the adjustments while you monitor the pressure gauge. Remember to take your time and make small, gradual adjustments to avoid causing damage to the clutch or other components of the semi-truck. With patience and attention to detail, you can successfully adjust the clutch in your semi-truck and enjoy a smoother, more responsive driving experience.
Gather the Necessary Tools
When it comes to any task, preparing well will make all the difference. This is true for gathering the necessary tools needed for any project. Depending on what project you’re undertaking, you’ll need different tools.
Before embarking on your project, consider what tools you’ll need and double check to ensure you have everything necessary. The key is to have the right tools for the job. Make a list of the tools that you need, and purchase or gather them ahead of time.
Don’t forget to include additional materials such as safety equipment, measuring tools, and any required hardware. Having everything at hand ensures that you won’t have to stop to go out and get something during your project, which saves you time and hassle. By taking the time to prepare beforehand, you’ll be setting yourself up for success and ensuring that your project is completed efficiently and effectively.

Park the Truck on a Flat Surface
When it comes to preparing your truck for maintenance or repairs, the first step is to park it on a flat surface. This may seem like a no-brainer, but it’s an important step that shouldn’t be overlooked. Parking your truck on an uneven surface can throw off the balance of the vehicle and make it difficult to work on.
Plus, it can be downright dangerous if your truck starts rolling or sliding while you’re underneath it. Before you begin any work, take a few minutes to find a level spot to park your truck. If you’re not sure if the surface is level, use a level tool to check.
It’s always better to be safe than sorry, and parking on a flat surface is an easy way to start your maintenance or repair project off on the right foot. So, make sure to park your truck on a level surface and enjoy a safe and successful project.
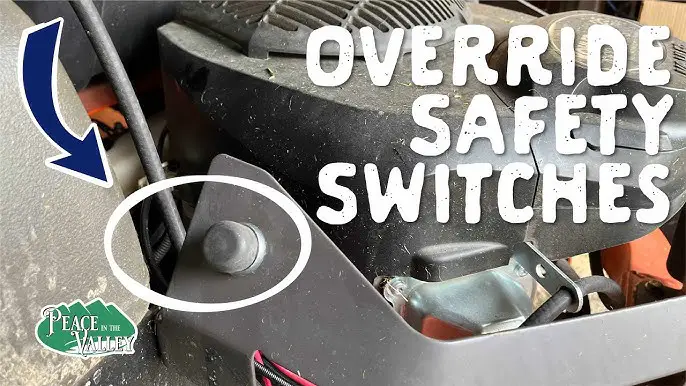
Locate the Clutch
Adjusting a semi-truck clutch is no easy feat, but the first step is always to locate the clutch itself. You will typically find the clutch pedal on the left-hand side of the driver’s seat, near the floor. However, finding the clutch requires more than simply identifying the pedal’s location.
A semi-truck’s clutch is incredibly intricate, so it’s important to carefully assess its operation and note any unusual behaviors or malfunctions. Some common signs that your clutch needs adjustment include slippage, rough shifting, or the inability to engage gears at all. If you notice any of these issues, it’s time to start adjusting the clutch so that your truck runs smoothly and efficiently.
By understanding the operation of your clutch and taking note of any problem signs, you’ll be well on your way to adjusting it successfully and getting back on the road with a reliable and responsive semi-truck.
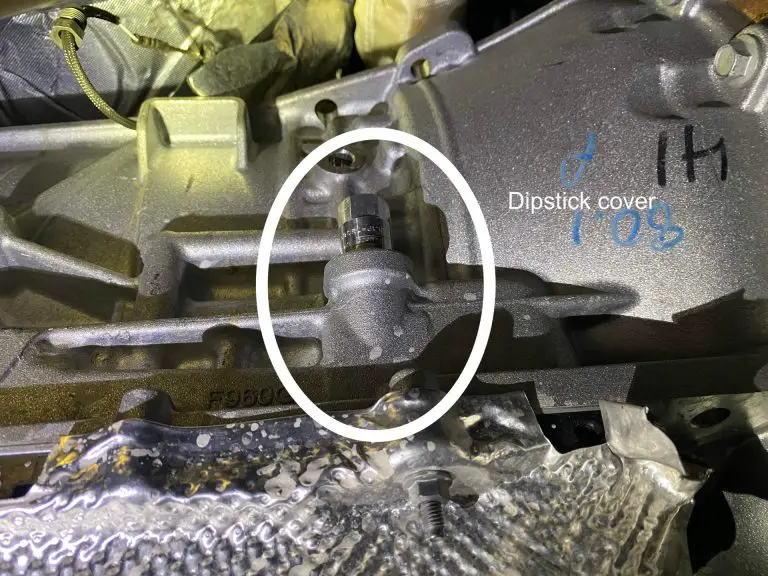
Identify the Clutch Linkage
To properly locate the clutch in your vehicle, it’s essential to understand what the clutch is and what it does. The clutch is a vital component of the manual transmission system, responsible for engaging and disengaging the engine from the wheels. It’s comprised of several parts, including the clutch pedal, pressure plate, friction disk, and release bearing.
The clutch linkage connects the pedal to the clutch release mechanism, enabling you to disengage the engine from the wheels when shifting gears. When identifying the clutch linkage, look for the part that connects the clutch pedal to the clutch release mechanism. It can usually be found near the clutch pedal under the hood of your vehicle.
If you’re having difficulty locating the clutch linkage, it’s best to consult your vehicle’s owner’s manual for further guidance.
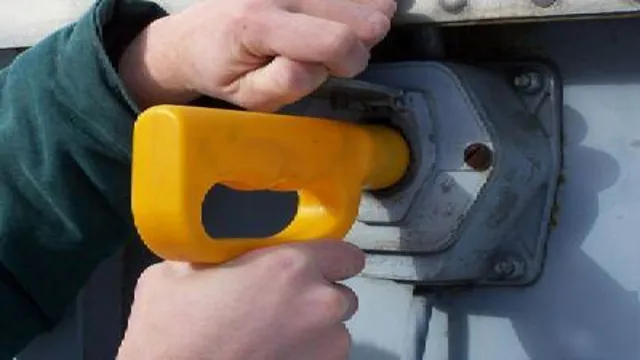
Find the Adjustment Nut
If you’re working on a vehicle, it’s essential to be able to locate the clutch and find the adjustment nut. The clutch is responsible for shifting gears and transferring power from the engine to the transmission. To find it, you’ll need to locate the pedal on the left side of the driver’s footwell.
The clutch should be near the top of this unit and looks like a circular plate. The adjustment nut is usually found on the clutch release lever, which is located near the bottom of the clutch. This nut allows you to adjust the clearance between the clutch and the release bearing, which can affect the transmission’s smoothness.
To locate the adjustment nut, you may need to refer to your vehicle’s owner manual or do some research online. Once you find it, it’s essential to handle it with care and make small adjustments to avoid damaging the transmission. With a bit of practice, you can become confident in adjusting the clutch and improving the overall performance of your vehicle.
Adjustment Process
Adjusting a semi truck clutch is an essential maintenance task that can save you a lot of time and money in the long run. The adjustment process involves adjusting the clutch pedal and linkage to ensure proper engagement and disengagement of the clutch. To begin the process, locate the clutch linkage and verify that there is enough slack in the linkage to allow for adjustment.
Next, loosen the jam nut on the linkage and turn the adjustment nut until the clutch pedal has the desired amount of free play. Tighten the jam nut and test the pedal for smooth engagement and disengagement. Keep in mind that over-tightening the clutch can cause premature wear on the clutch plates and can cause difficulty in shifting gears.
By regularly adjusting your semi truck clutch, you can ensure that your vehicle operates smoothly and efficiently, saving you time and money on repairs down the line.
Loosen the Lock Nut
Adjusting a lock nut may seem like a daunting task, but it’s not as complicated as you might think. To start, you need to loosen the lock nut, which is the nut that’s tight against the adjustment nut. The lock nut keeps the adjustment nut in place, so loosening it is essential for making any adjustments.
To do this, use a wrench to hold the adjustment nut in place while using another wrench to turn the lock nut counterclockwise. This loosens the lock nut, and you can then make the necessary adjustments to the adjustment nut. Remember to re-tighten the lock nut after making the adjustments, so the adjustment stays in place.
With a few simple steps, you can adjust your lock nut and keep your machinery working smoothly.
Turn the Adjustment Screw
If you’re having trouble with the performance of your machine, you may need to adjust the adjustment screw. This small but vital piece of equipment can make all the difference in how your machine operates. The adjustment process is typically quite easy, and you can do it yourself with just a few tools.
Simply locate the adjustment screw and use a screwdriver to turn it until you find the right level of performance for your needs. It’s important to be patient and to make small, incremental changes until you get the results you’re looking for. By doing this, you’ll avoid over-adjusting and causing even more problems.
Remember, the adjustment screw is there for a reason, and with a little bit of patience and some trial and error, you can get your machine back up to speed in no time.
Tighten the Lock Nut
When it comes to adjusting a lock nut, it’s important to tighten it properly to ensure that your appliance or machine stays securely in place. But before you even start tightening, it’s important to identify where the lock nut is located. It’s typically located at the end of a threaded rod or bolt and is used to prevent the nut from loosening due to vibrations or other factors.
Once located, you can use a wrench or pliers to tighten the lock nut until it’s snug against the other nuts. It’s important not to over-tighten, as this can cause damage or strip the threads. However, if the nut is too loose, you risk having it come undone, causing potential safety hazards or damage to your equipment.
So, take your time and ensure that the lock nut is tightened securely to keep everything in working order. Remember, safety first!
Testing the Clutch Like a Pro
Adjusting a semi truck clutch is an essential maintenance task that helps keep your vehicle running smoothly. To effectively test your clutch, begin by shifting your truck into gear and engaging the clutch. Then, press down on the accelerator and gradually release the clutch.
If your truck stalls, it’s likely that you need to adjust the clutch. A loose clutch will cause your truck to slip while a tight clutch will make it difficult to shift gears smoothly. To adjust your clutch, locate the clutch linkage on your truck’s transmission.
Depending on the make and model of your vehicle, you may need to loosen or tighten the bolts on the linkage until your clutch engages and disengages at the correct point. It’s important to note that the process can become complex, so if you’re unsure about how to do this yourself, it’s best to seek the help of a professional mechanic. By regularly testing and adjusting your semi truck’s clutch, you’ll ensure that it continues to operate efficiently and effectively for years to come.
Start the Engine
When you’re learning how to drive a manual car, one of the first things you’ll need to master is testing the clutch. This is a critical step in starting the engine and getting the car moving. Testing the clutch involves pressing the clutch pedal down with your foot and then slowly releasing it while keeping your other foot on the brake pedal.
As you release the clutch, you’ll feel it engage with the transmission, which means the engine is connected to the wheels and ready to move. It’s important to do this slowly and smoothly, so you don’t stall the engine or jerk the car forward. Practice makes perfect, so be patient and take your time until you feel comfortable with this important skill.
Once you’ve tested the clutch and the engine is running smoothly, you’re ready to shift into first gear and start driving!
Engage and Disengage the Clutch
Testing the clutch is an essential step in maintaining your vehicle’s performance. Engaging and disengaging the clutch must feel smooth and effortless. It’s essential to ensure the clutch feels tight and responsive, and there should be no slipping or resistance during acceleration or deceleration.
A clutch that doesn’t engage or disengage correctly can cause damage to your engine and transmission, reducing the lifespan of your vehicle. When testing the clutch, make sure that the pedal feels light and doesn’t require too much pressure to engage. Test the clutch by engaging it, pressing the gas pedal, and releasing the clutch slowly.
A well-maintained clutch should allow the car to move smoothly and without any shuddering or jerking. In summary, the clutch is a vital component of your vehicle, and regular testing can help identify small issues before they become more significant problems. So, it’s essential to pay attention to how your clutch feels and make sure that it’s operating at its optimal level.
Check the Result
If you’re wondering whether your car’s clutch is in good shape or not, it’s important to know how to test it. Testing the clutch is necessary to ensure that it’s working properly and smoothly. One way to do this is by using the “roll test” method.
While the vehicle is in a quiet area with a flat surface, put it in high gear and start it. Then, release the handbrake and gradually engage the throttle. If the engine stalls or sounds weird, it may indicate that the clutch needs replacing.
Another useful method is the “road test” method, which requires you to drive the car typically and notice how the clutch engages when you shift gears. If there’s any slip or grinding sound, you may need to have it checked. Testing the clutch is essential as it will prolong the life of your vehicle and prevent potential accidents.
Remember to have a trained technician inspect your car if either of these tests reveal any issues.
Conclusion
Adjusting a semi truck clutch is not rocket science, but it does require some patience, attention to detail, and a little bit of elbow grease. Whether you’re an experienced driver or a complete newbie, it’s important to ensure your clutch is in good working order for a smooth ride and efficient operation. With the right tools, knowledge, and a little bit of practice, you’ll be shifting gears like a pro in no time.
So, shift into gear, adjust that clutch, and hit the road with confidence, because there’s nothing quite like the feeling of a perfectly timed shift.”
FAQs
What are the signs that the semi truck clutch needs adjustment?
Signs indicating the need for clutch adjustment include difficulty shifting gears, clutch slippage, and a burning smell coming from the clutch.
How often should a semi truck clutch be adjusted?
Semi truck clutches typically need adjustment every 100,000 miles or every two years, depending on the manufacturer’s recommendations.
What tools are needed to adjust a semi truck clutch?
Adjusting a semi truck clutch typically requires basic hand tools such as a socket set, screwdrivers, and a wrench.
Can a semi truck clutch be adjusted without professional help?
Yes, it is possible to adjust a semi truck clutch without professional help. However, it is important to have a good understanding of the clutch system and follow the manufacturer’s recommended procedures closely to avoid causing damage to the clutch or transmission.
Is adjusting my truck’s clutch a DIY job?
It depends. Clutch adjustment on some trucks can be tackled by DIY enthusiasts with mechanical knowledge and a good understanding of their specific vehicle. However, it requires precision and can be time-consuming. If you’re unsure about your abilities or uncomfortable working on your truck’s undercarriage, seeking help from a qualified mechanic is recommended.
What tools do I need to adjust my truck’s clutch?
The specific tools you’ll need depend on your truck’s model and clutch system (hydraulic or cable-operated). Typically, you might need wrenches, pliers, and possibly a jack and jack stands if accessing the adjuster requires getting under the truck. Always refer to your truck’s manual for the exact tools required.
What happens if I don’t adjust my clutch properly?
Improper clutch adjustment can lead to a number of problems. Over-adjusting can cause the clutch to not disengage fully, leading to gear grinding and potential transmission damage. Under-adjusting can result in excessive pressure required to operate the clutch, causing premature wear and leg fatigue. In severe cases, both scenarios can lead to needing a complete clutch replacement, which can be a costly repair.
Is there anything else I can do to prolong the life of my truck’s clutch?
Absolutely! Here are some tips:
- Avoid riding the clutch: Don’t rest your foot on the clutch pedal while driving, as this creates unnecessary wear and tear.
- Smooth gear changes: Shift gears smoothly and avoid slamming them into place.
- Minimize towing heavy loads: Excessive towing puts a strain on the clutch. If you frequently tow heavy loads, consult your truck’s manual for towing capacity recommendations and avoid exceeding them.
- Listen to your truck: Pay attention to any warning signs like grinding or burning smells, and address clutch issues promptly to prevent further damage.
By following these tips and performing proper clutch adjustment when necessary, you can extend the life of your truck’s clutch and ensure a smoother driving experience.