How to Fix Oil Leak between Engine And Transmission
Oil leaks can be a common and frustrating issue for many vehicle owners, especially when they occur between the engine and transmission. Not only can oil leaks lead to a messy driveway, but they can also cause damage to your vehicle if left untreated. In this blog post, we will discuss the causes of oil leaks between the engine and transmission and provide a step-by-step guide on how to fix this issue.
Safety Precautions
Working on your vehicle requires prioritizing safety to avoid injuries and ensure a smooth repair process. Here’s a breakdown of the crucial safety precautions to take before tackling the oil leak fix between your engine and transmission:
-
Gather the Right Tools and Gear:
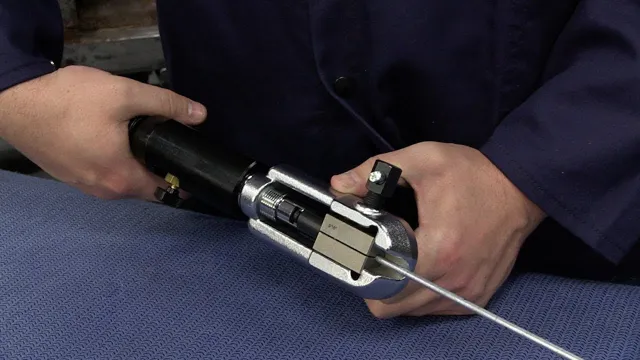
- Assemble all the necessary tools for the repair. You’ll likely need wrenches, screwdrivers of various sizes, a jack and jack stands, a drain pan for used oil, an oil filter wrench, and a replacement gasket or seal depending on the leak source.
- Don’t forget about safety gear! Gloves and safety glasses are essential to protect your hands and eyes from potential hazards like hot oil or flying debris.
-
Park Smart and Secure:
- Choose a level, stable surface to park your vehicle on. This will prevent the car from rolling and ensure a safe working environment.
- Engage the parking brake firmly to add an extra layer of security and prevent the vehicle from accidentally moving.
-
Cool Down Completely:
- Allow the engine ample time to cool down completely before you begin working on it. Touching hot engine components can lead to serious burns. Ideally, let the engine sit for several hours or overnight.
-
Optional Safety Step: Disconnecting the Battery
- While not always mandatory, some repair manuals might recommend disconnecting the battery as an added safety precaution. This disables the starter motor and reduces the risk of electrical sparks during the repair process.
- Important Note: Consult your vehicle’s specific repair manual for instructions on safely disconnecting the battery. Disconnecting the battery can sometimes reset certain vehicle settings, so be aware of this potential consequence.
By following these safety precautions, you’re setting yourself up for a successful and safe repair experience. Remember, taking the time to prioritize safety is paramount whenever working on your vehicle.
Leak Identification: Pinpointing the Culprit
Before diving into repairs, it’s crucial to identify the exact source of the oil leak between your engine and transmission. Here’s a detailed breakdown of the leak identification process:
-
The Great Clean Up: Begin by thoroughly cleaning the oily area around the engine and transmission bell housing. This will help pinpoint the exact location where fresh oil is appearing. Degreaser and rags will be your allies in this battle against grime. A clean work surface allows for better visual inspection.
-
Visual Inspection: With a clean and unobstructed view, meticulously examine the following common leak locations:
-
Rear Main Seal: This seal sits between the crankshaft and the rear engine cover, preventing oil leaks from the engine block. Look for oil stains or residue around the seam where the engine and transmission meet. In some cases, oil might travel down the backside of the engine block, making it seem like the leak is originating lower.
-
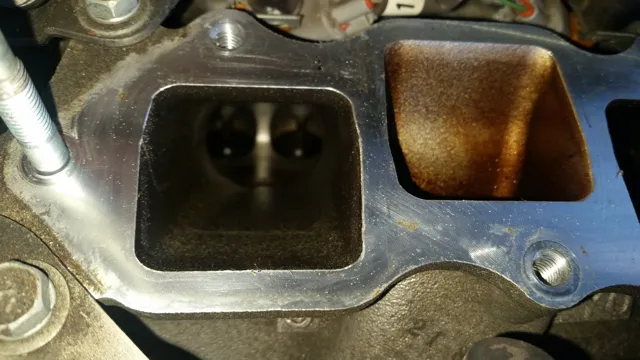
Oil Pan Gasket: The oil pan gasket forms a seal between the engine block and the oil pan, which holds the engine oil. Check the perimeter of the oil pan for signs of oil seepage or staining. A worn-out or damaged oil pan gasket can allow oil to leak from the engine.
-
Torque Converter Seal (Automatic Transmission Only): This seal sits between the torque converter (located on the flywheel/flexplate) and the transmission. Since the torque converter seal is internal to the transmission bell housing, you won’t be able to see it directly. However, if you suspect a leak here, you might notice oil dripping from the transmission pan mating surface or along the bell housing seam. Signs of transmission fluid loss, such as low fluid level on the dipstick or slipping gears, can also indicate a potential torque converter seal leak.
-
-
Additional Clues: The color and consistency of the leaking oil can offer further clues. Engine oil is typically a dark brown or black, while automatic transmission fluid is usually reddish or pinkish. Pay attention to the smell as well – engine oil has a distinct petroleum odor, while transmission fluid has a somewhat sweet scent.
By carefully cleaning the area, performing a visual inspection, and considering the type of fluid leaking, you should be able to identify the culprit behind the oil leak between your engine and transmission. This will determine the specific repair procedure required in the next section of the outline.
Causes of Oil Leak between Engine And Transmission
There are several potential causes of an oil leak between the engine and transmission. Some of the common reasons include:
- Worn or damaged seals and gaskets: Over time, the seals and gaskets that are used to keep the oil contained within the engine and transmission can become worn or damaged, leading to leaks.
- Loose or improperly tightened bolts: If the bolts that hold the engine and transmission together are loose or not properly tightened, it can create gaps that allow oil to escape.
- Cracked or damaged components: Cracks or damage to the engine or transmission housing can also result in oil leaks.
Credit: automotiveinstincts.com
Steps to Fix Oil Leak between Engine And Transmission
Now that we have identified some of the potential causes of oil leaks between the engine and transmission, let’s discuss how to fix this issue:
Step 1: Identify The Source Of The Leak
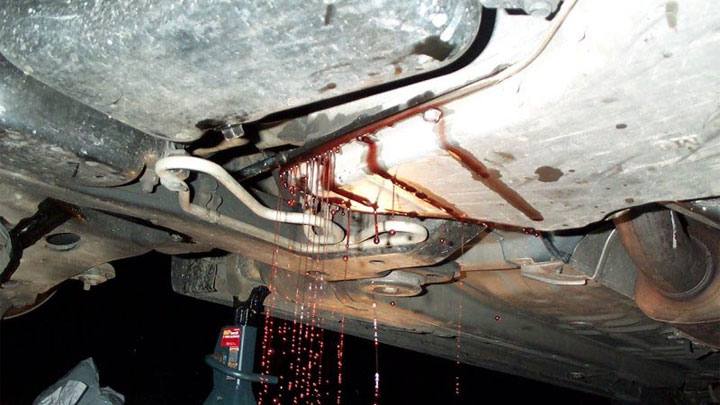
Before you can fix the oil leak, it’s important to first determine where the leak is originating from. Thoroughly inspect the area between the engine and transmission to locate the source of the leak. Look for signs of oil pooling, dripping, or staining to pinpoint the exact location.
Step 2: Tighten Loose Bolts And Fasteners
If the oil leak is being caused by loose or improperly tightened bolts, start by tightening them to the manufacturer’s specified torque. Use a torque wrench to ensure that the bolts are properly secured without over-tightening them, which can lead to other issues.
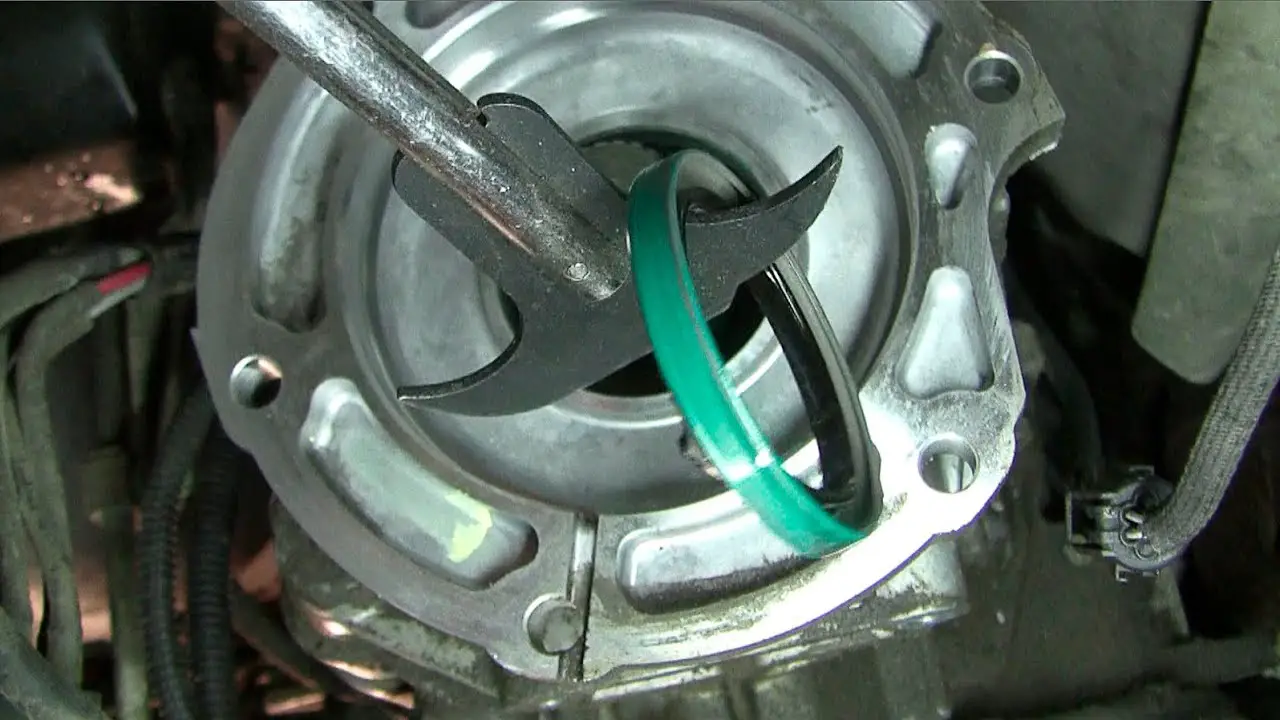
Step 3: Replace Seals And Gaskets
If worn or damaged seals and gaskets are the culprit, they will need to be replaced. Carefully remove the old seals and gaskets, clean the surfaces thoroughly, and install new ones in their place. Be sure to use the appropriate sealant as recommended by the manufacturer to prevent future leaks.
Step 4: Repair Cracked Or Damaged Components
If you discover cracks or damage to the engine or transmission housing, these issues will need to be repaired. Depending on the extent of the damage, this may involve welding, patching, or replacing the affected components. It’s crucial to address any structural damage to prevent further oil leaks.
Step 5: Test For Leaks
After completing the necessary repairs, it’s essential to test for leaks before considering the job done. Start the engine and allow it to run for a few minutes while checking for any signs of oil leakage. If no leaks are present, you have successfully resolved the issue.
Step 6: Regular Maintenance
Once you have fixed the oil leak between the engine and transmission, it’s important to maintain regular upkeep of your vehicle to prevent future leaks. Keep an eye on the oil levels and inspect for any potential signs of leakage during routine maintenance checks.
Leak Check and Final Touches
After completing the repairs outlined in Section III, it’s crucial to verify the success of your fix and ensure everything functions properly. Here’s a breakdown of the final steps:
1. Replenish Fluids and Leak Check:
- Refill Engine Oil (or Transmission Fluid): Refer to your vehicle’s owner’s manual for the recommended engine oil type and capacity (or transmission fluid type and capacity for automatic transmissions). Carefully add the appropriate fluid until it reaches the proper level indicated on the dipstick.
- Double-Check Fluid Levels: Once refilled, wipe away any excess fluid around the fill port to avoid messes. Recheck the fluid level on the dipstick to ensure it’s within the recommended range.
- Visual Leak Inspection: With the engine off, thoroughly inspect the repair area (rear main seal, oil pan gasket, or torque converter seal location depending on the repair) for any signs of fresh leaks. Look for dripping oil or wet spots.
2. Test Run and Retightening:
- Short Engine Start-Up: Start the engine and let it run for a few minutes. Observe the repair area for any leaks while the engine is idling.
- Listen for Unusual Sounds: Pay attention to any abnormal noises that might indicate loose components or improper assembly.
- Retighten Bolts (if Necessary): If you suspect any leaks or loose components, consult your repair manual for recommended torque specifications and carefully retighten the appropriate bolts.
3. Test Drive and Monitoring:
- Road Test: Take your vehicle for a short test drive. Pay attention to the vehicle’s performance, especially transmission operation for automatic vehicles (if the torque converter seal was replaced).
- Monitor for Leaks: After the test drive, park the vehicle on a level surface and inspect underneath for any signs of fresh leaks.
4. Additional Tips:
- It’s a good practice to monitor the fluid level and check for leaks periodically, especially during the first few days or weeks after the repair.
- If you notice any leaks or abnormal behavior, don’t hesitate to consult a qualified mechanic for further inspection.
By following these steps and remaining vigilant, you can ensure a successful oil leak repair and enjoy peace of mind on the road.
Frequently Asked Questions For How To Fix Oil Leak Between Engine And Transmission
Can An Oil Leak Between The Engine And Transmission Cause Damage?
Yes, an oil leak in this area can lead to serious engine and transmission damage if not addressed promptly.
How Can I Identify An Oil Leak Between The Engine And Transmission?
Look for oil puddles under your vehicle, a burning oil smell, or a decrease in oil levels to identify a potential leak.
What Are The Common Causes Of An Oil Leak Between The Engine And Transmission?
Leaks can often be caused by a damaged oil pan, worn seals, loose bolts, or a malfunctioning gasket in this area.
Is It Safe To Drive With An Oil Leak Between The Engine And Transmission?
Driving with a leak can be risky, as it may lead to lubrication issues and damage; it’s best to address it promptly.
What other potential leak points should be considered aside from using ATP AT-205?
Aside from utilizing ATP AT-205, it is important to consider other potential leak points that may contribute to issues such as camshaft O ring failure. Additional areas to examine for leaks could include valve cover gaskets, oil pan gaskets, rear main seals, and various other seals and gaskets throughout the engine. Regular inspection of these components can help identify potential leaks and prevent more serious issues in the future.
What parts were replaced in a 2006 Odyssey to fix leaks and ensure smooth driving?
In addressing leaks and ensuring smooth driving in a 2006 Odyssey, the owner shared that one van responded quickly, while another with a severe leak took longer to show improvement. After a few months, both vans stopped leaking. To proactively prevent future troubles, the owner now adds 4oz of a specific product during each oil change, which is half of what the manufacturer recommends for fixing active leaks.
Can ATP AT-205 fix rear main seal and oil pump seal issues?
Excerpt_Theirs addresses the query regarding the effectiveness of ATP AT-205 in resolving rear main seal and oil pump seal issues. In the passage, it is mentioned that a user named scottn3 asserts that AT205 should be able to tackle problems associated with the rear main seal, oil pump seal, and other related issues. The user recommends using 6 ounces of AT205 and driving approximately 5,000 miles to potentially address these concerns successfully.
How much ATP AT-205 should be used as a preventative measure during oil changes?
The recommended amount of ATP AT-205 to be used as a preventative measure during oil changes is 4oz per oil change, which is essentially half of the recommended dosage for fixing an active oil leak as specified.
How long does it take for ATP AT-205 to work on fixing leaks in vehicles?
For ATP AT-205 to effectively address leaks in vehicles, it is important to note that this is not a quick fix solution. The process involves hours of engine operation to allow the product to work effectively. In some instances, one vehicle might respond to the treatment within a couple of months, while for others with more severe leaks, it may take longer. Ultimately, based on the experience shared, it appears that by early summer, significant improvements were observed with neither vehicle leaking.
How effective is ATP AT-205 seal conditioner for long-term repair of rear main seal leaks in vans?
ATP AT-205 seal conditioner has proven to be highly effective for long-term repair of rear main seal leaks in vans. Users have reported significant success in addressing rear main seal leaks in their vehicles by using this product. The application of ATP AT-205 required some time to take effect, with results becoming noticeable after several hours of engine operation. In one instance, a van with a severe rear main seal leak took a bit longer to show improvement compared to another van with a less severe leak. Ultimately, the product successfully resolved the leaks in both vehicles, with one van completely stopping its oil loss and the other only experiencing occasional minor drops. This success led the user to implement ATP AT-205 as a preventative measure in all their family vehicles. Overall, the consistent positive experiences shared by users highlight the effectiveness of ATP AT-205 seal conditioner for long-term repair of rear main seal leaks in vans.
Is there a recommended seal conditioner for fixing rear main seal leaks in vans?
If you are seeking a reliable seal conditioner to address rear main seal leaks in vans, one product that has garnered positive feedback is ATP AT-205. This particular conditioner has been recommended by individuals who have experienced success in resolving rear main seal leaks in their vans, such as Odysseys. Users have reported long-term effectiveness in mitigating these types of leaks, despite initial skepticism about the product’s claims. ATP AT-205 is considered a viable solution by some van owners who have faced similar issues and found it to be an affordable option for potential repair.
How can oil pump seal issues be addressed during a timing belt replacement?
During a timing belt replacement, it is important to check and potentially replace the oil pump seal to prevent any leaks. Inspecting the oil pump seal carefully during the replacement process is crucial to ensure it is in good condition. If the oil pump seal shows signs of wear or damage, it should be replaced to prevent any potential leaks in the future. It is recommended to address any issues related to the oil pump seal proactively during the timing belt replacement procedure to avoid the need for redoing the work later on.
What are some possible additional leaks to look for when the timing belt is being replaced?
When replacing a timing belt, it’s important to check for potential additional leaks that may not have been initially visible. One common leak to look out for is the oil pump seal. This component is crucial in preventing oil leaks and ensuring the proper functioning of the engine. If the oil pump seal is not properly inspected and replaced if necessary during a timing belt replacement, it can lead to oil leakage and potential issues with engine performance. Therefore, it is advisable to thoroughly examine and potentially replace the oil pump seal when replacing a timing belt to prevent any future complications.
Is it worth getting the rear main seal replaced if the van is in good shape overall?
Replacing the rear main seal in the van, despite being labor-intensive due to the need for transmission removal, is recommended if the vehicle is generally in good condition. It can help maintain the van’s overall performance, ensuring that it continues to run well. By addressing the rear main seal issue, you can avoid the need to purchase a new van, making it a cost-effective solution to keep your existing vehicle in good working order.
What are common reasons for oil leaks in vans with high mileage?
In older vans with high mileage, common reasons for oil leaks may include issues such as the Rear Main Seal leaking between the engine and transmission. This specific problem can be labor-intensive to fix as it requires the transmission to be removed for the seal replacement. Despite the work involved, if the rest of the van is in good condition, it can be worthwhile to address the leak to keep the vehicle running. Ultimately, repairing such leaks could be a more cost-effective option than replacing the entire van.
What could be causing the oil leak and engine noise in my van?
The oil leak and engine noise in your van could be attributed to a rear oil leak, which is a common issue. The root causes might include a faulty VVT solenoid valve gasket or a valve cover gasket that needs attention. It would be prudent to inspect both the front and back gaskets while addressing this issue. Additionally, addressing the timing belt (TB) and its tensioner could also potentially resolve the engine noise problem.
Should I keep or replace my van with an oil leak and engine noise?
Based on the expert advice provided in Passage_1, if your van is experiencing an oil leak and engine noise due to a Rear Main Seal issue, it is recommended to keep the van and have the necessary repair work done. Despite the labor-intensive process required to replace the Rear Main Seal, if the van is in good overall condition, the cost of repairing it would likely be more economical than purchasing a new vehicle. By getting the repair work done, you can continue to use your van without the need for a replacement.
What are common reasons for oil leaks in vans with high mileage?
In older vans with high mileage, common reasons for oil leaks may include issues such as the Rear Main Seal leaking between the engine and transmission. This specific problem can be labor-intensive to fix as it requires the transmission to be removed for the seal replacement. Despite the work involved, if the rest of the van is in good condition, it can be worthwhile to address the leak to keep the vehicle running. Ultimately, repairing such leaks could be a more cost-effective option than replacing the entire van.
Conclusion
Dealing with an oil leak between the engine and transmission can be an arduous task, but with the right approach, it can be effectively resolved. By identifying the source of the leak and addressing the underlying causes, you can prevent further damage and maintain the performance and longevity of your vehicle.
Remember to follow proper safety precautions and consult with a professional mechanic if you’re unsure about fixing the issue yourself. Taking proactive measures to remedy oil leaks will not only save you money in the long run but also contribute to the overall health of your vehicle.