Stop the Drip: The Ultimate Guide to Fix a Leaky Back Window on Your Truck
Are you tired of having a leaky truck back window? It can be frustrating to have water seeping in during a surprise rainstorm or even just a car wash. Not only is it uncomfortable, but it can also cause damage to your vehicle’s interior. However, fixing a leaky truck back window doesn’t have to be a complicated or expensive process.
With the right tools and a bit of know-how, you can easily seal up your window and prevent any future leaks. In this blog post, we will explore different methods and tricks to help you fix your leaky truck back window, so you can hit the road with confidence and a dry cab. So sit back, grab a cup of coffee, and let’s get started!
Identifying the Source of the Leak
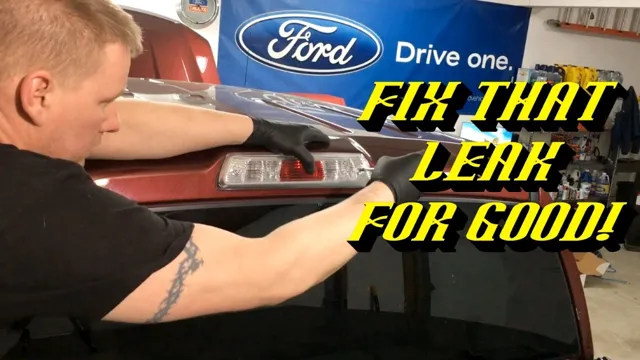
If you’re dealing with a leaky back window on your truck, the first step is to identify where the leak is coming from. Begin by cleaning the window and inspecting the sealant around the edges. Look for any cracks, gaps, or tears in the sealant that could be allowing water to seep through.
Another common culprit is the window gasket. Over time, these can dry out and become brittle, causing them to crack or shrink. If you notice any damage to the gasket, replacing it may be necessary to fix the leak.
Additionally, check the drainage channels along the bottom of the window to ensure they aren’t clogged with debris. If all else fails, it may be time to take your truck to a professional to have them diagnose and repair the issue. With a little detective work, you can stop that pesky leak and keep your truck’s interior safe and dry!
Inspecting the Gasket
When it comes to inspecting a gasket, it’s important to identify the source of the leak. There could be a variety of reasons why the gasket is leaking, so it’s crucial to take a close look at it. First, you’ll want to visually inspect the gasket for any visible cracks or signs of wear and tear.
If you notice any, it’s likely that the gasket needs replacing. Another thing to look out for is whether the gasket is sitting flush with the surface it’s meant to seal. If it’s not, it could be causing a gap that’s allowing fluids to leak through.
It’s also worth checking to make sure that the gasket is the correct size and type for the application, as using the wrong gasket could also lead to leakage. By taking the time to inspect the gasket thoroughly, you’ll be able to identify and fix the source of the leak, ensuring that your equipment runs smoothly and efficiently.

Checking the Window Sealant
When dealing with a leaky window, the first thing to do is identify the source of the problem. Water can seep in from different places, causing the issue to be more complicated than it seems. One of the most common culprits is the window sealant.
Over time, sealant can become worn out or damaged, causing water to trickle inside. Checking the sealant is a simple task that can save you from calling expensive professionals to deal with an issue that could have been easily solved. Carefully inspect the sealant for any cracks, gaps, or signs of wear and tear.
If you notice any damage, it’s time for a replacement. Sealant is an affordable fix that can save you from future water damage and keep your home dry and safe. Don’t hesitate to check your window sealant if you notice any water stains or dampness in your home.
It could be the key to stopping a leak before it turns into a major issue.
Repairing the Leak
If you’re dealing with a leaky back window on your truck, it’s important to address the issue as soon as possible to avoid any further damage. The first step is to identify where the leak is coming from. It could be due to a crack in the window itself, damaged weather stripping, or even a faulty seal.
Once you’ve located the source of the leak, you can begin to make repairs. Patching small cracks or replacing weather stripping can be done easily with a few basic tools and materials. However, if the seal is damaged, it may require more extensive repairs or even a replacement window.
Don’t ignore a leaky back window on your truck, as it can lead to more serious structural issues down the line. Instead, take action and fix the problem before it gets worse.
Replacing the Gasket
If you’ve noticed a leak coming from your engine, the culprit is often a faulty gasket. Luckily, replacing the gasket is a relatively straightforward repair that can save you from costly engine damage down the line. You’ll first need to locate the gasket and remove any surrounding components until you can access it.
Next, carefully clean the area to remove any debris or residue, then gently remove the old gasket and insert the new one. Properly torque the bolts to ensure a secure fit, and replace any other components that were removed. It’s important to note that gasket failure can be caused by a number of factors, such as overheating or improper installation, so it’s essential to address any underlying issues to prevent further leaks.
By taking the time to properly replace the gasket, you can effectively repair the leak and keep your engine running smoothly.
Applying Sealant
If you’re dealing with a leaky roof, it’s important to take action as soon as possible to prevent further damage. One way to repair the leak is by applying sealant. Before you begin, you should identify the source of the leak and ensure that the area is clean and dry.
Once you’ve done that, you can apply the sealant using a brush or caulk gun. Be sure to follow the manufacturer’s instructions carefully, as improper application can actually make the problem worse. It’s also a good idea to check the sealant periodically to ensure that it’s still holding up.
By taking care of leaks promptly and correctly, you can help protect your home and avoid costly repairs in the future. So don’t wait – get started on that repair today!
Using Silicone to Seal
Silicone Sealant When it comes to repairing a leak in your home, using silicone sealant can be a great solution. Silicone sealant is a flexible and durable material that is ideal for sealing gaps and cracks in various household items such as sinks, bathtubs, and toilets. To start, clean the area where you are going to apply the sealant thoroughly.
Make sure there is no dirt, oil, or moisture as this can affect the sealant’s effectiveness. Next, cut the tip of the sealant tube to the width you need. Apply the sealant to the area in question, making sure it is evenly distributed.
Press the sealant into the gap or crack using either your finger or a tool. Lastly, let the silicone sealant dry and cure according to the instructions on the tube. Once fully cured, the sealant will create a watertight bond that will keep your home leak-free.
Remember to reapply the silicone sealant every few years to ensure your home stays protected.
Preventing Future Leaks
If you’re tired of dealing with a leaky back window on your truck, there are a few steps you can take to prevent future leaks. First, make sure that the weatherstripping around the window is in good condition. Over time, weatherstripping can crack, shrink, or deteriorate, which can lead to leaks.
If you notice any damage, it’s important to replace it as soon as possible. Another way to prevent leaks is to make sure that the window is securely sealed when it’s closed. Check for any gaps or misalignments that could allow water to seep through.
Lastly, make sure to clean the window regularly and remove any debris or buildup that could compromise its sealing. By following these simple steps, you can keep your truck’s back window leak-free and ensure a dry and comfortable ride every time.
Regular Maintenance Tips
Regular maintenance is key to preventing future leaks in your home. One important tip is to check the caulking around your windows and doors. Over time, caulk can dry out and crack, allowing water to seep in.
Make sure to remove any old caulking and replace it with fresh caulk to ensure a tight seal. Additionally, it’s important to regularly clean your gutters to prevent clogs and backup of water. When gutters are clogged, water can overflow and potentially damage your roof and siding.
Taking the time to remove any debris from your gutters will help prevent any potential water damage. Another tip is to inspect your roof for any damage or wear and tear. If you notice any issues, it’s important to have them repaired as soon as possible to prevent any leaks during heavy rainfall or snow.
Keeping up with regular maintenance tasks can help prevent future leaks and save you money in the long run.
Covering the Truck
If you’ve experienced leaks in the back of your truck, you know how frustrating and damaging they can be. One effective solution to preventing future leaks is by covering the truck with a high-quality tarp. Not only will it keep water out, but it also prevents dust, debris, and other particles from accumulating in your truck bed.
When selecting a tarp, make sure to choose one that fits your truck bed perfectly and is made from durable, waterproof material. Additionally, securing the tarp tightly to your truck using bungee cords or tie-downs is crucial for preventing any potential gaps where water may seep in. So, invest in a quality tarp and keep your truck bed safe and dry no matter what the weather brings.
Conclusion
In summary, fixing a leaky back window on a truck can be a daunting task, but with the right tools and patience, it can be accomplished. Don’t let a few drops of water ruin your ride, take on the challenge and show that leak who’s boss. Remember, fixing a leak is not just about repairing the technical issue, it’s about regaining control, restoring peace and quiet, and keeping your belongings dry.
So, roll up your sleeves, grab a beer, and fix that leaky back window like a true DIY champion.”
FAQs
What causes a leaky back window on a truck?
The most common cause is a damaged or worn out seal around the window, but it can also be due to cracks in the glass or damage to the frame.
Can I fix a leaky back window myself?
It depends on the severity of the damage and your level of experience with auto repairs. If the damage is minor, you may be able to fix it with some sealant or resin. However, if the damage is severe, it’s best to take it to a professional.
How much does it cost to fix a leaky back window on a truck?
The cost can vary depending on the extent of the damage and the type of vehicle. On average, it can cost anywhere from $100 to $500.
How long does it take to fix a leaky back window on a truck?
Again, this can vary depending on the severity of the damage. Minor repairs can be done in a few hours, while more extensive repairs may take a day or two. It’s best to check with the repair shop for an estimated timeline.


