DIY Driveshaft Balancing: Mastering the Art of Perfectly Balanced Wheels at Home
Balancing a driveshaft at home may seem like a daunting task, but it can save you time and money in the long run. If a driveshaft is out of balance, it can cause vibrations and potentially damage other components of your vehicle, leading to costly repairs. However, by following a few simple steps and using the right tools, balancing a driveshaft at home can be easily accomplished.
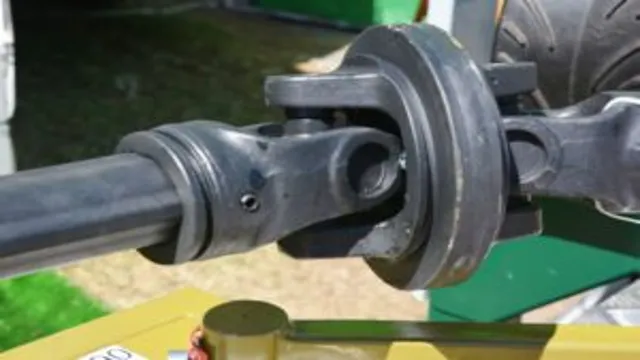
First, it’s important to understand what a driveshaft is and how it works. A driveshaft is a rotating shaft that transfers power from the engine to the wheels. It is made up of two or more sections that are connected by a series of universal joints.
When a driveshaft is out of balance, it can cause vibrations that can be felt throughout the vehicle, especially at higher speeds. To balance a driveshaft, you will need to first remove it from your vehicle. This can be done by disconnecting it from the transmission and the differential.
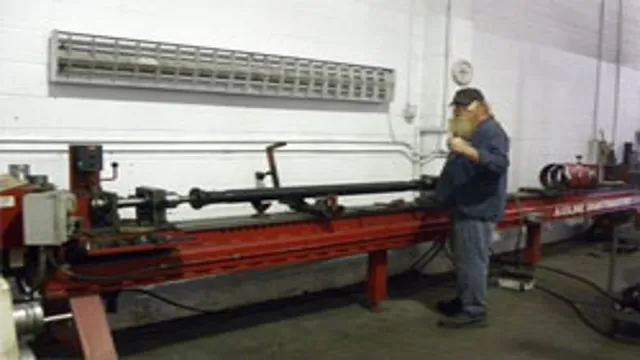
Once the driveshaft is removed, it can be placed on a balancing machine, which will identify any imbalances. Using a balancing machine, you can add or remove weights from the driveshaft to correct any imbalances. This process can be repeated until the driveshaft is properly balanced and the vibrations have been eliminated.
Balancing a driveshaft at home may sound complicated, but with the right tools and a little patience, it can be done easily and effectively. By taking the time to balance your driveshaft, you can ensure a smooth ride and prevent costly repairs down the road.
Introduction
If you’re experiencing vibrations or noises coming from your vehicle’s driveshaft, it’s possible that it’s out of balance. Fortunately, balancing a driveshaft is a relatively straightforward process that can be done at home. The first step is to remove the driveshaft from the vehicle and place it in a balanced position, either on a specialized machine or on jack stands.
Next, you will need to measure the driveshaft’s balance using a vibration analyzer or similar tool. To balance the driveshaft, small weights will need to be added or removed from strategic locations until the vibration measurements are within acceptable levels. Once the driveshaft is balanced, it can be reinstalled in the vehicle and should provide a smoother ride.
With a little know-how and the right tools at hand, balancing a driveshaft at home is an achievable task for any mechanical enthusiast or DIYer.
Why Balance a Driveshaft?
Driveshaft balancing is a critical aspect of vehicle maintenance that ensures a smooth and safe driving experience. When you drive your car, the driveshaft rotates at high speeds, transferring power from the transmission to the wheels. However, due to its weight and length, a driveshaft can also produce vibrations, which can cause severe damage to your vehicle’s components and even affect your driving comfort.
That’s why it’s essential to balance your driveshaft correctly. Balancing a driveshaft involves redistributing mass along the shaft to eliminate any excess weight and vibrations, minimizing wear and tear on your vehicle’s engine, transmission, and other critical components. By balancing your driveshaft, you’ll also improve your fuel efficiency, extend your vehicle’s lifespan, and enjoy a smoother ride.
Tools and Materials Needed
When it comes to working on DIY projects or handling repairs around the house, having the right tools and materials can make all the difference. Without the proper equipment, even the simplest task can become frustrating and time-consuming. The key to success is making sure you have everything you need before getting started.
Some basic tools you’ll want to have on hand include a hammer, screwdrivers, pliers, a level, and a tape measure. Additionally, depending on the project, you may need a saw, drill, or sandpaper. As for materials, it’s always a good idea to have a variety of screws, nails, and bolts in different sizes, as well as various types of adhesives.
Other helpful materials might include sandpaper, paint, and wood filler. By having the necessary tools and materials, you’ll be able to tackle any project that comes your way and achieve professional-looking results every time.
Preparation
If you’re wondering how to balance a driveshaft at home, it’s important to start with some preparation. The first step is to make sure the driveshaft is clean and free of any dirt or debris. You’ll also need to ensure that you have all the necessary tools and equipment, including a balancer, some weights, and a wrench.
Once you’ve gathered everything you need, you can begin the process of balancing the driveshaft. This involves attaching the shaft to the balancer and then adding weights to the appropriate points until the shaft is perfectly balanced. It’s important to take your time and be patient throughout the process, as rushing things can result in an inaccurate balance.
With a bit of practice and some attention to detail, balancing your driveshaft at home can be a rewarding DIY project. So there you have it, in just a few simple steps, you can achieve a perfectly balanced driveshaft, helping to ensure optimal performance and longevity.
Removing and Marking the Driveshaft
When it comes to removing and marking the driveshaft, preparation is key. Begin by ensuring that your vehicle is positioned on a level surface and in park or first gear with the parking brake engaged. Next, locate the bolts or straps that secure the driveshaft to the transmission or differential.
These bolts or straps should be marked before removal to ensure reassembly in the correct position. You can use a paint pen or scratch marks to indicate the alignment of the driveshaft. Carefully loosen the bolts or straps and remove them, allowing the driveshaft to slide out of the transmission or differential.
It’s important to handle the driveshaft carefully to avoid any damage, as it can be costly to repair or replace. By taking the time to properly prepare, mark, and remove the driveshaft, you can save yourself time and money down the line.
Inspecting the Driveshaft
Before inspecting the driveshaft, there are a few things you need to prepare. Firstly, make sure the engine is turned off, and the vehicle is secured in a stable and even position. You will also need to mark the driveshaft’s position to ensure proper reinstallation.
A marker or paint will do the trick, and marking at the front and rear of the driveshaft is recommended. Next, grab a flashlight or work light to help you see any cracks, rust, or other signs of wear more clearly. Finally, put on a pair of gloves to protect your hands from dirt, grease, and sharp edges.
With these preparations in place, you’re ready to start inspecting the driveshaft.
Balancing the Driveshaft
If you’re experiencing vibrations in your car while driving, it may be time to balance your driveshaft. Fortunately, with the right tools and a little know-how, you can balance your driveshaft at home without having to pay a professional. To start, you’ll need to remove the driveshaft from the car and place it in a balancing jig.
You can make your own jig using bearings and threaded rods or purchase one online. Once the driveshaft is in the jig, spin it and note the heavy spot. This can be done by marking the shaft or using a vibration sensor.
From there, you’ll need to add or remove weight from the opposite side until the driveshaft is balanced. You can do this by welding on small weights or drilling holes in the shaft and adding weight bolts. Once it’s balanced, re-install the driveshaft and take it for a test drive to ensure the vibrations are gone.
Balancing your driveshaft may seem daunting, but with the right tools and some patience, you can do it yourself and save money in the process.
Using a Bubble Balancer
Using a bubble balancer is a simple and effective way to balance your driveshaft. Balancing your driveshaft is crucial, as any imbalance can lead to vibrations and cause damage to your vehicle. Start by attaching the bubble balancer to the driveshaft and ensuring that it is level.
Next, rotate the driveshaft and observe the position of the bubble in the balancer. If the bubble remains in the center, your driveshaft is balanced and running smoothly. However, if the bubble moves to one side, you will need to add weight to the opposite side of the shaft until the bubble remains centered.
This weight can be in the form of weights that attach to the driveshaft or by drilling holes in the shaft itself. Regardless of which method you choose, it’s important to remember that a properly balanced driveshaft will improve vehicle performance and prevent potential damage.
Using a Computerized Balancer
Using a computerized balancer to balance the driveshaft has become a standard procedure in many repair shops and garages. Balancing the driveshaft is crucial in eliminating vibrations and ensuring a smooth ride. When using a computerized balancer, the technician inputs the necessary information, such as the dimensions and weight of the driveshaft, and the machine uses sensors to detect any imbalances.
The computer then calculates the amount of weight needed to be added or removed to achieve proper balance. This advanced technology ensures precise measurements and faster results compared to traditional methods. While most people associate balance with standing on one foot, balancing the driveshaft is essential in making sure that your vehicle’s powertrain stays healthy and your ride is smooth.
Reinstallation
If you’re wondering how to balance a driveshaft at home, it’s a relatively simple process that can save you a lot of money on auto repair costs. First, strip the driveshaft down to its basic components. Inspect the u-joints and replace any worn parts before reassembling the driveshaft.
Then, attach a magnetic base to the flange yoke and mount a dial indicator on it. Spin the driveshaft and measure its runout with the dial indicator. You can then add or remove weight to the driveshaft with small weights until it’s within an acceptable range of runout.
Once you’ve achieved the desired balance, mark it with paint or a sharpie so you know where to reassemble it later. With a little patience and attention to detail, balancing your driveshaft at home is a doable DIY task that can be mastered with practice.
Reinstalling the Driveshaft
Reinstalling the driveshaft is an important step in ensuring the proper function of your vehicle. You’ll need to carefully align the splines on the transmission and differential before pushing the driveshaft back into place. Once it’s in position, you can reattach the mounting bolts and torque them to the manufacturer’s specifications.
It’s essential that you don’t overtighten the bolts, as this can cause damage to the mounting points or the driveshaft itself. Before testing your vehicle, be sure to check for any abnormal vibrations or noises. If everything seems normal, take your car for a test drive and make sure that the driveshaft is working correctly.
With patience and attention to detail, you’ll have your vehicle back on the road in no time.
Conclusion
Balancing a driveshaft at home is a delicate art that requires patience, precision, and a bit of creativity. With the right tools and techniques, anyone can achieve a perfectly balanced driveshaft that will reduce vibration, improve reliability, and give your vehicle the smooth ride it deserves. So, whether you’re a seasoned DIYer or just starting out, don’t be afraid to dive in and give it a try – with a little bit of ingenuity and a lot of elbow grease, you’ll be spinning like a pro in no time! Just remember to keep your rotation steady, your weights balanced, and your puns as sharp as your tools.
“
FAQs
Why is it important to balance a driveshaft at home?
Balancing a driveshaft is important for the overall health of your vehicle. An unbalanced driveshaft can cause damaging vibrations and premature wear and tear on your vehicle’s other components.
What are some signs that my driveshaft may be unbalanced?
Some common signs of an unbalanced driveshaft include vibrations, clunking noises, and difficulty turning or steering your vehicle.
Can I balance a driveshaft at home without any special tools or equipment?
While it is possible to balance a driveshaft at home without professional equipment, it can be difficult and time-consuming. It may be more efficient and effective in the long run to bring your vehicle to a professional mechanic.
How can I prevent my driveshaft from becoming unbalanced again in the future?
Regular maintenance and inspections of your vehicle’s driveshaft can help prevent any issues from arising. It’s important to ensure that all components are in good condition and properly lubricated, and to address any issues as soon as they arise.

