Replacing A Dana 44 Axle Seal: A Step-by-step Guide
My truck started leaking axle fluid, and after some research, I discovered it was likely a bad axle seal on my Dana 44 axle. This led me down a rabbit hole of figuring out how to change axle seal dana 44, a process I want to share with you. This guide will walk you through the entire procedure, from gathering tools to reinstalling the axle, helping you save money and gain valuable mechanical skills. You’ll learn everything you need to confidently tackle this repair and keep your vehicle running smoothly. By the end, you’ll be able to confidently handle this common repair on your own.
Key Takeaways
- Learn the step-by-step process of replacing a Dana 44 axle seal.
- Understand the tools and materials required for the repair.
- Gain knowledge on diagnosing axle seal failure.
- Master the techniques for safely removing and reinstalling axle components.
- Develop confidence in performing vehicle maintenance tasks.
Preparing for the Dana 44 Axle Seal Replacement
This section covers the essential preparations needed before you begin the actual repair. You’ll learn about gathering the necessary tools, ensuring safety precautions are in place, and understanding the importance of proper vehicle support.
- Gather necessary tools: You’ll need a socket set, a wrench set, a pry bar, a hammer, a punch, a seal installer, axle grease, and a new axle seal specific to your Dana 44 axle. Don’t forget safety glasses and gloves!
- Safety First: Always work in a well-ventilated area, and make sure your vehicle is securely supported on jack stands. Never work under a vehicle supported only by a jack.
- Vehicle Support: Use jack stands rated for the weight of your vehicle. Place them securely under the frame, ensuring the vehicle is stable and won’t move during the repair.
Having the right tools readily available will streamline the process and prevent delays. A missing tool can halt the entire repair, so meticulously check your inventory beforehand.
Working safely is paramount. A falling vehicle can cause serious injury or death. A study showed that improper vehicle support is a leading cause of injury in DIY auto repairs.
Using improper jack stands can be dangerous. Ensure that your jack stands are rated for more weight than your vehicle, providing extra safety and security.
Removing the Old Axle Seal: A Step-by-Step Guide
This section details the careful process of removing the old, damaged axle seal. You will learn techniques to avoid damaging the axle housing or other components. Precision and patience are key here to ensure a smooth and successful seal replacement.
Preparing the Axle for Seal Removal
- Remove the wheel and brake components to access the axle.
- Disconnect the axle shaft from the differential.
- Carefully remove the cotter pin and castle nut from the axle shaft.
- Slide the axle shaft out of the housing enough to access the seal.
Removing the Axle Seal
- Use a pry bar and punch to carefully break the seal loose from its seat in the axle housing. Avoid damaging the housing itself.
- Once the seal is loosened, gently tap it out of the housing using a suitable tool. A seal puller is highly recommended.
- Clean the axle housing thoroughly to remove any old seal material or debris.
Remember, patience is crucial. Rushing this process could lead to damage of the axle housing or even injury. Take your time, and proceed methodically.
Installing the New Dana 44 Axle Seal
This section guides you through installing the new axle seal, ensuring proper seating and preventing future leaks. Proper installation is key to the success of the entire repair. You’ll learn how to use a seal installer and ensure a proper fit.
Preparing for Installation
- Inspect the axle housing bore for any damage. Any imperfections can cause future leaks.
- Lubricate the new seal with axle grease. This will make installation easier and help prevent damage to the seal.
- Use a seal installer (if available) to properly seat the new seal in the axle housing. This prevents damage to the new seal.
A damaged axle housing bore needs to be repaired before installing a new seal to avoid costly repeat repairs. Any scratches or nicks should be addressed to ensure a proper seal.
Lubricating the new seal reduces friction and prevents it from tearing during installation. Applying grease ensures a smooth insertion and helps it seat correctly.
Using a seal installer is far preferable to hammering the seal in directly. Improper installation can cause the seal to fail prematurely.
Completing the Installation
- Slide the axle shaft back into the housing, ensuring the new seal is properly seated.
- Reassemble the cotter pin and castle nut. Torque the nut to the manufacturer’s specifications.
- Reconnect the axle shaft to the differential.
- Reassemble the brake components and wheel.
- Inspect for leaks by turning the axle shaft and checking for any fluid seepage.
Following the manufacturer’s specifications for torque is essential to prevent premature wear on components and ensure proper seal function. Improper torque values can lead to axle shaft failure.
Troubleshooting and Common Myths
This section addresses potential problems you might encounter during the process and clarifies some common misconceptions about Dana 44 axle seal replacement. Understanding these issues can help prevent frustration and ensure a successful repair.
Troubleshooting Common Issues
- Leaking Seal: If the seal still leaks after installation, check for damage to the axle housing, improper seal installation, or incorrect torque specifications. You may need to replace the seal again and double-check your work.
- Difficult Axle Removal: If the axle shaft is difficult to remove, verify that the cotter pin and castle nut are fully removed. Use penetrating oil to loosen any rusted or seized components.
- Seal Damage during Installation: To avoid damaging the seal, use a seal installer if possible. Handle the seal gently to prevent tearing or cracking.
Debunking Common Myths
- Myth 1: You can reuse an old seal. Fact: Axle seals are a wear item and should always be replaced when damaged. Reusing a damaged seal guarantees that the leak will eventually return.
- Myth 2: You don’t need special tools. Fact: While some repairs can be done with basic tools, a seal installer is highly recommended to prevent damaging the new seal.
- Myth 3: The seal is a minor repair and can be ignored. Fact: Ignoring a leaking seal can lead to significant damage to the differential and other components, resulting in more costly repairs.
Frequently Asked Questions
What type of axle grease should I use?
Use a high-quality axle grease specifically designed for your Dana 44 axle. Consult your vehicle’s owner’s manual or a parts store for the recommended type.
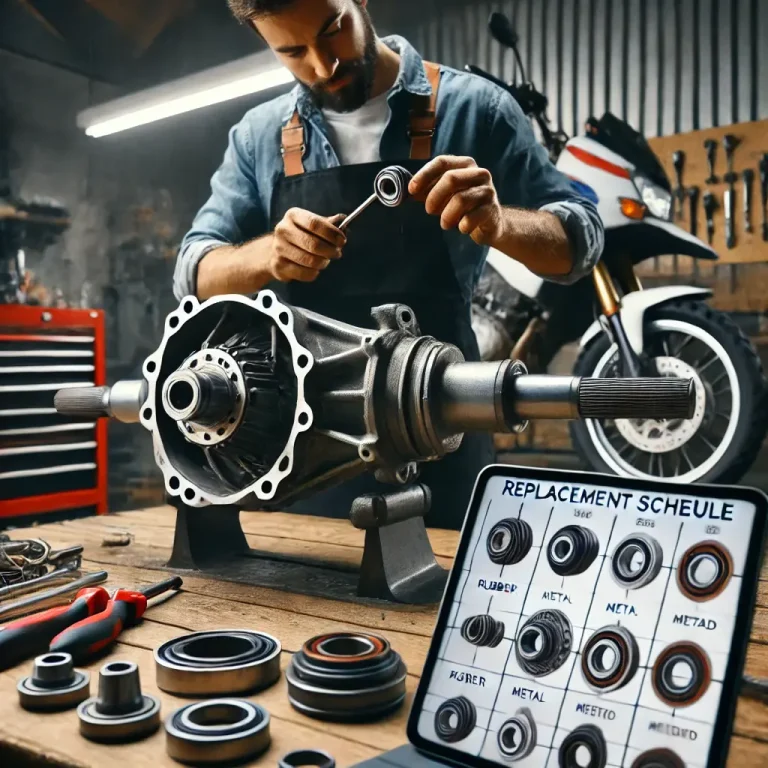
How often should I replace my axle seals?
There’s no set time frame for replacing axle seals. It depends on usage and conditions. Inspect them regularly for leaks or damage. Replacing them as preventative maintenance is a good idea every few years, especially under harsh operating conditions.
What happens if I don’t replace a leaking axle seal?
Ignoring a leaking axle seal can lead to a complete loss of axle lubricant, causing significant damage to the axle bearings, gears, and other components. This can result in costly repairs or even catastrophic axle failure.
Can I replace just one axle seal, or should I replace both?
While you can replace just one, it’s often recommended to replace both axle seals simultaneously. This ensures balanced performance and prevents the need for future repairs.
What if I damage the axle housing during the process?
Damage to the axle housing can significantly complicate the repair. It may require professional repair or even replacement of the housing itself. Careful work is crucial to avoid this.
What are the signs of a bad axle seal?
Leaking axle fluid is the most obvious sign. You may also notice a greasy substance around the axle shaft. A decrease in axle performance can also be a potential indicator.
Is this repair difficult for a beginner?
While it requires mechanical aptitude, with patience and attention to detail, most mechanically inclined individuals can handle it. Use high quality tools and refer to the steps multiple times.
Final Thoughts
Replacing a Dana 44 axle seal is a manageable repair for someone comfortable with basic automotive maintenance. By following this step-by-step guide and taking the necessary precautions, you can successfully complete this repair and save on costly professional labor fees. Remember to always prioritize safety and take your time. If you have any doubts, consult a qualified mechanic. This guide equipped you with the knowledge to tackle how to change axle seal dana 44, empowering you to maintain your vehicle’s health independently. Now go forth and conquer that axle seal!