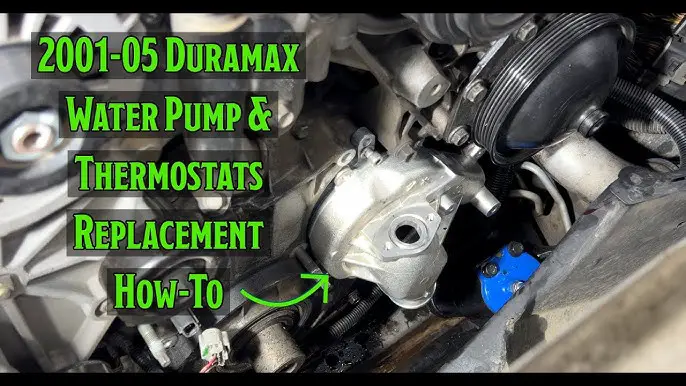
Lml Duramax Water Pump Replacement: Complete Guide
Are you facing overheating issues with your LML Duramax engine? It could be time to replace the water pump. Let’s dive into a comprehensive guide on how to replace the water pump on your LML Duramax in Austin, Texas, United States.
The heart of your LML Duramax is a powerful engine, and just like any hard-working heart, it needs a reliable cooling system to keep its temperature in check. That’s where the water pump comes in as the unsung hero. This essential component plays a critical role in circulating coolant throughout the engine block and heads, absorbing heat and transferring it to the radiator for dissipation.
However, like any hardworking part, a water pump can wear down over time. If you suspect yours might be failing, don’t fret! This guide will equip you with the knowledge to diagnose the problem and tackle the LML Duramax water pump replacement yourself. Not only can this save you money on mechanic labor costs, but it also gives you the satisfaction of conquering a crucial maintenance task.
Here’s what we’ll be covering:
- Recognizing the telltale signs of a failing water pump in your LML Duramax.
- Gathering the necessary tools and materials for a successful replacement.
- Following a step-by-step guide to safely remove the old water pump and install a new one.
- Effectively refilling and bleeding the cooling system to ensure proper circulation.
- Addressing any LML Duramax-specific considerations for the replacement process.
By the end of this comprehensive guide, you’ll be well-prepared to tackle this essential LML Duramax maintenance project and keep your engine running cool for miles to come. But first, let’s delve into the signs that your water pump might be on its last legs.
Credit: m.youtube.com
Why Replace the Water Pump?
- Overheating
- Coolant Leaks
- Corroded Water Pump
- Whining Noises
DIY Water Pump Replacement Steps
| Steps | Time Stamp |
|---|---|
| Take the Fan Shroud Off | 00:37 |
| Drain the Coolant | 03:11 |
| Take Off the Harmonic Balancer | 07:14 |
| Pry the Old Water Pump | 16:19 |
| Replace with New Water Pump | 31:25 |
Tools and Materials for LML Duramax Water Pump Replacement
Before diving into the repair, it’s crucial to assemble the right arsenal of tools and materials. Here’s what you’ll need to successfully replace your LML Duramax water pump:
Tools:
- Socket wrench set: Look for a set that includes various sizes, including (but not limited to):
- ⅜-inch drive ratchet
- ½-inch drive breaker bar (for stubborn bolts)
- Socket sizes: 8mm, 10mm, 12mm, 15mm, 18mm, 36mm (12-point)
- Wrenches: Open-ended wrenches in similar sizes (8mm-18mm) can be helpful for tight spaces.
- Pliers: Needle-nose pliers might come in handy for maneuvering clips or hoses.
- Drain pan: A large enough pan to catch the drained coolant (at least 4 liters).
- Scraper: A gasket scraper will help remove any residue from the old water pump gasket surface.
- Funnel: Makes refilling the coolant reservoir easier and helps avoid spills.
Materials:
- Replacement water pump: Choose a high-quality water pump specifically designed for your LML Duramax year model. Check online retailers or auto parts stores, ensuring compatibility.
- Coolant: Fresh coolant of the type recommended by your LML Duramax owner’s manual. You’ll likely need a few gallons (consult your manual for specific capacity).
- Coolant hoses (optional): While not always necessary, some mechanics recommend replacing the hoses along with the water pump, especially if they show signs of wear or cracking.
- Rags: Plenty of clean rags for wiping up spills and cleaning surfaces.
- Safety gear: Don’t underestimate the importance of safety! Wear gloves to protect your hands and safety glasses to shield your eyes from coolant splashes or debris.
Additional Tips:
- Look into purchasing a flywheel holding tool specifically designed for LML Duramax engines. This tool can simplify the process of holding the flywheel steady while removing the crank pulley bolt.
- Consider having a container of threadlocker on hand, which can be helpful for certain bolts during reassembly (refer to your manual for specific applications).
By having everything on this list readily available, you can ensure a smooth and efficient LML Duramax water pump replacement experience. Remember, using the correct tools and materials is crucial for a successful repair and avoiding any unnecessary complications.
Safety First: Essential Precautions for LML Duramax Water Pump Replacement
Before we dive into the disassembly process, safety is paramount. Here are some crucial precautions to keep in mind:
- Cool Down Time is Key: Always work on a cool engine. Coolant can reach extremely high temperatures during operation, and touching hot engine components can result in serious burns. Let your LML Duramax sit for several hours after the last drive to ensure everything has cooled down completely.
- Respect the Coolant: Used coolant is a toxic mixture and should be disposed of responsibly. Never pour it down the drain or onto the ground. Most auto parts stores and service stations offer collection bins for used coolant. Utilize these resources or consult your local waste management department for proper disposal procedures.
- Jacking with Care: If your repair process requires raising the LML Duramax, proper jacking and support techniques are essential. Always refer to your owner’s manual for the designated jack points on your specific model. Use jack stands rated for the weight of your vehicle to provide secure support once lifted. Never work under a vehicle supported only by a jack.
By following these safety precautions, you can minimize the risk of injury and ensure a safe and successful LML Duramax water pump replacement experience. Now that we’re prepared with the right tools and safety measures, let’s get started with draining the coolant!
Draining the Lifeblood: Removing Coolant from Your LML Duramax
Before replacing the water pump, we need to drain the coolant from the LML Duramax’s cooling system. Here’s how to tackle this step safely and efficiently:
Locating the Drain Plug:
The drain plug on your LML Duramax radiator is typically located on the passenger side near the bottom of the radiator core. It will be a small plastic or metal petcock valve. Consult your owner’s manual for the exact location if needed.
Safe Draining Procedure:
- Place the drain pan directly beneath the drain plug to catch the coolant.
- Locate a container (like a large empty jug) to hold the used coolant for proper disposal (refer back to safety precautions in Section III).
- Using a wrench or pliers (depending on the drain plug design), carefully loosen the drain plug by turning it counter-clockwise. Be prepared for the coolant to flow out quickly.
- Let the coolant drain completely into the drain pan. This may take several minutes.
- Once drained, securely tighten the drain plug to prevent leaks when refilling the system later.
Alternative Method: Disconnecting a Lower Radiator Hose (Optional):
On some LML Duramax models, you might find it easier to drain the coolant by disconnecting a lower radiator hose instead of using the drain plug. Here’s how:
- Locate the lower radiator hose where it connects to the radiator outlet.
- Loosen the clamp securing the hose with a pair of pliers.
- Carefully slide the clamp down the hose to create slack.
- Have your drain pan ready to catch the coolant that will flow out once the hose is disconnected.
- Gently pull the hose away from the radiator outlet, allowing the coolant to drain.
- Once drained, secure the hose clamp back onto the radiator outlet and tighten it firmly.
Important Note: Regardless of the draining method you choose, remember to dispose of the used coolant responsibly!
Heart of the Matter: Replacing the LML Duramax Water Pump
Now that the coolant is drained, we can delve into the core task – replacing the water pump on your LML Duramax. Here’s a detailed breakdown of the process:
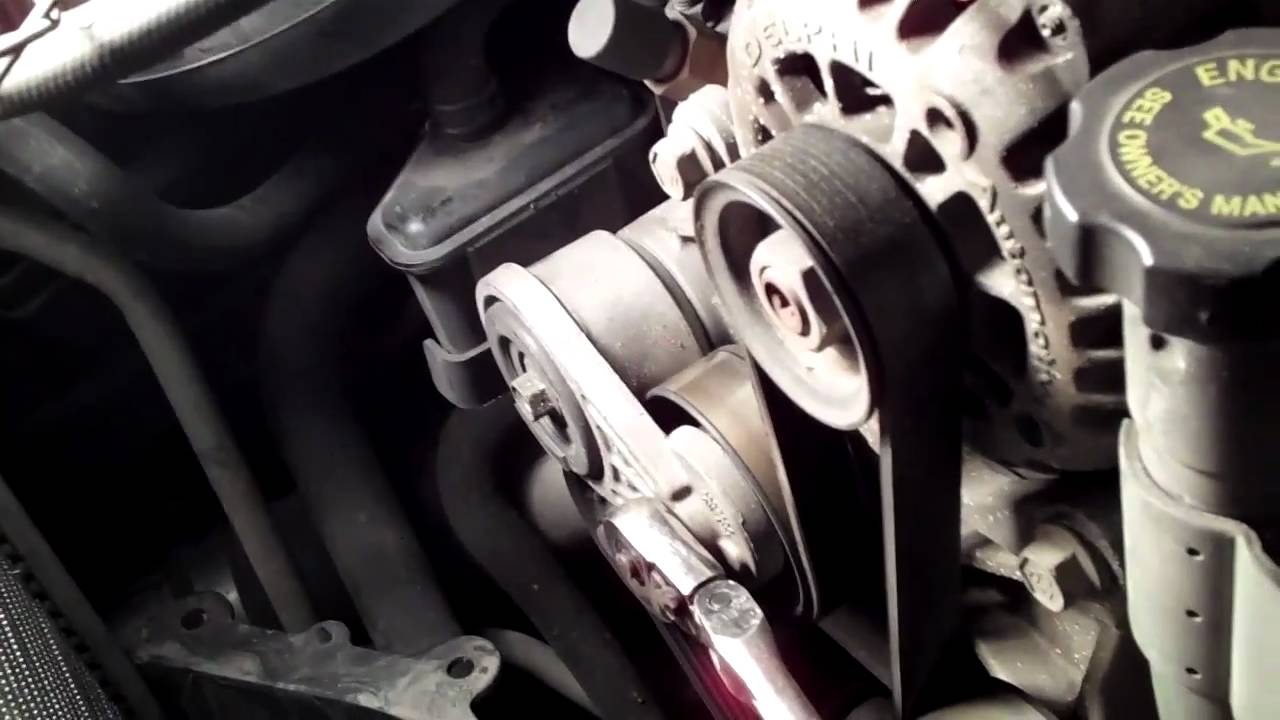
Accessing the Water Pump:
- Fan Shroud Removal (if necessary): Some LML Duramax models might require removing the fan shroud for better access to the water pump. Consult your owner’s manual or online resources specific to your year model for confirmation. If removal is needed, locate the bolts or screws securing the fan shroud to the radiator and engine compartment. Carefully remove them and set the shroud aside.
- Locate the Water Pump: The water pump is typically situated on the front lower portion of the engine block, usually near the thermostat housing. Identify the hoses and electrical connectors attached to it.
Disconnecting Components:
- Hoses: Using pliers, loosen the clamps securing the hoses connected to the water pump. Slide the clamps down the hoses to create slack. Carefully pull the hoses away from the water pump nipples. Be prepared for some residual coolant to spill out.
- Electrical Connectors: Locate any electrical connectors attached to the water pump (usually for a coolant temperature sensor). Disconnect these connectors by carefully pressing the release tabs and pulling them apart.
Removing the Old Water Pump:
- Mounting Bolts: Identify the bolts that secure the water pump to the engine block. Use the appropriate size socket wrench to loosen and remove these bolts in a crisscross pattern to avoid warping the mounting surface.
- Careful Removal: Once the bolts are removed, gently wiggle the water pump to break any sealant and remove it from the engine block. Be mindful of any remaining coolant that might spill out.
Preparing the New Water Pump:
- Gasket Transfer (if applicable): In some cases, the water pump gasket might be integrated with the old pump and needs to be transferred to the new one. Carefully remove the old gasket using a gasket scraper and ensure the new water pump mounting surface is clean and free of debris. Then, transfer the old gasket (if applicable) to the new water pump, ensuring proper alignment.
Installing the New Water Pump:
- Positioning: Carefully position the new water pump onto the engine block, aligning the mounting holes with the corresponding holes on the block.
- Torque Matters: Thread the mounting bolts back into the holes and tighten them gradually in a crisscross pattern to the specified torque values listed in your LML Duramax service manual. Using the proper torque is crucial to ensure a secure fit and prevent leaks.
Reconnecting Everything:
- Hoses: Slide the hoses back onto the nipples of the new water pump and secure them with the clamps you loosened earlier. Tighten the clamps firmly but avoid over-tightening.
- Electrical Connectors: Reconnect any electrical connectors you previously disconnected, ensuring a snug fit.
- Fan Shroud (if removed): Reinstall the fan shroud (if applicable) and secure it with the bolts or screws you removed earlier.
Congratulations! You’ve successfully replaced the water pump on your LML Duramax. The next steps involve refilling and bleeding the cooling system to ensure proper circulation.
Filling Up and Bleeding Out: Replenishing the LML Duramax Cooling System
With the new water pump in place, it’s time to refill the cooling system with fresh coolant. Here’s how to ensure proper circulation and eliminate any trapped air:
Fresh Coolant is Key:
- Don’t reuse the old coolant! Invest in fresh coolant specifically formulated for your LML Duramax engine. Refer to your owner’s manual for the recommended coolant type and the proper coolant-to-water mix ratio.
Refilling the Reservoir:
- Locate the coolant reservoir: It’s typically a translucent plastic container located in the engine bay.
- Slow and Steady Wins the Race: Slowly add the pre-mixed coolant to the reservoir, following the fill lines marked on the container. Avoid overfilling, as the coolant level will rise slightly once the system is bled.
Bleeding Out the Air:
- Locating the Bleeder Screws: Your LML Duramax might have one or more bleeder screws located on the thermostat housing or along the coolant hoses at high points in the system. Consult your owner’s manual for the exact locations.
- Preparing for Bleeding: With the heater core on high (to promote circulation) and the engine off, have a helper slowly add more coolant to the reservoir as needed while you perform the bleeding procedure.
Bleeding Process:
- Open a Bleeder Screw: Using a suitable wrench, carefully loosen one of the bleeder screws slightly. Be prepared for a small amount of coolant to escape, possibly mixed with air bubbles.
- Tighten When Coolant (without bubbles) Flows: Once a steady stream of coolant (without air bubbles) flows out, tighten the bleeder screw securely.
- Repeat for All Bleeder Screws: Repeat the process of opening, bleeding, and tightening for each bleeder screw on your LML Duramax cooling system.
- Refill and Monitor: After bleeding all the screws, keep the engine running with the heater on high and monitor the coolant level in the reservoir. Top it off as needed to maintain the proper level.
Final Leak Check:
- Visually Inspect: Once the bleeding process is complete, visually inspect all the connections you made, including the water pump, hoses, and bleeder screws, for any signs of leaks.
- Test Run: Let the engine run for a few minutes and observe the temperature gauge. If everything seems normal and there are no leaks, take your LML Duramax for a short test drive. Be mindful of the temperature gauge and pull over if it starts to climb excessively.
Congratulations! You’ve successfully replaced the water pump, refilled, and bled the cooling system on your LML Duramax. Remember to keep an eye on the coolant level in the reservoir over the next few days, as some air pockets might escape after initial operation. If the level drops again, simply top it off with the recommended coolant mix.
LML Duramax Variations and Helpful Tips
While the core steps outlined above provide a solid foundation for replacing the water pump on most LML Duramax models, there might be slight variations depending on your specific engine year and configuration. Here’s a breakdown of some things to keep in mind:
- Engine Variations: Consult a repair manual or reliable online resources specific to your LML Duramax year model. There could be minor differences in hose routing, bleeder screw locations, or specific tools required based on engine configuration.
- Online Resources: LML Duramax forums and communities are valuable resources for additional tips and tricks. Here are some reputable sources to explore:
- LML Duramax forums on websites like https://www.duramaxforum.com/
- YouTube video tutorials by reputable mechanics specializing in diesel trucks (look for channels with high viewership and positive comments).
Here are some additional tips gleaned from LML Duramax communities:
- Flywheel Holding Tool: Consider purchasing a flywheel holding tool specifically designed for LML Duramax engines. This tool can simplify the process of holding the flywheel steady while removing the crank pulley bolt (if necessary).
- Threadlocker: Have a container of threadlocker on hand, which can be helpful for certain bolts during reassembly (refer to your manual for specific applications).
- Double-Check Connections: Before refilling the coolant and starting the engine, double-check all connections, hoses, and clamps to ensure they are secure and free of leaks.
- Test Drive: After completing the repair, take your LML Duramax for a short test drive, paying attention to the temperature gauge and any abnormal noises.
By referencing these additional tips and exploring resources specific to your LML Duramax model, you can ensure a smooth and successful water pump replacement experience.
Video Guides for Water Pump Replacement
Check out these YouTube channels for detailed tutorials on LML Duramax water pump replacement:
- Zmotorsports
- Drews Shop Life
- DIY Diesel

Credit: www.reddit.com
Cost of Water Pump Replacement
Here are some price comparisons for LML Duramax water pump replacement:
| Retailer | Price |
|---|---|
| Dmaxstore | $304.99 |
| Kbdieselperformance.com | $298.95 |
| Amazon.com | $328.95 |
The Power of DIY: Saving Money on LML Duramax Water Pump Replacement
Replacing your LML Duramax water pump yourself can be a rewarding experience, not only in terms of accomplishment but also for your wallet. Here’s a breakdown of the potential cost savings:
- Professional Repair Costs: Taking your LML Duramax to a mechanic for water pump replacement can run you anywhere from $800 to $1200 or even more. This cost estimation factors in labor charges, which can vary depending on your location and the shop’s labor rates. Parts might also be included in this price range, but some shops might quote labor costs separately.
- DIY Alternative: By tackling the replacement yourself, you can significantly reduce the overall cost. Here’s a breakdown of the parts and tools you’ll need:
- Water Pump: High-quality water pump for your LML Duramax model – $100-$200
- Coolant: Fresh coolant – $20-$40 (depending on quantity needed)
- Tools: You might already own some of the basic tools listed earlier. If not, purchasing them can range from $50-$150 (depending on the specific tools you lack).
The Math of Savings: As you can see, the cost of parts and tools for a DIY water pump replacement can range between $170 and $390, which is a significant saving compared to professional repair costs. Even after factoring in the potential purchase of a flywheel holding tool or threadlocker, you can still expect to save several hundred dollars by tackling the project yourself.
Beyond Cost Savings: The benefits of DIY go beyond just saving money. You gain valuable knowledge about your LML Duramax and the satisfaction of completing a successful repair. However, remember that attempting repairs beyond your skillset can lead to complications. If you’re unsure about any steps or encounter unforeseen issues, don’t hesitate to seek help from a qualified mechanic.
Duration of Replacement
On average, it takes around two to three hours to replace the water pump on a LML Duramax. It’s recommended to seek professional assistance for this task.
Troubleshooting LML Duramax Water Pump Replacement
Even the most meticulous DIYer can encounter minor hurdles during a repair. Here’s how to tackle some common issues that might arise during your LML Duramax water pump replacement:
- Stripped Bolts: Wrestling with a stubborn bolt that won’t budge and starts to strip can be frustrating. If you encounter a stripped bolt head, don’t force it further. Here are some solutions:
- Use the right size socket: Ensure you’re using the correct size socket wrench to avoid stripping the head further.
- Try a bolt extractor: Invest in a bolt extractor specifically designed to grip stripped heads. These tools can help you remove the bolt without further damage.
- Drilling it out (last resort): As a last resort, you might need to drill out the stripped bolt. This is a more advanced technique, so consult a repair manual or a mechanic if you’re unsure about the process.
- Leaks: After completing the repair and refilling the system, a leak might be a cause for concern. Here’s how to diagnose and fix it:
- Identify the source: Carefully inspect the water pump, hoses, and all the connections you made for any signs of leaking coolant.
- Tighten loose connections: If a leak is coming from a loose hose clamp or a bolt that wasn’t tightened sufficiently, simply retighten the connection securely (refer to torque specs if applicable).
- Replace faulty components: If the leak persists and seems to be coming from the water pump itself, there might be a faulty seal. In this case, you might need to replace the water pump again.
- Overheating: If your LML Duramax starts to overheat after the water pump replacement, there could be a few reasons:
- Air pockets: Double-check that you properly bled the cooling system to eliminate any trapped air pockets that could impede coolant circulation.
- Incorrect coolant mix: Ensure you used the right coolant type and followed the proper coolant-to-water ratio as specified in your owner’s manual.
- Faulty thermostat: A malfunctioning thermostat might not be allowing the coolant to flow properly, leading to overheating. Consider replacing the thermostat if bleeding and coolant check don’t resolve the issue.
Remember, if you encounter any problems beyond your comfort level, don’t hesitate to consult a qualified mechanic for assistance.
Frequently Asked Questions
How Long Does It Take To Change A Water Pump On A Duramax?
It takes about two to three hours to change a water pump on a Duramax engine.
How To Tell If A Water Pump Is Bad In Duramax?
To check if a water pump is bad in a Duramax, look for these signs: overheating, coolant leaks, corroded pump, and whining noises. It’s a complex job best left to professionals, taking 2-3 hours. Replacement cost varies, but expect to spend around $300-$400.
How Many Hours Does It Take To Replace A Water Pump?
Replacing a water pump is a job that can take about 2 to 3 hours. However, this is usually best left to professional mechanics as the water pump may be hidden and require special tools.
What Is The Average Life Of A Lml Duramax?
The average life of a LML Duramax engine is typically around 200,000 to 300,000 miles.
Conclusion
Don’t let a faulty water pump cause your LML Duramax to overheat. Follow the steps outlined in this guide for a smooth water pump replacement process in Austin, Texas, United States.