Revive Your Car Engine: Step-by-Step Guide on How to Fix an Oil Soaked Starter
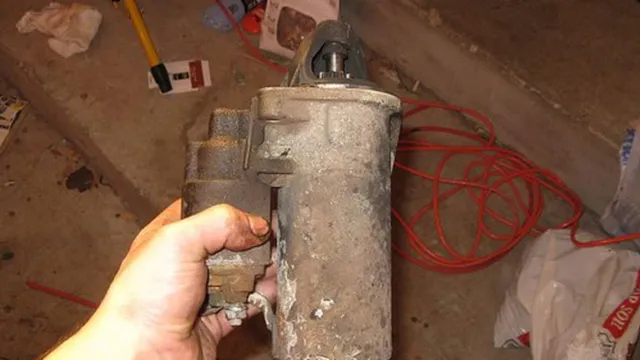
When you turn the ignition key, your car’s starter should fire up immediately, getting you ready for your daily commute or your next road trip. However, what if your starter is completely soaked in oil? That can be a frustrating problem, causing all sorts of issues with getting your car up and running. But don’t worry, we’ve got you covered with some tips on how to fix an oil-soaked starter so that you can get back on the road again.
If your starter is drenched in oil, it’s most likely caused by a leaking gasket or seal. These can be challenging to identify, but once you know the source of the leak, you can take the necessary steps to fix it and prevent any further damage. One thing to keep in mind is that an oil-soaked starter can significantly impact your car’s performance, and if left unfixed, it can cause long-term damage to your engine.
The good news is that fixing an oil-soaked starter is a relatively simple process that can be done with some basic tools and a bit of patience. In this blog post, we’ll go over some steps that you can take to get your starter cleaned up and back in working order. We’ll also discuss some preventive measures that you can take to avoid this problem in the future.
So, whether you’re a seasoned mechanic or a DIY enthusiast, read on to find out how to fix an oil-soaked starter like a pro!
Diagnosing the Problem
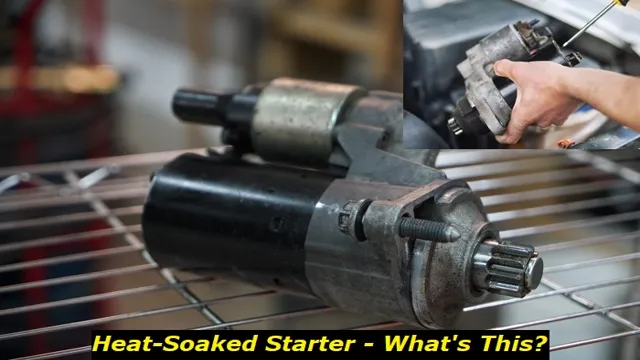
If an oil-soaked starter in your vehicle is causing your engine to fail, then it’s important to diagnose the problem before trying to fix it. In most cases, the most likely cause of oil in the starter is a leaking engine oil seal. This can happen when the seal between the engine block and the oil pan begins to wear out, allowing oil to seep into the starter and cause damage.
To diagnose the problem, you’ll need to inspect the starter and the area around it for signs of oil. If you see any oil spots or a buildup of oil on the starter or the nearby components, it’s likely that the seal has failed. In this case, you’ll need to replace the engine oil seal and clean the starter thoroughly before reinstalling it.
By taking the time to properly diagnose the issue, you can save yourself a lot of time and frustration, and ensure that your vehicle runs smoothly and reliably. So, if you notice any oil-soaked components in your engine, then it’s best to take action and get it fixed as soon as possible to avoid further damage.
Listen for Abnormal Noise
One of the tell-tale signs that something might be wrong with your vehicle is when you hear abnormal noises coming from under the hood. These noises can range from whining, grinding, or rumbling, and they’re usually a clear indication that there’s something wrong that needs to be addressed. However, it’s not always easy to determine the source of the noise, which is why it’s important to investigate the issue as soon as possible.
Some common causes of abnormal car noises include worn out bearings or bushings, damaged belts or pulleys, or a faulty engine or transmission. To diagnose the problem, you can start by listening carefully to the noise and trying to pinpoint where it’s coming from. Once you’ve identified the source of the noise, you can take your vehicle to a mechanic to get a professional diagnosis and repair plan.
Remember, ignoring abnormal noises can lead to more serious problems down the line, so it’s always best to address them right away.
Check for Weak Battery
When your car won’t start, the culprit could be a weak battery. But how do you diagnose the problem? The first step is to turn on your car’s headlights. If they’re dim or flickering, it’s a sign that your battery might be the issue.
Next, try turning the ignition. If you hear a clicking noise but the engine doesn’t start, it could be a dead battery. However, if the engine turns over slowly, it’s likely that your battery is weak and needs to be charged or replaced.
Don’t ignore the warning signs – a weak battery can cause further damage to your car’s electrical system if not addressed promptly. Keep in mind that even if you haven’t experienced any problems with your car’s battery, it’s a good idea to have it checked by a professional regularly. By keeping your battery in good condition, you can avoid unexpected breakdowns and maintain your car’s performance.
Cleaning the Starter
If you have an oil-soaked starter, cleaning it may be the solution you need. Before you begin, make sure to disconnect your car battery to prevent any accidental electrical shocks. Next, detach the starter from the vehicle using the appropriate tools and place it in a container filled with a cleaning solution.
White vinegar or brake cleaner are both effective options. Allow the starter to soak for about 30 minutes while using a brush to scrub any stubborn oil residue. Rinse the starter thoroughly with water and allow it to dry completely before reattaching it to the vehicle.
Cleaning the starter can not only improve its performance but also extend its longevity.
Disconnect Battery and Wiring
When it comes to cleaning the starter, the first thing you need to do is disconnect the battery and wiring. This is a crucial step to ensure your safety and prevent any electrical damage. Once you have disconnected everything, you can then proceed with cleaning the starter.
Remember that the starter is an essential component of your vehicle’s engine, so it needs to be maintained correctly. Wipe off any dirt or grime that has accumulated on the starter, and make sure to check for any signs of corrosion or wear and tear. You can also use a wire brush or sandpaper to remove any stubborn debris.
Just be careful not to damage any of the starter’s components while cleaning it. Remember, a little bit of regular maintenance can go a long way in extending the life of your starter and keeping your engine running smoothly. So, take the time to clean and maintain it properly!
Remove Starter from Engine
When it comes to maintaining the longevity of your engine’s starter, regular cleaning is key. The process of cleaning the starter begins with removing it from the engine. This can be done by disconnecting the battery, loosening bolts or screws, and gently pulling the starter away from the engine.
Once the starter is removed, it’s important to inspect it for any signs of damage or wear, such as corrosion or frayed wires. From there, using a soft-bristled brush or compressed air, carefully remove any dirt or debris that may have accumulated on the starter. Be sure to pay close attention to the areas where the starter connects to the engine, as buildup in these areas can impede proper function.
When everything is clean and dry, re-install the starter back into the engine and reconnect the battery. By taking the time to regularly maintain your engine’s starter, you can ensure that it functions properly for years to come.
Soak in Degreaser Solution
If you’re looking to clean your starter, soaking it in a degreaser solution is an effective way to remove any dirt or grime build-up. But before you get started, make sure you disconnect the battery to prevent any accidents. Once you’ve removed the starter, prepare your degreaser solution following the manufacturer’s instructions.
Place the starter in the solution and let it soak for about 30 minutes or until the dirt starts to dissolve. Using gloves and a brush, gently scrub the starter to remove any tough spots. Once you’re satisfied with the cleanliness, rinse the starter with water and use a clean cloth to dry it off.
It’s important to ensure the starter is completely dry before reinstalling it into your car. Soaking your starter in a degreaser solution is a cost-effective and easy way to keep your starter running smoothly for longer.
Replacing the Starter
If you are struggling with an oil soaked starter, it’s time to consider replacing it. The first step is to disconnect the battery and remove any wires or connections that are attached to the starter. Then, use a wrench to loosen and remove the bolts that are holding the starter in place.
Be sure to keep track of the bolts and washers so that you can easily reattach the new starter. Once the old starter is removed, you can install the new starter by reversing the process. It’s a good idea to clean the surrounding area of any excess oil before installing the new starter.
Remember to tighten all bolts and connections and to reconnect the battery. In just a few simple steps, you can replace your oil soaked starter and have your vehicle running smoothly once again.
Purchase a New Starter
If your car won’t start, it may be time to replace the starter. A new starter can be purchased at your local auto parts store or online. When purchasing a new starter, it’s important to make sure it is the correct one for your specific make and model of car.
Check your owner’s manual or consult with a professional to ensure you get the right starter. Once you have the new starter, you’ll need to disconnect the old one and connect the new one in its place. This may involve removing other car parts and can be a time-consuming process, so it’s important to have the proper tools and knowledge before attempting the replacement.
Once the new starter is installed, your car should start up with ease. By replacing the starter, you can ensure that your car has reliable starting power for years to come.
Install New Starter
If you’re looking to replace the starter in your car, you’ve come to the right place. Installing a new starter may seem daunting, but with the right tools and a bit of know-how, you can have it up and running in no time. Before getting started, make sure you have a replacement starter that matches the make and model of your car.
Once you have the right equipment, locate your existing starter under the hood and unmount it, making sure to disconnect any wires and bolts holding it in place. When installing your new starter, be sure to follow the same mounting and wiring instructions, tightening all bolts firmly. With your new starter connected and tightened up, give your car a test start to make sure it’s working properly.
Remember, a faulty starter can cause significant damage to your engine, so it’s essential to attend to it as soon as possible. Get started today and enjoy the peace of mind that comes with a fully-functional starter!
Preventative Maintenance
Have you ever faced the issue of an oil-soaked starter in your car? Well, don’t worry, it is a common problem that can be fixed with a few simple steps. Firstly, turn off the engine and let it cool down if it’s hot. This is important as the oil can be hot enough to burn you.
Once it’s cool, remove the starter and disassemble it. Check for any oil leaks on the engine and fix them. After that, clean the starter with a rag and some solvent.
Make sure to remove all the oil from the starter. If there is excessive wear or damage to the starter, it may need replacement, but if it’s in good condition, you can reassemble it and reinstall it back in the car. Taking proper care of your car by performing regular maintenance and fixing any issues promptly will prevent such problems in the future.
Regular oil changes and keeping an eye on any visible leaks can save you from costly repairs in the long run.
Conclusion
In conclusion, fixing an oil soaked starter requires patience, precision, and a little bit of elbow grease. But fear not, the solution is simpler than you think! First, remove the starter from the engine and clean the excess oil from the exterior. Then, disassemble the starter and thoroughly clean each component with a brake cleaner.
Once all parts are clean and dry, reassemble the starter and reinstall it into the engine. The key to success is diligent cleaning and attention to detail. So, don’t let an oil soaked starter get you down, get your hands dirty and fix it like a pro!”
FAQs
What causes an oil-soaked starter?
An oil-soaked starter is typically caused by a leak in the engine’s oil system. This leak can be due to a faulty seal or gasket in the engine.
Can an oil-soaked starter be repaired?
Yes, it is possible to repair an oil-soaked starter. However, it may require removing and cleaning the starter, replacing any damaged components, and fixing the underlying oil leak.
How do you clean an oil-soaked starter?
To clean an oil-soaked starter, you can use a degreaser or brake cleaner along with a wire brush to remove any residue. It is important to thoroughly dry the starter before attempting to reinstall it.
What are some signs that the starter may be affected by oil?
Some signs that the starter may be affected by oil include difficulty starting the engine, grinding or clicking sounds when attempting to start the vehicle, and a burning smell.

