Fuel Filler Neck Rust: A Complete Step-by-Step Guide to Fix It Like a Pro!
Are you noticing that your car is leaking fuel or emitting a pungent odor? These are tell-tale signs that your fuel filler neck might be rusted. The fuel filler neck is an essential component of your car’s fuel system that connects the fuel tank to the gas cap. Over time, it is vulnerable to rust, leading to fuel leaks, emissions, and even potential accidents.
However, do not panic; we have the solution. In this blog post, we will guide you through the process of fixing a rusted fuel filler neck and the importance of addressing this issue promptly. So buckle up, and let’s dive in!
Assess the Damage
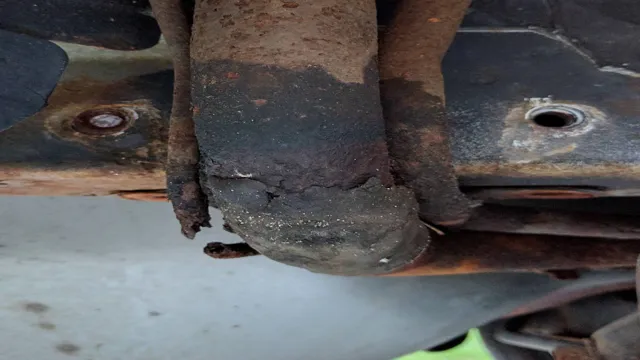
So, you’ve noticed rust on your fuel filler neck and now you’re wondering how to fix it. The first step is to assess the damage. Look closely at the affected area and determine how extensive the rust is.
Is it just surface rust or has it eaten away at the metal? If it’s just surface rust, you may be able to remove it with steel wool or sandpaper. However, if the rust has eaten away at the metal, you may need to replace the entire fuel filler neck. It’s important to act quickly in either case, as rust can spread and cause further damage if left unchecked.
Don’t ignore the problem and risk your safety and the safety of others on the road.
Inspect for Rust Severity
Rust is a common problem faced by people who have metal items. It is important to inspect the severity of the rust to assess the damage that has been done. The severity of rust can be classified into four categories – mild, moderate, severe and very severe.
In order to assess the severity of rust, there are certain things that must be looked for. The first thing is the appearance of the rust. If it is just a few spots, then it is mild.
If it is a larger area, then it is moderate. If it has caused pits and holes in the metal, then it is severe. Very severe rust requires immediate attention as it can cause the metal to break apart.
Assessing the severity of rust is important to decide the course of action that must be taken to fix the problem.
Check Fuel Filler Neck Connections
When it comes to assessing the damage in your fuel filler neck connections, it’s important to first identify any leaks or cracks. This can be done by visually inspecting the connections for any signs of wear and tear. It’s possible that the damage may be small and easily fixable, but it’s important not to ignore any issues as they can worsen over time and lead to bigger problems.
One way to prevent damage is by avoiding overfilling your gas tank, as this can cause stress on the connections. By taking the time to properly assess and address any issues with your fuel filler neck connections, you can ensure the safety and functionality of your vehicle. So, make sure to keep an eye out for any potential damage and take action as needed.
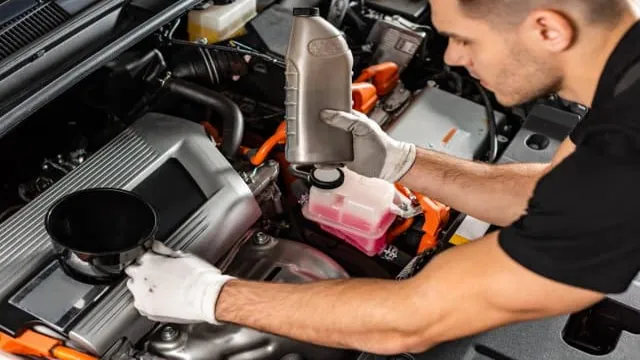
Gather Tools and Supplies
When it comes to fixing a rusted fuel filler neck, the first step is to gather all the necessary tools and supplies. You will need a replacement fuel filler neck, a socket wrench set, gloves, safety glasses, penetrating oil, sandpaper or a wire brush, cleaning agent, a jack, jack stands, and a container to catch fuel. Ensure that you have the appropriate replacement part and all necessary fasteners before starting the repair process.
Putting on gloves and safety glasses is essential before starting any work, to prevent personal injury. For easier removal, apply penetrating oil on the bolts holding the old filler neck in place. Use a socket wrench set to remove the bolts holding the old fuel filler neck in place.
Clean the area around the filler neck using sandpaper or a wire brush to remove any rust and debris buildup. Finally, ensure that the new filler neck is properly fastened and secured before driving the vehicle. Taking these necessary precautions will ensure safe and successful repairs to your rusted fuel filler neck.
Prepare Work Surface
When preparing your work surface, it’s important to gather all the necessary tools and supplies to ensure a smooth and efficient workflow. Depending on the task at hand, you may need different tools such as a hammer, screwdriver, pliers, or a wrench. Make sure to have all tools within arm’s reach and organized for easy access.
Additionally, having supplies like sandpaper, nails, screws, or glue on hand will save time and prevent interruptions during the process. It’s like preparing a meal in a kitchen – you wouldn’t want to start cooking without all necessary ingredients and utensils readily available, right? So, take the time to gather and organize your tools and supplies before diving into your project. This will help prevent frustrations and ensure a successful outcome.
Gather Necessary Tools and Supplies
When it comes to any project, having the right tools is key to getting the job done right. Before starting your next project, take the time to gather all necessary tools and supplies. This may include things like drills, saws, sanders, and other power tools, as well as hand tools like hammers, screwdrivers, and pliers.
You’ll also want to stock up on screws, nails, glue, and other fasteners, as well as sandpaper, paint, and any other supplies needed for the specific project at hand. It can be helpful to make a list of everything you need before heading to the store, so you don’t forget anything important. By taking the time to gather all necessary tools and supplies upfront, you’ll be able to work efficiently and effectively, without any frustrating roadblocks along the way.
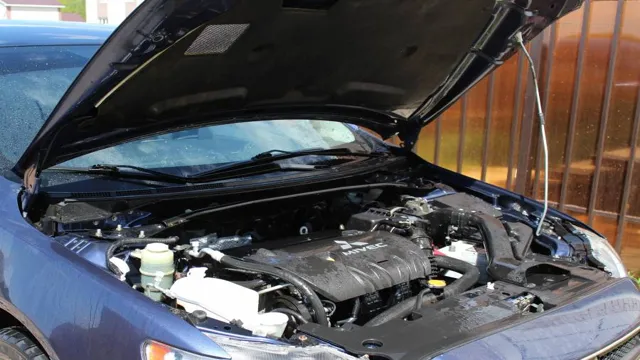
Remove the Fuel Filler Neck
If you’re tackling a rusted fuel filler neck, you’ll need to start by removing the old one. Luckily, that’s a relatively simple process. First, you’ll need to locate the fuel filler cap and remove it.
Depending on your vehicle, you may need a special tool or just a wrench to do so. Once the cap is off, you should be able to see the fuel filler neck itself. The neck should be attached to the body of the vehicle by a series of bolts, screws, or clips.
Depending on how rusted the neck is, these may be difficult to remove, so be prepared to use some elbow grease. Once all the fastenings have been removed, the neck should be free to come out. Be sure to remove it carefully, as there may still be some fuel in the neck that could spill out.
With the old neck out of the way, you’ll be free to install a new one and get back on the road in no time.
Disconnect Fuel Lines and Electrical Connections
When it comes to disconnecting the fuel lines and electrical connections of your vehicle, it’s important to take care and follow the proper steps. One important step in this process is removing the fuel filler neck. This is the narrow, long tube that runs from the fuel cap to the fuel tank, allowing you to add fuel to your vehicle.
To remove this component, start by locating the mounting bolts and screws that connect it to the body of your car. Once you’ve found them, use a wrench or pliers to loosen and remove them. Then, carefully slide the filler neck out of its housing and disconnect any hoses or electrical connections that are attached to it.
This step ensures that you have access to the fuel tank and can safely disconnect the fuel lines and electrical connections without any obstacles. Remember to always wear gloves and take precautions when working with fuel to avoid any accidents or injuries.
Loosen and Remove Bolts and Clamps
When it comes to removing the fuel filler neck, the first step is to loosen and remove bolts and clamps that secure it in place. Before you start, make sure the vehicle is cool to the touch to avoid any burns or injuries. Use a wrench or socket set to loosen the bolts and clamps that attach the filler neck to the fuel tank, fuel door, and any other components that may be in the way.
Once all the bolts and clamps have been removed, gently pull the filler neck away from the vehicle. It may take some wiggling and twisting to get it free, but be patient and careful not to damage any surrounding parts. Removing the fuel filler neck is a necessary task when it comes to replacing or repairing it, and with some patience and the right tools, it can be accomplished without any hassles.
Clean the Fuel Filler Neck
If you’re experiencing difficulties fueling up your car or noticing that gasoline is leaking out, it could be due to a rusted fuel filler neck. Over time, exposure to the elements and moisture can cause the metal to corrode, leading to leaks and other problems. One solution is to replace the entire filler neck, but that can be costly.
Alternatively, you can try cleaning the neck to remove the rust and prevent further damage. To do this, start by disconnecting the negative battery cable to prevent any electrical mishaps. Then, use a wire brush or sandpaper to remove as much rust as possible.
You may also want to apply a rust dissolver or converter to help break down the rust. Once finished, reattach the filler neck and replace any damaged parts. A little care and maintenance can go a long way in ensuring your car’s fuel system is in good working order.
Remove Rust and Debris
If you own a vehicle, you know how important it is to keep it in good shape. One vital part of your car’s maintenance is cleaning the fuel filler neck. Over time, rust and debris can build up in this area, causing blockages and other problems.
To clean the fuel filler neck, you’ll first need to remove any rust or debris that’s accumulated. This can be done using a wire brush or sandpaper. Once the area is clear, use a cleaning solution and a cloth to wipe down the neck and remove any remaining dirt or grime.
Don’t forget to check the fuel cap for any buildup as well. By keeping your fuel filler neck clean, you’ll ensure that fuel flows smoothly to the engine, improving your car’s overall performance. So, why wait? Grab your cleaning supplies and get to work!
Apply Rust Converter
If you notice any rust on your fuel filler neck, it’s important to take action before it gets worse. Rust can cause damage to your car’s fuel system and lead to expensive repairs. Applying a rust converter can help prevent further damage and stop the rust from spreading.
Before applying the converter, you’ll need to clean the area thoroughly. Use a wire brush to remove any loose rust and dirt. Then, apply a degreaser and scrub the area with a clean cloth.
Once the area is clean and dry, apply the rust converter with a brush or spray can according to the manufacturer’s instructions. The converter will chemically react with the rust and create a barrier that prevents further corrosion. This can save you from costly repairs down the line and keep your car running smoothly.
So, don’t hesitate to take action if you spot rust on your fuel filler neck – applying a rust converter can make a world of difference.
Clean and Dry the Area
Before starting any maintenance or repair work on your vehicle, it is important to follow a few basic steps to ensure that you are working with a clean and safe environment. One important area that should be paid attention to is the fuel filler neck. To start, you want to make sure that the area around the neck is clean and free from debris.
Use a microfiber cloth to wipe down the area, removing any dirt or grime that may have accumulated. After cleaning the area, you want to make sure it is completely dry. Any moisture left behind could potentially contaminate the fuel and cause problems down the line.
As you work on the neck, it is important to be gentle and careful to avoid any damage that could lead to leaks or other issues. By taking the time to clean and dry the fuel filler neck, you can help ensure that your vehicle stays in top condition for years to come.
Install the New Fuel Filler Neck
Now that you have successfully removed the rusted fuel filler neck from your vehicle, it’s time to install the new one. First, clean the area thoroughly where the fuel filler neck will be installed. Apply a rust inhibitor to the area to prevent future rusting.
Make sure that the new fuel filler neck fits perfectly and secure it in place using the screws or bolts provided in the kit. Connect the hoses and clamps to the new fuel filler neck. Double-check all the connections to ensure that there are no leaks.
Once you’re confident that everything is secure, test the new fuel filler neck by filling up your gas tank. Installing a new fuel filler neck is not too difficult but if you’re not comfortable doing it yourself, consult with a professional mechanic. Remember to maintain your vehicle’s fuel system regularly to avoid any future issues with rust or wear and tear.
Apply Sealant to Connections
To successfully replace a fuel filler neck, you’ll need to apply sealant to the connections to ensure a tight and secure fit. This step is crucial in preventing leaks and maintaining the integrity of your fuel system. Before installing the new fuel filler neck, make sure the connections are clean and dry.
Then, apply a thin layer of sealant to the base of the neck, where it will connect to the fuel tank. Tighten the clamps securely to ensure a proper seal. Remember, fuel leaks can be dangerous and costly.
It’s essential to take the time to ensure all connections are secure and leak-free before hitting the road. Don’t be afraid to double-check your work and take your time during installation. Your safety and the safety of your vehicle depend on it.
Secure in Place with Bolts and Clamps
When it comes to securing your fuel filler neck, bolts and clamps are your best friends. First, make sure that the area where you will be installing the new neck is clean and free from any debris. Then, carefully slide the new neck into place, making sure that it lines up with the opening in your car’s body.
Once you have it set in place, attach the bolts and clamps securely, using a torque wrench to make sure that they are tightened to the manufacturer’s specifications. This will ensure that your fuel system will be leak-free and safe to use. Keeping your car’s fuel system in tip-top shape doesn’t have to be a complicated process, but it does require some attention to detail.
By taking the time to install your new fuel filler neck properly and securely with bolts and clamps, you can rest assured that you won’t have any issues with leaks or other problems down the road. So why wait? Get started on your fuel filler neck replacement today and enjoy the peace of mind that comes with knowing that your car’s fuel system is secure and reliable.
Test for Leaks and Functionality
If you have a rusted fuel filler neck, it’s important to fix it before it starts to leak. The first step is to inspect the filler neck for any signs of rust or damage. If you notice any, it’s best to replace the entire fuel filler neck assembly.
To do this, you’ll need to disconnect the fuel tank and remove the old filler neck. Once you have the new neck in place, connect it to the fuel tank and tighten any bolts or clamps. Then, it’s time to test for leaks and functionality.
Fill the tank with a small amount of fuel and start your engine. Check the filler neck for any signs of fuel leaks or puddles underneath your car. If everything looks good, you’re all set.
If you notice any leaks or other issues, it’s important to address them right away to prevent any further damage or problems down the road. Remember, a rusted fuel filler neck can compromise your vehicle’s performance and safety, so it’s always better to stay on top of any maintenance or repairs needed.
Conclusion
In summary, fixing a rusted fuel filler neck is a lot like rehabilitating a corroded relationship. First, you need to assess the damage and determine if it’s salvageable. Then, you have to remove any unwanted buildup and smooth out the rough spots.
Finally, you apply a protective coating to prevent future damage. And just like with a relationship, it’s important to catch the rust early before it spreads and becomes irreparable. So, whether you’re fixing a car or a connection with a loved one, invest the time and effort to maintain the things that matter most to you, and you’ll enjoy years of smooth sailing ahead.
“
FAQs
What causes rust on a fuel filler neck?
Rust on a fuel filler neck is typically the result of exposure to moisture or exposure to salt used on the roads during the winter. Over time, this exposure can cause the metal to corrode and rust.
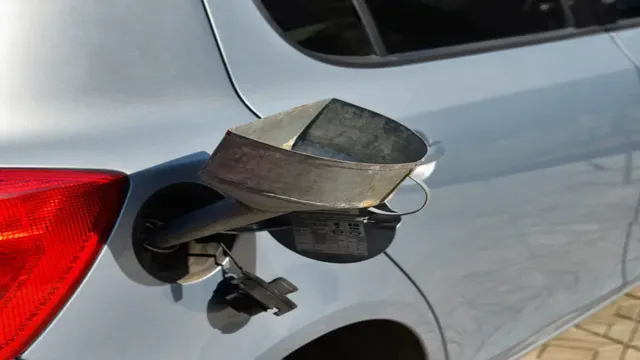
How do you know if your fuel filler neck is rusted?
One of the most common signs of a rusted fuel filler neck is difficulty inserting the fuel pump nozzle into the neck. You may also notice rust or corrosion around the neck or on the surrounding body panels.
Can a rusted fuel filler neck be repaired?
Yes, a rusted fuel filler neck can be repaired. Depending on the severity of the rust, the neck may need to be replaced entirely or it may be possible to patch the affected area with a rust converter solution.
How can you prevent a fuel filler neck from rusting?
To prevent a fuel filler neck from rusting, it’s important to keep the neck and surrounding area clean and dry. You can also apply a rust protectant spray to the neck to help prevent corrosion. Additionally, avoiding driving on salted roads and storing the vehicle in a dry garage can help prevent rust from forming.