Step-by-Step Guide: How to Check Transfer Case Fluid Like a Pro
If you own a four-wheel-drive vehicle or an all-wheel-drive vehicle, one of the critical components that you should maintain regularly is the transfer case. This mechanism is responsible for transferring power from the engine to the transmission, and ultimately to the wheels. To ensure your vehicle’s optimal performance, you’ll need to check your transfer case fluid regularly.
However, the process of checking transfer case fluid might seem daunting, especially if you’re a new vehicle owner or don’t have much technical knowledge. But worry not, as we are here to guide you through the process step-by-step. We’ll walk you through the signs that indicate a need for a transfer case fluid check, the materials you need, and how to check transfer case fluid.
By the end of this guide, you’ll have all the knowledge you need to effectively maintain your transfer case and prolong the life of your vehicle.
Gather Necessary Materials
To check the transfer case fluid, you need to gather a few essential materials. Firstly, make sure you have safety gloves and glasses as you’ll be dealing with fluids. Then, you’ll need your vehicle’s owner’s manual to locate the transfer case.
You’ll need a socket wrench and a drain pan to remove the fill and drain plugs easily. A fluid pump or a funnel will also be helpful to add the new fluid into the transfer case. Finally, ensure that you have the right type of fluid recommended by the manufacturer.
Using the incorrect type of fluid could damage your vehicle’s transfer case, which could lead to expensive repairs. By having all the necessary materials, checking and changing your transfer case fluid will be a straightforward task that won’t take much time.
Jack Stands
When it comes to working on your vehicle, you want to make sure that you have the necessary tools and equipment to keep yourself safe. If you’re planning on using jack stands for elevated work on your vehicle, there are a few materials that you’ll need to gather beforehand. The first and most important item is a sturdy set of jack stands that are properly rated for the weight of your vehicle.
It’s also important to have a reliable floor jack that can smoothly lift your car off the ground. Additionally, you’ll need to make sure that you have a level and stable surface to work on, such as concrete or asphalt. Finally, it’s advisable to wear appropriate clothing and safety gear to prevent any accidents or injuries while working on your car.
With all of these precautions in place, you’ll be well-equipped to safely complete any repairs or maintenance on your vehicle while using jack stands.
Clean Towels
When it comes to keeping your towels clean, there are a few materials you’ll need to gather before getting started. First and foremost, make sure you have your towels on hand. You’ll also need a laundry detergent that is safe for your towels, a washer, and a dryer.
If you prefer to air dry your towels, make sure you have a clothesline or drying rack to use. If your towels have any stubborn stains, you may also want to have a stain remover on hand. Additionally, consider using fabric softener or dryer balls to help keep your towels soft and fluffy.
By gathering these necessary materials, you can ensure that your towels are clean and fresh every time you use them. So go ahead, throw those towels in the wash and enjoy the feeling of a clean and cozy towel after your next shower or bath!
Socket Wrench Set
If you’re going to be working with socket wrenches, the first step is to gather all the necessary materials. The most important item is, of course, the socket wrench set itself. You might already have one, or you might need to buy one.
Make sure to choose a set that includes a range of socket sizes, as well as a ratchet and an extension bar. You’ll also need a few other essential tools, such as a pair of pliers, a set of screwdrivers, and a hex wrench set. It’s also a good idea to have a sturdy workbench or table to work on, along with a comfortable chair and good lighting.
Once you have all the necessary materials, you’ll be ready to start working on your project. With the right tools at your disposal, you’ll be able to tackle any job with confidence and efficiency.
Find and Remove Transfer Case Fill Plug
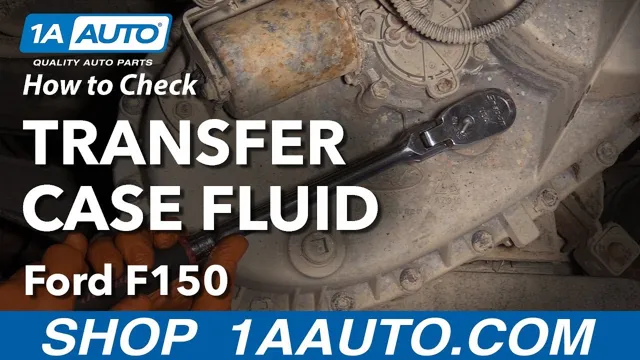
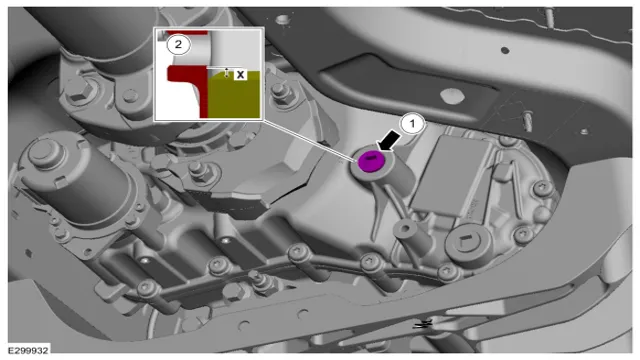
“Checking the transfer case fluid is an essential part of routine maintenance for your vehicle. To do this, you must first locate the transfer case fill plug, which is typically on the side of the transfer case. The fill plug can usually be removed using a ratchet or wrench.
Once removed, check the level of the fluid by inserting a finger or dipstick into the opening. If the fluid level is low, add more fluid until it reaches the appropriate level. If you notice that the fluid is dirty or contaminated, it may be time to change the transfer case fluid.
Keeping your transfer case properly lubricated is critical in ensuring smooth operation and longevity of your vehicle’s drivetrain. Regularly checking the transfer case fluid level is an easy and cost-effective way to prolong the life of your vehicle.”
Locating the Fill Plug
When it comes to filling up your transfer case with fluid, the first step is to locate the fill plug. This can be a bit tricky depending on the make and model of your vehicle, but in most cases, it can be found on the side of the case towards the top. Once you’ve found it, you’ll need to remove the plug using a socket or wrench.
It’s important to make sure you have the right size tool to avoid stripping the plug. Before removing the plug, it’s also a good idea to clean around the area to prevent any debris from getting into the fill hole. Once the plug is removed, you can start filling up your transfer case with the recommended fluid until it reaches the level indicated in your owner’s manual.
Remember, it’s important to check the fluid level regularly to ensure that your transfer case is lubricated properly and running smoothly.
Remove the Fill Plug
When performing maintenance on your transfer case, finding and removing the fill plug is a crucial step. The fill plug is typically located on the upper side of the transfer case and can be identified by its square-shaped head. To remove it, you’ll need to use a wrench that fits the plug’s size, usually around 3/8″ – 1/2″.
Remember to work carefully when removing the plug to avoid stripping it or damaging the threads. Once the plug is removed, inspect it for any signs of damage or corrosion and replace it if necessary. With the fill plug out, it’s time to drain the old fluid before filling up the transfer case with fresh gear oil.
Taking your time during this process will ensure that your transfer case is well-maintained and can function effectively for years to come.
Inspecting the Fluid
When performing maintenance on your transfer case, it’s essential to inspect the fluid regularly. One step in this process is to find and remove the transfer case fill plug. This plug is usually located on the passenger side towards the rear of the transfer case.
Firstly, ensure that your vehicle is on level ground and has had time to cool down before beginning any work. Next, locate the fill plug and use the appropriate tool for its removal. Once it has been removed, inspect the fluid for consistency, color, and any debris.
If the fluid appears milky or has chunks in it, it may be an indication of water or metal particles. These issues require further investigation and should be addressed immediately to prevent any damage to your transfer case. Remember to always replace the fill plug and use the manufacturer’s recommended fluid when refilling the transfer case.
Fill Transfer Case with Fluid
If you want to make sure your vehicle maintains its optimal performance, it is important to keep an eye on the transfer case fluid. Checking the transfer case fluid is an easy task that can be done on a regular basis. First, you need to locate the transfer case and find the fill plug.
Next, remove the plug and use a dipstick or a finger to check whether the fluid is at the recommended level. If it is not, make sure to fill the transfer case with the right type of fluid specified by your vehicle’s manufacturer. Over time, the transfer case fluid can get contaminated or break down, so it is recommended to replace it every 30,000 to 50,000 miles.
By following these simple steps, you can ensure your vehicle’s transfer case stays well-lubricated, prolonging its lifespan and keeping your drives smooth and safe. It’s always better to double-check your transfer case fluid to avoid any damages in the future.
Locating the Drain Plug
When it comes to maintaining your vehicle, it’s essential to know the location of the drain plug for the transfer case. Once you’ve found it, the next step is to fill it with fluid. The transfer case is an integral part of your vehicle’s drivetrain, and it’s responsible for sending power to all four wheels.
Without the proper fluid, it can quickly wear out and cause significant damage to your car. It’s best to locatethe drain plug and the fill hole before beginning your maintenance process. Once the transfer case is drained, you’ll need to fill it with the recommended amount of fluid specific to your vehicle’s make and model.
Always refer to the owner’s manual for accurate information. Remember to be cautious when taking on any vehicle maintenance yourself, and when in doubt, consult a professional mechanic.
Add Fluid Until Full
When it comes to maintaining your vehicle, the transfer case is one of the most critical components. It is designed to distribute power to the front and rear axles, allowing for proper control and handling on any terrain. But to ensure that it functions correctly, it needs to be filled with the right amount of fluid.
To do this, you need to start by locating the fill plug on the transfer case. Once you have found it, use a socket wrench to remove the plug, and insert a hand pump into the hole. Next, slowly add the recommended fluid until it begins to overflow slightly.
This is an indication that the transfer case is full. Replace the fill plug, tighten it securely, and the job is done. Remember, regularly checking and filling the transfer case with fluid can help extend its lifespan and improve vehicle performance.
So, make sure you keep an eye on it and add fluid until full as needed.
Reinstall the Fill Plug
If you’re wondering how to check the transfer case fluid, there are a few simple steps to follow. First, you’ll need to locate the fill plug on your vehicle’s transfer case. It’s typically located towards the rear of the case and may be difficult to access, so you may need to use a socket wrench or other tools to remove it.
Once the plug is removed, use a finger or a small tool to check the level of the fluid – it should be at or near the level of the fill plug. If the fluid is low, you can add more until it reaches the correct level. Once you’re finished checking and topping off the fluid, it’s important to reinstall the fill plug securely to prevent any leaks.
Regularly checking and maintaining the fluid levels in your transfer case is important to ensure the proper functioning of your vehicle’s 4WD system.
Conclusion
In conclusion, checking the transfer case fluid is like checking the heart of your four-wheel-drive vehicle. It keeps everything running smoothly, ensuring all the power gets distributed properly and evenly. Much like a doctor listens to your heart, you must listen to and inspect your fluid regularly to ensure it’s healthy.
With a little bit of time and attention, you can keep your transfer case in tip-top shape. Trust us, your vehicle will thank you!”
FAQs
What is a transfer case fluid?
A transfer case fluid is a lubricant that the transfer case uses to provide proper lubrication for the bearings and gears.
How often should I check the transfer case fluid?
It is recommended to check the transfer case fluid every 30,000 miles or during every oil change.
What are the signs of low transfer case fluid?
The signs of low transfer case fluid include grinding noises, difficulty engaging the four-wheel drive, and leaking fluid.
What type of fluid should I use for my transfer case?
You should consult your vehicle owner’s manual to determine the proper type of transfer case fluid to use. It’s important to use the correct fluid to ensure optimal transfer case performance.

