Step by Step Guide to Effortlessly Install Shock Boots – Protect Your Suspension System Today!
Shock boots are a great accessory to have if you want to protect your suspension’s shock absorbers from dirt, grime, and other debris. But installing them might seem like a daunting task for some vehicle owners. After all, not everyone is a mechanic or an auto expert.
If you’re wondering, “how do I install shock boots?”, don’t worry, we’ve got you covered. In this blog post, we’ll take you through the step-by-step process of installing shock boots on your vehicle so that you can do it yourself without any hassle. From the tools you’ll need to the actual installation process, we’ve got all the information you need to get you started.
So, let’s dive in and learn how to install shock boots!
Introduction
Installing shock boots on your vehicle can help extend the life of your shocks, prevent damage from debris, and enhance the overall appearance of the suspension. First, remove the old boots if applicable. Before putting on the new boots, make sure they are the correct size and style for your shocks.
Stretch the boots gently and slide them over the shock absorber. Be careful not to twist the boots too far, as this can cause them to tear. Once the boots are in place, secure them with the included ties or clamps.
It’s also a good idea to clean the shocks and ensure they are in good working order before installing the boots. With these simple steps, you can easily install shock boots on your vehicle and enjoy the benefits they provide.
What are Shock Boots?
Shock boots are an essential accessory for any off-road enthusiast. These boots protect the shock absorber from damages caused by flying rocks, mud, and debris. They are designed to protect the suspension of off-road vehicles from harsh terrains and harsh weather conditions.
Shock boots are made of high-quality materials that offer maximum protection while also maintaining the suspension’s flexibility. They come in different sizes and colors, making it easy for you to customize your ride. The use of shock boots ensures that your vehicle’s shocks retain their shock-absorbing capabilities, maximizing their performance and lifespan.
Investing in shock boots is an affordable way to protect your vehicle’s suspension system, improve your off-road experience, and get the most out of your ride.
Why Install Shock Boots?
If you’re looking to upgrade your vehicle’s suspension system, shock boots are definitely worth considering. Shock boots are rubber or polyurethane covers that fit over your shock absorbers, covering them from the elements. Though not necessary for all vehicles, installing shock boots on your suspension system can help protect your shocks from dust, dirt, and other debris that can cause wear and tear, leading to reduced performance and eventual failure of the shocks.
Additionally, shock boots can prevent your shocks from taking damage from flying rocks, branches, or other hazards while driving, making them a useful investment for those who frequently take their vehicle off-road. With shock boots in place, you can extend the life of your shocks, improve their performance, and give yourself greater peace of mind while on the road.
Tools and Materials Needed
To install shock boots, you will need a few specific tools and materials. Firstly, you will need a jack and jack stands to lift and secure the car. Secondly, you will need a socket wrench and socket set to remove the old shock absorber and install the new one.
Thirdly, make sure you have the right shock boots to match your vehicle’s make and model. You may also need silicone grease to lubricate the shock boots and prevent them from drying out. Installing shock boots is a relatively simple process.
However, having the right tools and materials is crucial to ensuring the job is done correctly and safely. Make sure you have all the tools and materials needed before you begin the installation process. This will save you both time and money in the long run.
Once you have everything ready, you can begin the installation process and have your new shock boots installed in no time. Remember to double-check everything before going for a drive to ensure your safety on the road.
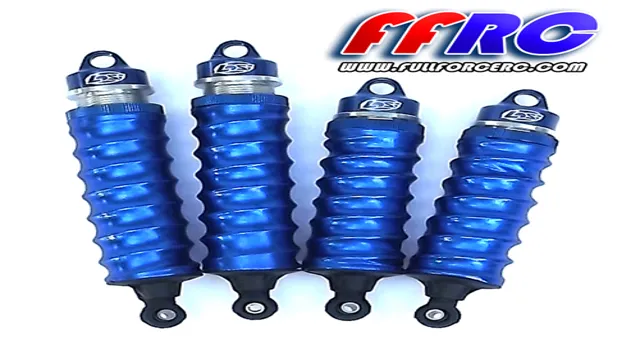
Shock Boots
Shock boots are an essential component of any car’s suspension system, designed to protect your shock absorbers from dirt, rocks and debris. They also help improve the lifespan of your shocks and maintain their efficiency. To install shock boots, you will need a few tools and materials.
Firstly, you’ll need a pair of shock boots, which are readily available from auto parts stores. You’ll also need a jack and jack stands, a wrench or socket set, and a pair of pliers or sharp scissors to cut the boots to the desired length. Before commencing, ensure you have a clean working area and that your car is securely braced.
Start by jacking up the car and pliantly removing the shock absorber from the vehicle. Then, place the boot onto the shock and cut it to the correct length if necessary. Finally, secure the boot into place with zip ties or clamps and reattach the shock absorber to the vehicle.
The whole process is quick and easy and can be completed in just a few hours.
Socket Wrench
When it comes to repairing or maintaining anything, having the right tools is crucial. Among the most essential tools in any handy person’s arsenal is a socket wrench. This versatile tool is designed to tighten or loosen nuts and bolts with ease.
To use a socket wrench, you’ll need the wrench itself, along with a set of sockets that fit your bolts, nuts, or screws. Most socket wrench sets come with a ratcheting mechanism, which makes it easier to work with in tight spaces. Some advanced models allow you to adjust the torque, making it easier to tighten or loosen bolts to a specific level of tightness.
While a socket wrench is a straightforward tool, it can be a lifesaver when attempting to fix anything from a car engine to a leaky faucet. Using a socket wrench is relatively straightforward, but it’s essential to choose the right size socket for the specific bolt or nut you’re working with. It’s also crucial to ensure the socket is securely attached to the wrench to avoid slippage.
When it comes to torque, it’s vital to use the appropriate amount of force to avoid damaging the bolt or nut. When working in tight quarters, using a socket wrench with a pivoting head can be incredibly useful, allowing you to reach bolts or nuts in hard-to-reach areas. With a little bit of experience, anyone can become proficient with a socket wrench, making it an essential tool in every handy person’s collection.
So, whether you’re a seasoned handy person or just starting, a socket wrench is a tool that you won’t regret having on hand when you need it.
Jack Stands
Jack stands are a crucial tool for any car enthusiast and mechanic. These sturdy supports are designed to hold up the weight of a car, ensuring safety and allowing you to work on the underside of the vehicle with ease. To use jack stands properly, you’ll need a few tools and materials.
Firstly, you’ll require a floor jack to lift the car off the ground. Once you have your car in the air, you’ll need to slide the jack stands into place under the vehicle. Jack stands most commonly come in pairs, so it’s best to use both when working on the car.
Ensure that you position the jack stands correctly and that they are level before lowering the car onto them. A ratchet or wrench will also be necessary to adjust the height of the jack stands. Always double-check the stability of the jack stands before working on the car and keep them well-maintained for long-lasting use.
Remember, using jack stands should always be done with caution and care to avoid any accidents or injuries.
Wheel Chocks
When it comes to working on and maintaining your vehicle, wheel chocks are a must-have. These simple yet effective tools help keep your vehicle in place, preventing it from rolling or moving during repair work or maintenance. But what exactly do you need to use wheel chocks properly? Firstly, you’ll need a quality set of chocks made of sturdy materials such as rubber or plastic, which can withstand the weight of your vehicle.
In addition, you’ll need a flat, stable surface to place the chocks on securely. It’s also a good idea to have a reliable jack and jack stands on hand, should you need to lift your vehicle for more extensive maintenance. By investing in the right tools and materials, and taking the proper safety precautions, you can effectively use wheel chocks to keep your vehicle secure while you work.
Steps for Installing Shock Boots
If you’re looking to protect your shock absorbers from debris and damage, installing shock boots can be a great solution. The first step is to gather all necessary materials such as the boots, zip ties, and lubricant. Once you have everything ready, you should start by removing the old boots if there are any.
Wipe down the shock absorber and apply lubricant to the shaft and top of the boot. The boot can then be slipped over the shock and secured with zip ties at each end. Make sure the boot is positioned correctly and not twisted or rubbing against anything.
Repeat the process for each shock absorber and double-check the installation for any loose connections or potential issues. With these simple steps, you can keep your shock absorbers protected and extend their lifespan.
Step 1: Lift the Vehicle
Are you looking to install shock boots on your vehicle but have no clue where to start? Well, fear not, because we’ve got you covered. The first step to installing shock boots is to lift the vehicle. You can do this by using a car jack or a hydraulic lift.
It’s important to make sure that the vehicle is securely lifted and stable before proceeding with the installation process. Once you’ve lifted the vehicle, you can move on to the next step. Shock boots are important because they protect the shock absorbers from getting damaged by dust, mud, or debris.
They also help to prolong the lifespan of the shocks, making them a worthwhile investment for any vehicle owner. By following these steps, you can easily install shock boots and protect your shocks while driving on and off-road.
Step 2: Remove the Old Boots
Removing the old shock boots is an essential step when installing new ones. Start by loosening the lug nuts on the wheel you want to work on and then jacking up the vehicle and securing it with jack stands. Once you have access to the shocks, use a pair of pliers to remove the metal clamps holding the old boots in place.
Then, slide the old boots off of the shocks and dispose of them properly. One thing to note is that some shocks may have internal bump stops that also need to be removed before installing the new boots. Make sure to inspect the shocks for any signs of damage or wear while you have them exposed.
Remember to always prioritize safety when working on your vehicle and use caution when handling heavy equipment. With the old boots removed, you are now ready to move on to the next step of installing the new shock boots.
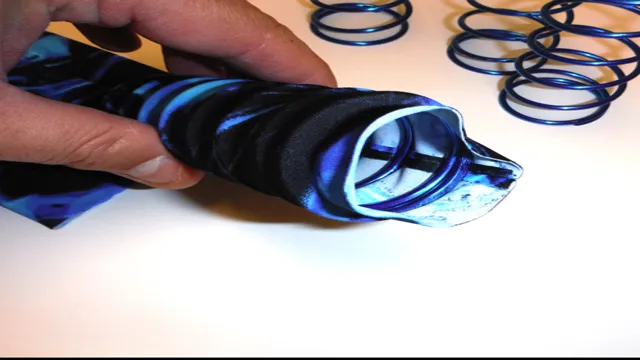
Step 3: Install the New Boots
Installing shock boots can be a straightforward process if you follow the right steps. Once you have removed the old boots, go ahead and slide the new boots onto the shock absorber. Make sure that the boots are pushed all the way down so that it covers the shock absorber entirely.
If you’re struggling with this part, try using some lubricant to help slide the boots on more easily. Once the boots are in place, you can put the shock absorber back in its original position and secure it using the necessary hardware. Don’t forget to check that everything is tightened correctly and ensure the boots are evenly distributed before calling it a day.
With these simple steps, you’ll be able to install shock boots like a pro!
Step 4: Lower the Vehicle
If you’ve made it this far in installing your shock boots, congrats! You’re almost done. The last step is to lower the vehicle, but before you do, double-check that everything is tightened and secure. The last thing you want is to take your vehicle out on the road, hit a bump, and have your shock boots come loose.
Once you’ve ensured everything is secure, it’s time to lower the vehicle slowly and carefully. Use a jack or lifts to ensure the vehicle is lowered at a safe and controlled pace. Finally, check to make sure your shock boots are still secure after lowering the vehicle.
If they are, your DIY installation is complete! Remember, proper installation of shock boots is crucial to protecting your shocks and extending their lifespan. It’s never a bad idea to double-check your work, so take the time to do it right, and you’ll enjoy better performing shocks for years to come. Happy driving!
Conclusion
In conclusion, installing shock boots is a wise and practical choice for any suspension enthusiast. Not only do they protect your shocks from the elements, but they also add an extra touch of style to your ride. It’s simple to do and the benefits are tremendous.
So go ahead and slip those boots on, your shocks will thank you. And who knows, you might even have a few jealous car lovers eyeing up your sleek new upgrade.”
FAQs
What are shock boots and why are they important?
Shock boots are rubber or polyurethane covers that protect your shock absorbers from dirt, debris, and other contaminants that can cause damage or premature wear. They are important because they help prolong the life of your shocks and keep them working at peak performance.
How do I choose the right size shock boots for my vehicle?
The size of shock boots you need will depend on the make and model of your vehicle, as well as the size of your shocks. Most shock boot manufacturers provide sizing charts that can help you determine the correct size for your application.
Can I install shock boots myself or should I take my vehicle to a mechanic?
Installing shock boots is a relatively simple process that can be done by most DIY enthusiasts with basic tools. However, if you are not comfortable working on your vehicle or do not have the necessary tools, it is best to take your vehicle to a qualified mechanic.
How often should I replace my shock boots?
There is no set interval for replacing shock boots, but they should be inspected on a regular basis for signs of wear, damage, or deterioration. If you notice any problems, such as holes, cracks, or tears, they should be replaced immediately to prevent damage to your shocks.