The Ultimate Step-by-Step Guide on Installing an Axle on your Trailer: A Beginner’s Tutorial
Are you planning on upgrading or repairing your trailer’s axle? Installing a new axle may seem like a daunting task, but it doesn’t have to be. With the right tools and some patience, you can do it yourself and save money on labor costs. But where do you start? In this step-by-step guide, we’ll walk you through the process of installing an axle on your trailer.
From selecting the right size and type of axle to properly positioning and securing it, we’ve got you covered. Think of it as assembling a puzzle – each piece needs to fit just right for everything to come together smoothly. And just like with a puzzle, taking your time and being methodical will pay off in the end.
Ready to get started? Let’s roll up our sleeves and dive in!
Preparation
Installing an axle on a trailer requires some preparation to ensure that the process goes smoothly. Firstly, you must gather all the necessary tools, including a jack, jack stands, wheel chocks, a torque wrench, and a socket set. Next, you need to park the trailer on a level surface and engage the parking brake.
Then, place the wheel chocks in front of and behind the wheels on the opposite side of the trailer where you’ll be working. Once that’s done, raise the trailer using the jack and support it with the jack stands. You’ll want to remove the tires and wheels before proceeding with the installation.
It’s also important to inspect the old axle for any signs of wear or damage and replace any affected parts. By following these steps and taking the necessary precautions, you’ll be ready to install the new axle and get your trailer back on the road in no time.
Gather Tools and Materials
Before embarking on any DIY project, having the right tools and materials is crucial. You don’t want to start a project only to find out halfway through that you don’t have what you need. So, it’s important to gather all the tools and materials you’ll need before you begin.
First, make a list of everything you’ll need for the project and double-check the list before heading to the store. This will save you time and effort in case you forget something. When selecting tools, look for ones that are appropriate for your level of expertise and the project at hand.
Don’t be afraid to ask for help or advice from the experts at the store. When picking out materials, choose high-quality ones that will withstand wear and tear. Finally, make sure you have everything you need before starting the project to avoid any unnecessary delays or frustration.
Proper preparation is key to a successful DIY project, and having the right tools and materials is the first step to getting there.
Find a Workspace
When it comes to finding a workspace, there are a few key things you’ll want to consider in order to prepare yourself. First, think about what kind of environment you work best in. Do you need complete silence, or do you thrive in a busy, bustling atmosphere? Consider things like lighting and temperature as well – some people work best with natural light and fresh air, while others prefer dimmer lighting and a cooler environment.
Once you have a sense of your ideal workspace, start thinking about practical factors like location, amenities, and cost. Look for a space that’s convenient to get to, with the amenities you need (like wifi, printing, or office supplies), and that fits your budget. With a little bit of preparation, you’ll be well on your way to finding the perfect workspace for your needs.
Removing the Old Axle
If you’re looking to install a new axle on your trailer, the first step is to remove the old one. This can be a bit of a challenge, but with the right tools and a little bit of know-how, it’s definitely doable. First, you’ll need to jack up your trailer and support it securely with jack stands.
Then, you’ll need to remove the wheels and brakes from the old axle. Once that’s done, you can use a pry bar to loosen the nuts on the u-bolts that hold the old axle in place. Finally, you can use a jack to lower the axle and remove it from underneath the trailer.
With the old axle out of the way, you’ll be ready to install your new one and get back on the road in no time!
Detach the Wheels and Springs
When it’s time to replace the axle of your vehicle, it’s important to properly detach the wheels and springs first. This is not a simple task and should only be done by a skilled and experienced mechanic. The first step is to loosen the lug nuts on the wheels and raise the car with a jack.
Once the car is securely lifted off the ground, remove the wheels and set them aside. The next step is to detach the springs by loosening the bolts connecting them to the axle. Removing the old axle may require additional tools such as a pry bar or hammer to separate it from the suspension.
It’s important to take great care during this process to avoid causing any damage to other components of the suspension system. Once the old axle is removed, the new axle can be installed, and the wheels and springs reattached. Regular maintenance of your vehicle’s suspension system is crucial for its longevity and safety on the road, so make sure to have it inspected by a professional regularly.
Remove the Old Axle
When it’s time to replace your car’s axle, removing the old one is the first step. This process can be a little daunting, but taking your time and following the appropriate steps will make it easier. First, jack up the car and secure it on jack stands.
Next, loosen the lug nuts on the wheel with the old axle and then remove the wheel entirely. You should now be able to access the hub that is connected to the axle. Locate the bolts or nuts that secure the hub to the axle and remove them.
Depending on the make and model of your car, there may be other parts that must be removed before the axle can come out. Once you’ve identified all the necessary bolts or nuts, carefully remove the old axle, taking care not to damage the surrounding components. With the old axle safely removed, you can begin installation of the new one.
By following these steps, you’ll be on your way to a smoother ride in no time!
Installing the New Axle
Installing the new axle on your trailer can seem like a daunting task, but with some patience and the right tools, it can be a manageable DIY project. Before you begin, make sure you have all the necessary equipment, such as a jack, jack stands, a wrench, and a torque wrench. Begin by parking your trailer on level ground and using the jack to lift the trailer off the ground.
Be sure to place the jack stands securely to ensure safety. Next, remove the old axle by unscrewing the bolts and carefully lowering it down. To install the new axle, carefully align it with the suspension, making sure it properly fits into place.
Then, secure it with bolts and tighten them using a torque wrench to ensure the proper tightness. Finally, double-check all connections and make sure everything is fastened securely before lowering the trailer back onto the ground. When done correctly, installing a new axle can greatly improve the safety and performance of your trailer.
Align the New Axle
Now that you’ve removed the old axle, it’s time to align the new one for installation. Proper alignment is essential for ensuring that the new axle fits perfectly and functions properly. To align the new axle, start by cleaning the area where it will be installed, removing any debris and dirt.
Then, place the new axle in position, lining it up with the mounting points on your vehicle. Check that it is level and centered, making any minor adjustments as needed to ensure a snug fit. It’s critical to take your time during this step, as even a slight misalignment can cause issues down the road.
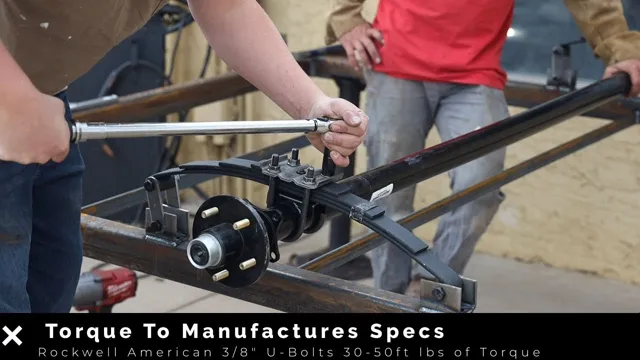
Once you’re confident that the new axle is properly aligned, you can move on to securing it in place with the mounting bolts. Remember to torque the bolts to the manufacturer’s specifications, as overtightening or under-tightening can cause problems. By following these steps, you’ll be well on your way to successfully installing your new axle and enjoying a smooth ride.
Attach the Wheels and Springs
Once you have removed the old axle, it’s time to install the new one. This is an important step in attaching the wheels and springs to ensure your vehicle’s stability and safety. Make sure the new axle is the correct size and design for your vehicle.
Once you have confirmed this, you can begin the installation process. Start by sliding the new axle into place and securing it with the appropriate hardware. Next, attach the springs to the axle, making sure they are securely fastened.
Finally, attach the wheels to the axle, tightening the lug nuts to the manufacturer’s specifications. Double-check everything to ensure that all components are properly installed before you hit the road. By installing the new axle correctly, you’ll enjoy a smoother ride and increased stability, giving you the confidence to take on any terrain with ease.
Test the Trailer
If you want to tow anything, you’ll need a trailer with an axle. Installing an axle on a trailer isn’t as hard as it might seem at first, and can be done by someone with moderate experience and tools. Start by positioning the axle and making sure it’s level and square with the trailer frame.
If it’s not, you’ll have problems down the road with uneven wear on your tires. Once the axle is in place, mount your springs and other hardware correctly, and make sure the brake lines, wiring, and lights are properly connected and working. After that, it’s time to test the trailer.
Make sure it’s loaded properly, and take it for a drive to see how it handles. You’ll want to make sure it’s stable at speed, and that it turns smoothly and without any jerking or swaying. Don’t be afraid to make adjustments as needed, and remember to take it easy on your first few tow trips to make sure everything is working as it should be.
Overall, installing an axle on a trailer is a straightforward process that can be done by anyone with a bit of patience and attention to detail.
Check for Proper Alignment
When it comes to towing a trailer, it’s imperative to ensure that it’s properly aligned. Without proper alignment, you risk an unsafe and uncomfortable ride, as well as potential damage to your towing vehicle. To test the alignment, begin by hitching up the trailer and adjusting the ball mount to a level position.
Then, use a tape measure to measure the distance between the front and back of the trailer wheels on each side. If the measurements are not the same, adjust the trailer’s axles until they are. Additionally, take the time to check that the trailer’s brakes, lights, and tires are all in good condition and functioning properly.
By properly testing and adjusting the alignment of your trailer, you can ensure a smooth and safe towing experience on the road. Remember, safety should always come first!
Test for Proper Functioning
When it comes to towing a trailer, safety should always be your top priority. And one of the most effective ways to ensure that you and your cargo arrive at your destination in one piece is by testing the trailer before hitting the road. Testing a trailer simply means verifying its proper functioning to avoid any unexpected surprises during your trip.
Start by checking the tires’ pressure, make sure all lights are working correctly, including brake lights, turn signals, and headlights. Check the brake system and hitch connection tightness. You can also test the weight distribution and braking performance of the trailer.
Doing these checks will prevent road accidents and ensure that your trip is hassle-free. It’s always better to be safe than sorry, and testing the trailer will alleviate any anxieties and give you the peace of mind to enjoy the journey. Safe travels!
Final Thoughts
If you’re looking to install an axle on your trailer, there are a few things you should keep in mind. First, make sure you have all the necessary tools and equipment to get the job done safely. Once you have everything you need, start by jacking up your trailer and removing the old axle.
From there, you can install the new axle, making sure it’s properly aligned and tightened down securely. Don’t forget to check things like the brakes, bearings, and springs before taking your newly-equipped trailer out on the road. It may seem like a daunting task, but with a little attention to detail and careful planning, you can ensure that your trailer is ready for whatever adventures lie ahead.
So why wait? Get started on your axle installation today!
Conclusion
Well, folks, installing an axle on a trailer may seem like a daunting task, but with the right tools and a little bit of know-how, it can actually be quite simple. Just remember to measure twice and cut once (not that you’ll be doing any cutting), and always use the proper safety equipment. Now, you’ll be cruising down the highway with a trailer that’s as smooth as butter.
Happy hauling!”
FAQs
What tools do I need to install an axle on a trailer?
To install an axle on a trailer, you will need a jack, a wrench set, pliers, grease, and a torque wrench.
How do I know which way the axle should face on the trailer?
The axle should face with the curve of the axle pointing upward towards the top of the trailer.
Can I install an axle on my trailer by myself or do I need a professional?
While it is possible to install an axle on your trailer by yourself, it is recommended to have a professional do the installation to ensure proper alignment and safety.
How do I properly torque the bolts when installing the axle on my trailer?
To properly torque the bolts, use a torque wrench and tighten each bolt to the manufacturer’s specifications. It is important to torque each bolt in a cross pattern to ensure even pressure.