Step-by-Step Guide: Installing a Clutch Slave Cylinder for Smooth Shifting and Better Performance
Replacing or installing a clutch slave cylinder is a crucial task that needs to be done the right way. But, if you’re a beginner, you might wonder where to even begin. So, in this blog post, we’re going to take you through everything you need to know about installing a clutch slave cylinder.
We’ll cover what a clutch slave cylinder does, how to tell if it’s faulty, the tools you’ll need, and a step-by-step guide on how to install it on your own. Don’t worry if you’re not a mechanic; we’ll make this process as simple and easy to follow as possible. By the end of this post, you’ll have gained the knowledge and confidence to get the job done right.
Overview: What is a Clutch Slave Cylinder?
Installing a clutch slave cylinder can be a tricky process, but it’s important to keep your vehicle running smoothly. A clutch slave cylinder is a small component of your car’s transmission system that helps to operate the clutch. When you depress the clutch pedal, it sends hydraulic pressure to the slave cylinder, which then engages the clutch.
If your slave cylinder is failing, you may notice a variety of symptoms, such as difficulty shifting gears or a soft clutch pedal. If this is the case, you may need to replace it. To install a new clutch slave cylinder, you’ll need to drain and refill the clutch master cylinder, remove the old slave cylinder, and install the new one.
It’s important to follow the manufacturer’s instructions and use the correct parts for your vehicle to ensure a proper fit. With a little patience and some basic mechanical skills, you can replace your clutch slave cylinder and get back on the road in no time!
Define and describe clutch slave cylinder and its function.
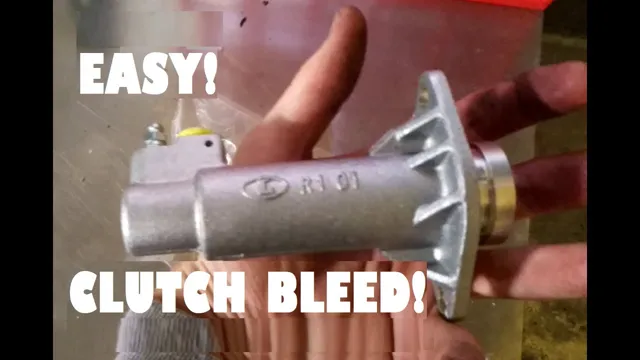
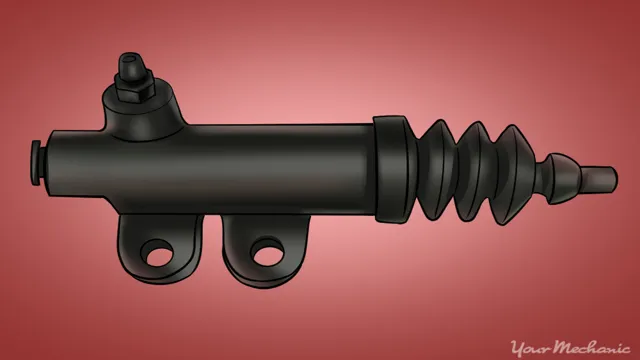
A clutch slave cylinder is an essential component of a manual transmission system. It is situated within the transmission bell housing and is connected to the clutch release fork through a pushrod. The primary function of the clutch slave cylinder is to engage and disengage the clutch disc from the flywheel when shifting gears.
The slave cylinder works by compressing hydraulic fluid that then activates the clutch release arm and, consequently, the clutch. Essentially, without the clutch slave cylinder, it would be impossible to change gears in a manual transmission car. Like any other mechanical component, the clutch slave cylinder can deteriorate over time due to wear and tear, causing clutch failure.
Nevertheless, proper maintenance can significantly improve its longevity, saving car owners from costly replacements.
Step-by-Step Guide to Installing a Clutch Slave Cylinder
Installing a clutch slave cylinder may seem intimidating, but with the right tools and a methodical approach, it can be done easily. Before starting, make sure to gather all the necessary tools such as a wrench, socket set, and a container to catch any spilled fluid. Begin by locating the slave cylinder, which is typically on the driver’s side of the transmission.
Remove the hose and retaining bolts that connect the cylinder to the transmission. Take note of the orientation of the old cylinder and compare it to the new one to ensure they are the same. Install the new cylinder in the same orientation as the old one, and tighten the retaining bolts.
Reconnect the hose and add new fluid to the reservoir, being careful not to overfill it. Finally, test the clutch pedal to ensure that it engages and disengages smoothly. By following these steps, you can successfully install a clutch slave cylinder and get back on the road in no time.
Tools and materials needed.
If you’re experiencing difficulty shifting gears, your clutch slave cylinder may be failing, and it’s time to install a new one. Installing a clutch slave cylinder may seem intimidating, but it’s not as difficult as you may think. Here are the tools and materials needed for this task: a wrench, pliers, a bleed kit, a new clutch slave cylinder, and a repair manual for your specific vehicle.
The first step is to locate your old clutch slave cylinder and remove it using the wrench and pliers. Then install the new one and bleed the hydraulic system using the bleed kit. Once done, test the system to ensure smooth gear shifting.
By following these simple steps, you’ll save money on mechanic fees and have a more satisfying driving experience.
Step 1: Remove old cylinder and prepare for installation.
If you’re experiencing issues with your clutch, it may be time to install a new clutch slave cylinder. Before you get started, make sure you have your tools handy and a new cylinder on hand. The first step in the installation process is to remove the old cylinder and prepare for the new one.
You’ll need to carefully disengage the old cylinder from the hydraulic line, being sure to avoid damaging the line in the process. Once the old cylinder is removed, clean the area around it thoroughly to ensure a proper seal for the new cylinder. Take the time to inspect the hydraulic line and replace it if necessary.
With the area prepped and the new cylinder ready, you’re one step closer to a smoother clutch. Keep reading to learn more about the installation process of a clutch slave cylinder.
Step 2: Install new clutch slave cylinder.
Installing a clutch slave cylinder can be a bit tricky, but it’s not impossible. Here’s a step-by-step guide to help you get the job done right. Step 2 is all about installing the new clutch slave cylinder.
This is an essential part of the process, as the clutch slave cylinder is what helps to engage and disengage the clutch. Firstly, you need to locate the clutch slave cylinder. It’s typically located on the left-hand side of the transmission, near the bellhousing.
Next, remove the old clutch slave cylinder. This can be done by using a socket or wrench to remove the mounting bolts that hold it in place. You may also need to disconnect the hydraulic line that runs to the clutch master cylinder.
Once you’ve removed the old clutch slave cylinder, it’s time to install the new one. Start by attaching the hydraulic line to the new cylinder. Be sure to tighten it securely to avoid any leaks.
Next, position the new clutch slave cylinder in place and reattach the mounting bolts. Again, make sure they are tightened securely. With everything in place, it’s time to bleed the clutch system.
This is important to ensure that the hydraulic fluid is flowing properly and that there are no air bubbles in the system. To do this, locate the bleeder valve on the clutch slave cylinder and attach a hose to it. Place the other end of the hose in a container of hydraulic fluid.
Step 3: Bleed the clutch system.
Now that the clutch slave cylinder is in place, it’s time for the next step in the installation process: bleeding the clutch system. This step is essential to ensure that the clutch engages and disengages smoothly. To start, locate the bleed valve on the slave cylinder and connect a clear hose to it.
The other end of the hose should be submerged in a container filled with brake fluid. Next, have a helper press the clutch pedal to the floor and hold it down. Open the bleed valve and let the fluid flow into the container until there are no air bubbles left in the hose.
Close the valve and repeat the process until no more bubbles appear. This process may take a few attempts, and it’s crucial to make sure the fluid level in the reservoir doesn’t drop too low while bleeding. Once done, test the clutch’s operation to ensure everything is functioning correctly.
With this step complete, the clutch slave cylinder installation process is almost complete, and you’ll be back to driving smoothly in no time!
Tips for Installing a Clutch Slave Cylinder
Installing a clutch slave cylinder can be a daunting task, especially for those who have never done it before. However, with the right tools and a little bit of know-how, you can easily install a clutch slave cylinder yourself. The first step is to locate the clutch slave cylinder, which is usually located on the side of the transmission.
From there, you will need to remove the old slave cylinder and replace it with the new one. Make sure to bleed the clutch after installation to ensure optimal performance. It is also important to check for leaks and proper alignment before test driving your vehicle.
Following these simple tips will have your clutch slave cylinder installed in no time and ensure that your vehicle is running smoothly.
Common mistakes to avoid.
Installing a clutch slave cylinder can be a tricky process, and mistakes are easy to make. One of the most common errors is not properly bleeding the system after the slave cylinder has been installed. If not bled correctly, air can remain in the system, preventing proper clutch engagement.
Another mistake is not properly torquing the bolts that secure the cylinder in place. This can lead to leaks or, in extreme cases, the cylinder falling off entirely. It’s also important to make sure that the clutch fork is properly aligned with the cylinder before securing it in place.
This will ensure optimal performance and longevity for your clutch system. By taking the time to avoid these common mistakes, you can save yourself a lot of time, money, and frustration in the long run. Remember, proper installation is key for a smooth and reliable clutch system.
So, take your time, do your research, and if you’re unsure about something, don’t be afraid to ask for help from a professional mechanic.
Additional tips for a successful installation.
If you’re installing a new clutch slave cylinder, there are a few additional tips to keep in mind for a successful installation. First, make sure that the push rod is properly aligned and seated in the clutch fork. This will ensure smooth operation of the clutch system once everything is installed.
Second, be sure to use new gaskets and seals to prevent any leaks. Check that the mating surfaces are clean and free of debris before installing the new components. Finally, it’s a good idea to bleed the clutch hydraulic system to remove any air bubbles that may have formed during installation.
This will improve the feel and responsiveness of the clutch pedal. Overall, by following these tips you can ensure a smooth and trouble-free installation of your new clutch slave cylinder.
Conclusion
So there you have it, folks. Installing a clutch slave cylinder may seem like a daunting task, but with the right tools and a little bit of patience, it can be done easily. Just remember to take your time, follow the instructions, and don’t be afraid to get your hands dirty.
And if all else fails, just pretend you’re assembling a puzzle and enjoy the satisfaction of a job well done. Happy wrenching!”
FAQs
What is a clutch slave cylinder and what is its function in a manual transmission system?
A clutch slave cylinder is a hydraulic component that is responsible for engaging and disengaging the clutch in a manual transmission system. It works by converting hydraulic pressure from the master cylinder into mechanical force that pushes against the clutch fork, which in turn disengages the clutch.
What are the symptoms of a failing clutch slave cylinder?
Some common symptoms of a failing clutch slave cylinder include difficulty shifting gears, a soft or spongy clutch pedal, clutch slippage, and leaking or dripping fluid from the cylinder. If you notice any of these symptoms, it’s important to have your cylinder inspected and replaced if necessary.
How do I know if my clutch slave cylinder needs to be replaced?
If you notice any of the symptoms listed above, or if your clutch pedal feels unusually soft or difficult to push down, it may be time to replace your clutch slave cylinder. Additionally, if your cylinder is leaking or visibly damaged, it should be replaced immediately.
Can I replace my own clutch slave cylinder or should I take it to a professional mechanic?
While it is possible to replace your own clutch slave cylinder if you have the necessary tools and experience, it can be a difficult and time-consuming process. If you’re unsure of your abilities, or if you simply want to ensure that the job is done correctly and safely, it’s best to take your car to a professional mechanic for replacement.

