Maximize Your Car’s Performance: Step-by-Step Guide on How to Flush Your Transmission Cooler
Are you experiencing transmission issues such as delayed shifting, slipping gears, or overheating? If so, it might be time to flush your transmission cooler. Flushing your transmission cooler removes any debris, dirt, or metal particles that might be clogging the system and causing these problems. Think of it like unclogging a drain- once the obstruction is removed, the system can run smoothly again.
In this blog post, we’ll go over how to flush your transmission cooler step-by-step so you can easily maintain your car’s transmission and keep it running smoothly.
Why flushing transmission cooler is important
If you want to maintain a healthy transmission, then flushing the transmission cooler is important. Your transmission cooler is responsible for regulating the temperature of your transmission fluid, preventing it from overheating and causing damage. Over time, however, debris and contaminants can build up in the cooler, reducing its efficiency and causing it to overheat.
This can lead to transmission failure and costly repairs. To prevent this from happening, you should flush the transmission cooler regularly. This involves draining the old fluid, flushing the cooler with a cleaning solution, and refilling it with fresh fluid.
By doing so, you can ensure that your transmission runs smoothly and efficiently, and avoid costly repairs down the line. So, whether you’re a seasoned mechanic or just starting out, knowing how to flush transmission cooler is an essential skill to have.
Save transmission from overheating and friction damage
If you’re wondering why flushing your transmission cooler is important, let us fill you in. Over time, transmission fluid can become contaminated with dirt, metal shavings, and other debris that can cause friction damage and overheating in your transmission. This can result in reduced fuel efficiency, sluggish acceleration, and even transmission failure.
By flushing your transmission cooler and replacing the old fluid with new, clean fluid, you can help prevent these problems and prolong the life of your transmission. Plus, it’s a relatively quick and inexpensive maintenance task that can save you from costly repairs in the long run. So why not give your transmission some love and keep it running smoothly?
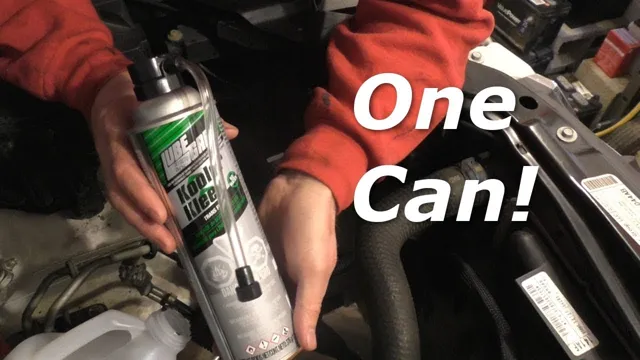
Improve transmission performance and extend its lifespan
Flushing your transmission cooler is an important step in maintaining the performance and lifespan of your transmission. Over time, debris and contaminants can build up in the cooler, restricting flow and reducing cooling efficiency. This can lead to increased transmission temperatures, which can cause premature wear and damage to internal components.
Additionally, contaminated transmission fluid can be circulated throughout the system, causing further damage and reducing transmission performance. Flushing your transmission cooler can remove these contaminants and restore proper flow and cooling, helping to extend the life of your transmission. So, just like how you brush your teeth regularly to maintain oral health, flushing your transmission cooler is an essential step in maintaining the health and longevity of your vehicle’s transmission.
Tools you need for flushing transmission cooler
If you’re experiencing transmission problems, it might be time to flush your transmission cooler. This process involves removing all the old, contaminated fluid from your transmission system, including the fluid in the cooler. To do this, you’ll need a few essential tools.
First, you’ll need a drain pan to collect the old fluid as it’s drained from your system. You’ll also need a transmission flush kit, which typically includes a canister that connects to your transmission lines and a special fluid that’s used to remove any buildup or debris that’s accumulated inside your system. Additionally, you’ll need a funnel to refill your system with fresh fluid after it’s been flushed.
With these tools on hand, you can complete the transmission cooler flush process and get your vehicle running smoothly again.
Transmission cooler flush kit
When it comes to flushing the transmission cooler, having the right tools can make all the difference. One essential tool that can help you get the job done right is a transmission cooler flush kit. This kit typically includes a variety of attachments and adapters that allow you to connect a flushing machine or transmission fluid exchange equipment directly to the cooler lines.
With the help of this kit, you can effectively flush out any contaminants or debris that might be clogging your transmission cooler, ensuring your transmission stays cool and running smoothly. Using a transmission cooler flush kit is relatively straightforward. To begin, you’ll need to locate the transmission cooler lines and disconnect them from the transmission.
Next, you’ll need to attach the appropriate adapters from the flush kit to the cooler lines, ensuring a tight and secure fit. Once everything is connected, you can turn on the flushing machine or exchange equipment, allowing it to pump out the old fluid and debris from the cooler and lines, replacing it with fresh, clean fluid. Overall, having a transmission cooler flush kit can make flushing your transmission cooler a more efficient and effective process.
By ensuring your transmission stays cool and properly lubricated, you can help extend the life of your vehicle and minimize the risk of costly repairs. So if you’re planning on flushing your transmission cooler, be sure to invest in a quality flush kit that fits your specific vehicle and needs.
Clean bucket or container
Having a clean bucket or container is essential when flushing your transmission cooler. It’s important to make sure the container is free from any contaminants that could make their way back into your transmission. You don’t want to risk any debris or dirt causing further damage to your transmission after going through the effort of flushing it.
When prepping for the flush, take the time to thoroughly clean the container and inspect it for any cracks or leaks. Additionally, make sure to have a large enough container to hold the entire volume of fluid in your transmission system. A little extra preparation goes a long way when it comes to effectively flushing your transmission cooler.
By having a clean and appropriately sized container, you can ensure that the process goes smoothly and that your transmission remains in good condition.
Transmission fluid
When it comes to flushing your transmission cooler, there are a few tools that you’ll need to have on hand. First, you’ll need a transmission flush machine. This is a specialized piece of equipment that is designed to flush out all of the old transmission fluid and replace it with new fluid.
You’ll also need a transmission cooler flush adapter, which is used to connect the flush machine to the cooler lines. Additionally, you’ll need a set of open-end wrenches to remove the cooler lines from the radiator and to attach the flush adapter. A drain pan is also necessary to catch the old fluid that will be flushed out of the system.
Finally, you’ll need a funnel to add the new transmission fluid. By having these tools on hand, you can ensure that your transmission cooler is thoroughly flushed and ready to perform at its best.
Step by step guide to flush transmission cooler
If you’ve noticed your vehicle’s transmission acting up, it might be time to flush your transmission cooler. Flushing your transmission cooler involves removing any built-up debris or contaminants that could potentially cause damage to your transmission. To get started, you’ll need to gather a few tools such as a drain pan, a new transmission filter, and some transmission fluid.
The first step to flushing your transmission cooler is to drain the old fluid from your transmission. Next, disconnect the transmission cooler lines and flush them out with a special solution to remove any contaminants. Then, replace your old transmission filter with a new one and reattach the cooler lines.
Finally, refill your transmission with fresh fluid and check your fluid level. Regularly flushing your transmission cooler is a crucial step in maintaining the health of your transmission, so don’t put it off any longer!
Disconnect transmission lines
If you need to flush your transmission cooler, one essential step is to disconnect the transmission lines. This should be done before you start flushing the system to ensure that the fluid only goes where it’s needed. Disconnecting the transmission lines may seem daunting if you’re not familiar with auto repairs, but it’s actually a straightforward process.
You’ll need to locate the lines, usually found near the radiator. Then, using a wrench or pliers, loosen the nuts or clamps that hold the lines in place. Be sure to have a drain pan handy, as some fluid will likely spill out.
Once the lines are disconnected, you can start the flushing process. This involves running a cleaning solution through the system to remove any debris or contaminants that may have built up over time. Once the solution has run through, you’ll need to drain it and refill the system with fresh fluid.
Overall, flushing your transmission cooler is an important maintenance task that can help extend the life of your vehicle. By following a step-by-step guide like this one, you can confidently tackle the project and keep your car running smoothly.
Connect flush kit to cooler lines
Connecting a flush kit to your transmission cooler lines is a crucial step in properly flushing out your transmission system. Here’s a step-by-step guide on how to do it. First, locate your transmission cooler lines and remove them from the transmission.
Next, connect the flush kit to the cooler lines with the provided fittings. It’s important to ensure a tight fit to prevent any leaks. Once the flush kit is securely connected, reattach the cooler lines to the transmission.
Now, it’s time to add the flushing solution to the flush kit. Follow the manufacturer’s instructions carefully to avoid any damage to the transmission. Finally, run the engine and monitor the flushing solution to make sure it’s being circulated properly.
When the solution runs clear, the flush is complete. By following these steps, you can ensure that your transmission is properly flushed and ready for optimal performance. Remember to always consult your owner’s manual and follow all safety precautions when performing any maintenance on your vehicle.
Start engine and flush transmission cooler
If you’re looking to flush your transmission cooler, here’s a step-by-step guide to get you started. First, start your engine and let it run for a few minutes. This will warm up the transmission fluid and make it easier to flush out.
Once your engine is warm, turn it off and locate the transmission cooler lines. These will usually be near the radiator and look like small hoses. Next, disconnect one of the cooler lines and attach a rubber hose to it.
Place the other end of the rubber hose into a container to catch the old transmission fluid. Turn your engine on and start flushing. Keep an eye on the container to make sure it doesn’t overflow.
Once you’ve flushed out the old fluid, turn your engine off and repeat the process on the other cooler line. When you’re finished, replace the cooler lines and add new transmission fluid to your vehicle. This process will help to keep your transmission working smoothly and protect it from damage.
Don’t forget to dispose of the old transmission fluid responsibly! By taking care of your transmission, you can extend the life of your vehicle and save yourself from costly repairs down the road. So, keep this simple process in mind and give your car the care it deserves!
Refill with clean transmission fluid
To ensure your vehicle runs smoothly for years to come, it’s important to pay close attention to your transmission. Flushing the transmission cooler is a crucial step in maintaining your vehicle’s health, as it helps to prevent overheating and prolongs the lifespan of your transmission. Here’s a step-by-step guide to help you successfully flush your transmission cooler.
First, locate the transmission cooler lines and disconnect them from the transmission. Then, attach a flushing machine to one of the lines and a waste container to the other. Run the machine so that it flushes out all the old fluid and debris from the cooler.
Once the flushing process is complete, it’s time to refill the transmission with clean transmission fluid. Begin by reconnecting the cooler lines to the transmission and adding fresh transmission fluid to the transmission itself. Next, start your vehicle and let it run for a few minutes, checking the fluid levels and adding more as necessary.
Overall, flushing the transmission cooler is a simple yet vital step in maintaining your vehicle’s health. With this guide, you can easily perform this necessary task and keep your transmission running smoothly for years to come. Don’t forget to make sure the job is done right by entrusting your vehicle to a qualified mechanic.
When to flush your transmission cooler
If you want to ensure your transmission cooler is working effectively, it’s important to know when to flush it. Over time, your transmission cooler can accumulate sludge, debris, and other contaminants that can degrade its performance and potentially damage your transmission. So, how do you know when it’s time to flush your transmission cooler? One sign is if you start to notice your transmission fluid is discolored or has a burnt smell.
That can be a sign that there’s build-up in your transmission cooler and it’s time to flush it. Additionally, if you’ve recently had your transmission rebuilt or replaced, it’s a good idea to flush your cooler to ensure any debris from the old transmission is removed. Regularly flushing your transmission cooler will help keep your transmission running smoothly and prevent costly damage down the line.
At least every 60,000 miles or as recommended by manufacturer
Maintaining your vehicle’s transmission cooler is important for the longevity of your car’s transmission. Your manufacturer may recommend a transmission flush every 60,000 miles, but it’s essential to keep an eye on your transmission’s performance and address any issues promptly. Flushing your transmission cooler removes any contaminants or old fluid that may be clogging up the system, preventing your transmission from functioning correctly.
A clogged transmission cooler can cause your transmission to overheat, leading to significant damage or even failure. If you’re experiencing any issues with your transmission, such as slipping gears or delayed shifting, it may be time for a transmission flush. Don’t wait until it’s too late; preventative maintenance is key to ensuring the health of your vehicle.
Conclusion
And now, with a freshly flushed transmission cooler, your vehicle will purr like a contented kitten. So sit back, relax, and revel in the silky smooth shifting of your transmission. Remember, regular maintenance is the key to keeping your vehicle running smoothly, so don’t neglect your transmission cooler or any other vital components.
If you do, your vehicle might start to sound less like a kitten and more like a chainsaw. Ain’t nobody got time for that!”
FAQs
Why is it important to flush a transmission cooler?
Flushing a transmission cooler helps remove any debris or contaminants that may have built up over time, preventing them from causing damage to the transmission.
How often should a transmission cooler be flushed?
It is recommended to flush the transmission cooler every 30,000 miles or every two years, whichever comes first, to keep it functioning properly.
Can I flush my transmission cooler myself, or do I need to take it to a mechanic?
Flushing a transmission cooler can be done yourself, but it is recommended to seek the assistance of a mechanic, especially if you are not familiar with the process.
What type of fluid should be used to flush a transmission cooler?
A specialized transmission flush fluid should be used to ensure the proper cleaning and flushing of the transmission cooler. It is important to follow the manufacturer’s instructions for the appropriate type of fluid to use.

