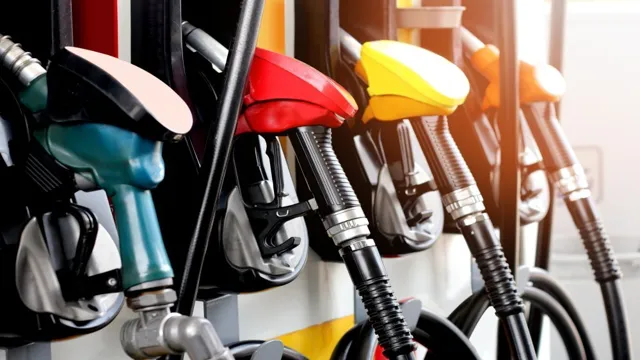
Leaky Fuel Line Connectors? Here’s Your Step-by-Step Guide to Fix it Like a Pro!
Dealing with a leaking fuel line connector can be a frustrating experience for any vehicle owner. Not only can it be hazardous, but it can also lead to expensive repairs if left unchecked. If you’ve noticed fuel dripping from the connection between your fuel line and the engine, it’s important to address the issue right away.
However, fixing a leaking fuel line connector can feel daunting if you’ve never done it before. That’s why we’ve put together this guide to help you diagnose the problem and fix it yourself. With a few basic tools and some patience, you can restore your vehicle’s fuel line and prevent further damage.
So, let’s dive in and learn how to fix a leaking fuel line connector.
Identify the Leak
If you notice that your car is leaking fuel, it’s essential to take action right away to avoid safety hazards and costly repairs. One of the most common causes of fuel leaks is a loose or faulty fuel line connector. Luckily, fixing this issue is relatively straightforward and can be done by following a few simple steps.
The first step is to identify the leak’s exact location, which can be done by inspecting the fuel lines and connections underneath your car. Once you’ve located the leak, you’ll need to remove the fuel line connector and inspect it for any signs of damage or wear and tear. If the connector is damaged, it’s important to replace it with a new one before reattaching the fuel line.
Additionally, it’s a good idea to check the other fuel line connectors in your car to ensure they are secure and free of leaks. By taking these steps, you can fix a leaking fuel line connector and keep your car running smoothly and safely on the road.
Check Fuel Line Connector for Damage
If you notice your car leaking fuel, it’s crucial to identify the source of the leak right away to avoid any potential hazards. One possible cause of a fuel leak is a damaged fuel line connector. These connectors join the fuel line to the fuel tank and the fuel injector rail.
Over time, these connectors can become brittle and cracked, resulting in fuel leaks. To check your fuel line connector for damage, start by locating the connector. Most cars have a fuel line that runs from the fuel tank to the engine and is visible underneath the vehicle.
Once you locate the connector, inspect it for any cracks or signs of wear. If you notice any damage to the connector, have it replaced immediately by a qualified mechanic. It’s also important to avoid driving your vehicle until the leak has been repaired to prevent any fires or potential accidents.
By taking these necessary steps, you can keep you and your vehicle safe on the road. Remember, safety always comes first when it comes to dealing with fuel leaks!
Check If the Fuel Line Is Loose
If you suspect a fuel leak in your vehicle, the first thing you’ll need to do is identify the source of the leak. One common cause of fuel leaks is a loose fuel line, which can occur when the connection between the fuel line and the engine becomes disconnected or damaged. This can cause fuel to seep out of the line and leak onto other parts of the engine or the ground.
To check if the fuel line is loose, inspect the area around the fuel line connections for signs of fuel or moisture. You may also notice a strong smell of gasoline. If you suspect a loose fuel line, it’s important to have it checked out by a mechanic as soon as possible.
Ignoring the problem can lead to more serious issues, such as engine damage or even a fire hazard. So, if you notice any symptoms of a fuel leak, be sure to take action right away to keep your vehicle in good working order.
Gather Necessary Tools and Materials
To fix a leaking fuel line connector, the first step is to gather all the necessary tools and materials. This includes a replacement fuel line connector, fuel line pliers, safety glasses, gloves, and a container to catch any spilled fuel. Before starting the repair, make sure the vehicle is turned off and the engine is cool.
It’s also important to follow all safety procedures, such as wearing safety glasses and gloves to protect yourself from any potential fuel splatter. Once you have everything you need, you can begin the repair process and fix your leaking fuel line connector. Always remember to work carefully and take your time to ensure safety and an effective repair.
Fuel Line Connector Set
When it comes to replacing your fuel line connector set, gathering the necessary tools and materials is crucial. First, you’ll need a new fuel line connector set that matches your vehicle’s make and model. You’ll also need a wrench or pliers to loosen and tighten the connectors, as well as a fuel line disconnect tool to safely remove the old connectors.
It’s important to make sure you have the right size tools and that they are in good working condition to prevent any damage or injury. Additionally, it’s recommended to have gloves and safety glasses on-hand to protect your hands and eyes while working with fuel lines. With these tools and materials, you can successfully replace your fuel line connector set and ensure your vehicle’s fuel system is functioning properly.
Sealant Tape or Epoxy
When it comes to sealing leaks in pipes, you have two main options: sealant tape or epoxy. But before you start, it’s important to gather all of the necessary tools and materials. For sealant tape, you’ll need a pair of scissors to cut the tape to the desired length, as well as a clean and dry surface to apply it to.
It’s also a good idea to have a rag or towel on hand to wipe away any excess water or debris before applying the tape. For epoxy, you’ll need to mix the two-part formula together according to the instructions on the package. You’ll also need a clean and dry surface to apply the epoxy to, as well as a stirring stick and a disposable mixing container.
No matter which option you choose, make sure to wear gloves to protect your hands and give yourself plenty of time to allow the sealant to cure properly. With the right tools and materials, you can successfully seal leaks in pipes and prevent further damage.
Remove the Damaged Connector
To fix a leaking fuel line connector, the first thing you need to do is remove the damaged connector. This can be done by using a wrench or pliers to loosen the connector from the fuel line. Once loosened, the connector can be gently pulled off the fuel line.
Be careful not to damage the fuel line during this process as it is essential for the safe transport of fuel. Inspect the fuel line for any signs of damage or wear and tear, which could have caused the leak. If the fuel line is damaged, it must be replaced before installing a new connector.
Always wear protective gloves and eyewear when handling fuel lines as gasoline is highly flammable and can be dangerous if it comes into contact with your skin or eyes. Once the damaged connector is removed and the fuel line inspected, you can move onto the next step of fixing a leaking fuel line connector.
Relieve Pressure in the Fuel System
When experiencing issues with your vehicle’s fuel system, it’s important to first relieve the pressure before attempting any repairs. This can be done by removing the damaged connector that may be contributing to the problem. By doing so, you can prevent any dangerous fuel leaks and avoid potentially harmful fuel vapor inhalation.
Once the connector is removed, you can inspect it for any visible damage or wear that may have caused the issue. It’s important to also check the fuel lines and replace any damaged connectors or lines to prevent any future problems. By taking these steps and being proactive in maintenance, you can ensure your vehicle runs smoothly and safely on the road.
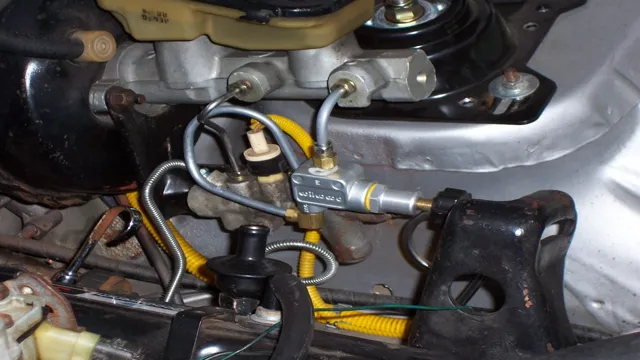
Detach the Fuel Line Connector
When it comes to repairing a damaged fuel line, the first step is to detach the fuel line connector. This can seem daunting at first, but with the right tools and a bit of patience, it can be accomplished fairly easily. Start by locating the connector, which is typically located near the fuel tank or the engine.
Once you’ve found it, use a pair of pliers to gently squeeze the tabs on either side of the connector. This will loosen it and allow you to pull it away from the fuel line. Be careful not to use too much force or you could damage the fuel line itself.
Once the connector is detached, you can inspect it for damage or wear and decide if it needs to be replaced. Remember to always exercise caution when working with fuel lines, as they can be dangerous if handled improperly. By following these steps, you can safely and effectively remove a damaged fuel line connector and get your vehicle back on the road in no time!
Install the New Connector
If you’re experiencing a fuel leak due to a malfunctioning fuel line connector, don’t worry! You can easily fix it by installing a new one. Start by safely removing the old connector with fuel line pliers or a wrench. Next, place the new connector onto the fuel line, making sure it is securely in place.
Finally, tighten the connector with the pliers or wrench until it is snug and the fuel line is no longer leaking. It’s important to remember to always double-check the connector for any leaks by starting the engine and checking for any fuel dripping or spraying. By following these steps, you can fix a leaking fuel line connector with ease and avoid any potential hazards on the road.
Coat Threads with Sealant Tape or Epoxy
When connecting wires for your project, it’s important to ensure a tight and secure connection. One way to do this is by using sealant tape or epoxy to coat the threads of the connector before installation. This will create a waterproof and air-tight seal that will protect your wires from any moisture or other elements that might damage it.
To install the new connector, start by twisting the wires together and then insert them into the connector. Make sure the threads are properly aligned before gently tightening the connector using a wrench. Be careful not to over-tighten, as this can damage the wires or the connector itself.
Finally, apply sealant tape or epoxy to the threads for added protection. Using sealant tape or epoxy may seem like an extra step, but it can save you a lot of trouble in the long run. By making sure your connector is waterproof and air-tight, you’re ensuring a long-lasting and reliable connection for your project.
So, don’t skimp on this step and take the time to do it right. Your project will thank you for it!
Attach New Fuel Line Connector
To attach a new fuel line connector, first, you need to install the new connector. This process involves cutting the fuel line and fitting the new connector securely. Before you begin the installation process, make sure you have all the necessary tools, such as a tube cutter and wrenches.
First, locate the fuel line and determine where to cut it. Measure the length and cut the line with a tube cutter. Next, insert one end of the connector into the fuel line and the other end into the fuel pump.
Make sure to tighten each connection with the appropriate wrenches to prevent leaks. Finally, test the new fuel line connector by turning on the engine and checking for any leaks or pressure issues. By following these steps, you can install a new fuel line connector and ensure your vehicle runs smoothly.
Test for Leaks
If you’re experiencing a fuel leak from your connector, there are a few ways you can troubleshoot the issue. First, ensure the fuel line connector and surrounding area is dry. Then, visually inspect the connector and the fuel line for any cracks or damage.
Tighten any loose bolts or clamps if necessary. Next, test for leaks by starting the engine and checking the fuel line for any signs of leakage. If you still see a leak, you may need to replace the connector.
How to fix a leaking fuel line connector ultimately depends on the severity of the damage, but taking the time to diagnose the issue and following these steps can help prevent any future problems. Remember, safety is the most important factor, so if in doubt, seek professional help.
Conclusion
So there you have it, folks! If you find yourself with a pesky leaking fuel line connector, fear not! By following these steps, you can quickly and easily fix the problem and get back on the road. Just remember to use caution, keep your wits about you, and never underestimate the power of a good set of pliers. Happy fixing!”
FAQs
What causes fuel line connectors to leak?
Fuel line connectors can leak due to wear and tear, improper installation, or damage from external factors like road debris or accidents.
How can I tell if my fuel line connector is leaking?
Signs of a leaking fuel line connector include fuel odor, visible fuel dripping or pooling under the vehicle, and a decrease in fuel efficiency.
Can I fix a leaking fuel line connector myself?
It is not recommended to attempt to fix a leaking fuel line connector yourself as it requires specialized knowledge and equipment. It is best to have a professional mechanic inspect and repair the issue.
How much does it typically cost to repair a leaking fuel line connector?
The cost of repairing a leaking fuel line connector can vary depending on the extent of the damage and the make and model of the vehicle. However, on average, it can cost anywhere from $150 to $500 to repair the issue.