Revive Your Vehicle’s Starting Power: Expert Tips to Fix a Dragging Starter
Have you ever turned the key on your vehicle, only to hear the starter motor whine, but not engage the engine? Or maybe you have experienced a starter that drags, causing slow cranking and an eventual failure to start your vehicle. Whatever the situation, it is a frustrating experience that demands a prompt solution; that’s why we are here to help you fix your dragging starter. Fixing a dragging starter is not as technical as you may think, but it requires that you follow some easy steps.
Over time, corrosion and wear in the starter can cause it to seize up, preventing it from spinning freely and engaging the engine. Thus, these steps would include checking for bad starter connections, a dead battery, or worn-out starter components. Don’t worry; we’ve got you covered on how to fix a dragging starter.
In this guide, we will give you everything you need to know to troubleshoot and repair your starter. So, put on your mechanic gloves, grab your toolbox, and join us as we explore how to fix a dragging starter, step by step.
Locating the Starter
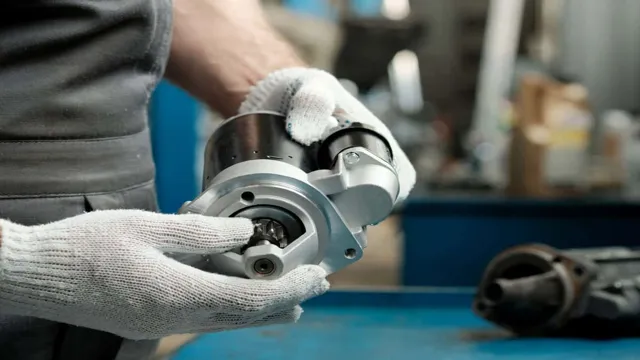
Before you can fix a dragging starter, you need to know where to find it. The easiest way to locate the starter is to look under the hood of your car and find a round or cylindrical object attached to the engine. This object is the starter motor, and it’s usually located near the bottom of the engine, close to the transmission.
If you’re having trouble finding it, consult your car’s manual or do a quick search online. Once you’ve located the starter, you can move on to diagnosing the problem and figuring out how to fix it. A dragging starter can be caused by a variety of issues, including a dead battery, a faulty solenoid, or a worn-out starter motor.
So, take some time to troubleshoot the problem and find the root cause before you start making repairs. By identifying the problem and fixing it correctly, you can ensure that your car starts smoothly every time you turn the key.
Check Battery Connection
When it comes to checking your battery connection, it’s important to first locate your starter. The starter is typically found near the bottom of the engine, and it’s responsible for turning the engine over and starting the car. Once you’ve located the starter, you can check the battery connection by tracing the cables that run to it.
Make sure the cables are securely connected to both the battery and the starter, and check for any signs of corrosion or damage. A loose or corroded connection can cause problems with starting your car, so it’s important to make sure everything is tight and clean. Don’t let a bad battery connection leave you stranded – take the time to check and maintain your connections regularly.
Check Solenoid Connection
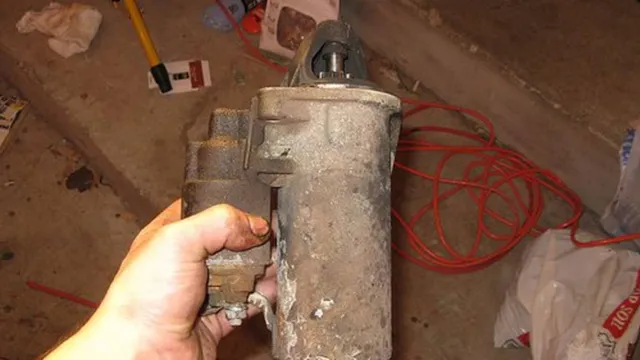
If your car won’t start, one potential issue could be a faulty solenoid connection. To check this, you’ll need to locate the starter in your vehicle. In most cars, the starter is located near the bottom of the engine, where the transmission and engine meet.
Once you’ve located the starter, look for the solenoid, which is a small cylinder that’s connected to the starter. Check that all the wires are securely connected to the solenoid. If any wires are loose or disconnected, try reconnecting them and see if your car starts.
If the issue persists, you may need to replace the solenoid or seek the help of a professional mechanic. By keeping an eye on your solenoid connection, you can avoid potential issues and keep your car running smoothly.
Remove and Clean Starter Connections
If you’re experiencing a dragging starter, it could be due to dirty or loose connections in your starter. The first step to fixing this issue is to remove and clean the starter connections. Start by disconnecting the battery cables to ensure safety.
Then, locate the starter and remove the nuts or bolts holding the wires in place. Take care not to damage the wires or terminals during removal. Once disconnected, clean the connections using a wire brush or sandpaper to remove any corrosion or debris.
Reconnect the wires and ensure they are tightened properly. Finally, reconnect the battery cables and test the starter to see if it’s working properly. Taking these steps can help solve the issue of a dragging starter and ensure your vehicle starts smoothly every time.
Disconnect Battery
Disconnecting the battery is an essential step before you start working on anything electrical in your vehicle, including the starter connections. Once you’ve done that, locate the starter motor and check the connections. You may need to remove some bolts to access it.
Once you can see the connections, remove them carefully to avoid damaging them. Often, a buildup of corrosion or dirt on the connections can cause a poor connection between the battery and the starter motor, causing issues with starting the vehicle. Clean the connections thoroughly with a wire brush or sandpaper until they are shiny and look like new.
Then, reattach the connections, making sure they are tight and secure. Reconnect the battery and test to see if the starting issue has been resolved. By taking the time to clean your starter connections, you’ll ensure that your vehicle starts easily every time you turn the key.
Remove Starter
Removing and cleaning the connections of a starter can be a daunting task, but it is something that must be done in order to maintain the proper functioning of your vehicle. First, you should disconnect the negative terminal of your car’s battery to prevent any electrical damage or accidents. Next, locate the starter and disconnect the wires that are attached to it.
Make sure to label them so you know which one goes where when reassembling. After this, you can remove the bolts that are securing the starter in place and carefully take it out. Once you have the starter out, inspect the connections for any corrosion or damage.
If there is any, clean them with a wire brush or sandpaper. You should also check the starter gear and motor for any wear and tear. After cleaning and inspecting everything, you can reinstall the starter in the reverse order that you took it out.
It is important to take your time and be careful when working with electrical components. By following these steps, you can ensure that your starter will work properly and prevent any future issues.
Clean and Inspect Connections
When it comes to maintaining your car’s starter, one important step is to clean and inspect its connections. Over time, dirt, corrosion, and oxidation can build up on the starter’s electrical connections, which can cause poor starting performance or even complete failure. To remove and clean the starter connections, start by disconnecting the battery cables to ensure your safety.
Next, remove the starter and take note of all the connections attached to it. Use a wire brush and electrical contact cleaner to scrub away any dirt or residue from the connections. Additionally, inspect the cables and connectors for any signs of damage or wear, and replace them if necessary.
This simple maintenance step can improve your car’s reliability, extend the life of your starter, and save you the hassle and expense of an unexpected breakdown. So, if you’re having starting issues or it’s been a while since you’ve inspected your starter connections, take the time to clean them up and get your car running smoothly again.
Inspect Starter Parts
If your car’s starter seems to be dragging, there are a few things you should check to pinpoint the problem. One common issue with a dragging starter is worn-out starter parts. When the starter gears are grinding against each other, the motor will struggle to turn over.
It’s important to inspect the starter motor, solenoid, and gear drive for any signs of wear or damage. The starter motor may have worn brushes or a damaged armature, while the solenoid could have bad contacts or burned wire connections. The gear drive may have missing or broken teeth that need to be replaced.
Be sure to use a multimeter to check for continuity and voltage at the connection points. If you notice any issues, it’s best to replace the faulty parts to prevent further damage and ensure your car starts smoothly. By inspecting your starter parts, you’ll be one step closer to fixing the issue of your dragging starter.
Check Drive Gear
When inspecting the starter parts of your vehicle, it’s essential to check the drive gear. The drive gear is responsible for engaging and turning the flywheel, which ultimately starts the engine. A worn or damaged drive gear can cause the starter to make a grinding noise and not engage the flywheel properly, leading to ignition problems.
So, it’s crucial to regularly inspect the drive gear for any signs of wear or damage. If you notice any issues, it’s best to replace the drive gear immediately to avoid any further damage to your engine. It’s always better to be proactive in these situations rather than waiting for bigger problems to arise.
By taking care of your starter parts regularly, you can ensure that your vehicle runs smoothly and efficiently every time you turn the key.
Check Pinion Gear
As you inspect the starter parts of your vehicle, it’s important to check the pinion gear. The pinion gear is a small but important component that connects the starter motor to the flywheel of your engine. Over time, pinion gears can wear down or become damaged due to regular use.
To inspect the pinion gear, you’ll need to remove the starter motor from your engine and examine the gear for any signs of damage or wear. Look for any cracks or chips in the teeth of the gear, or any unusual wear patterns that could indicate a problem. If you do notice any issues with the pinion gear, it’s important to replace it promptly to avoid any further damage to your starter system.
By keeping an eye on this critical component, you’ll help ensure that your vehicle’s engine starts reliably every time you turn the key.
Working with Professionals
We’ve all experienced a car that won’t start before, but have you ever encountered a dragging starter? It’s when the engine cranks up slowly, grinds or makes a strange noise, or simply won’t start at all. If that’s your situation, don’t fret because it can be fixed! First, disconnect the battery to avoid an electrical shock, then check for loose or corroded connections, damaged wires, and worn-out brushes that cause the starter to malfunction. However, fixing a dragging starter can be a difficult task, especially if you’re not familiar with the car’s electrical system.
It’s always best to hire a professional mechanic to fix any issues related to the engine. By doing so, you’ll ensure that all repairs are done correctly and you won’t have to worry about any further problems. When it comes to troubleshooting, nothing beats the expertise and experience of a mechanic.
So, don’t hesitate to let them take care of the problem and get your car running smoothly again!
Conclusion
In order to fix a dragging starter, you must first diagnose the root cause of the issue. Is it a faulty starter motor, a weak battery, or a loose connection? Once you’ve identified the culprit, it’s time to roll up your sleeves and get to work. Don’t be afraid to get a little dirty and put in some elbow grease.
After all, nothing worth having comes easy. And remember, if all else fails, sometimes you just gotta give it a good old-fashioned tap with a wrench. But don’t hit too hard, you don’t want to be the cause of a new problem.
In the end, with a bit of knowledge and determination, you’ll have that starter humming along in no time. So go ahead and get to fixing, and let the purr of a well-oiled engine be your reward.”
FAQs
What causes a starter to drag?
A starter can drag due to a variety of reasons such as worn-out bearings, corroded wires, and a weak battery.
How do I diagnose a dragging starter?
You can diagnose a dragging starter by performing a voltage drop test, inspecting the starter solenoid, and checking the battery voltage.
Can a dragging starter damage the engine?
Yes, a dragging starter can damage the engine as it puts additional strain on the flywheel and bearings, causing them to wear out faster.
How do I fix a dragging starter?
To fix a dragging starter, you can replace the starter motor, clean the wires and terminals, install a new battery, or repair any damaged components. It is recommended to seek professional help for starter repairs.

