Revive Your Engine’s Performance: A Step-by-Step Guide on How to Fix a Collapsed Lifter
Do you hear a clicking or tapping noise coming from your engine? If so, it could mean that you have a collapsed lifter. A lifter is a small component of the engine that helps the camshaft push the valve open. Without lifters, your engine won’t run properly.
Fortunately, fixing a collapsed lifter is a relatively simple process that you can do yourself with the right tools. In this step-by-step guide, we will walk you through everything you need to know to fix a collapsed lifter and have your engine running smoothly again in no time. So, grab your tools and let’s get started!
Identifying the Problem
If you’re experiencing a collapsed lifter, the first step in fixing the problem is identifying it. A collapsed lifter can cause a variety of issues in your engine, including a persistent tapping noise or rough idling. You’ll need to pop the hood and visually inspect the lifter to see if it’s collapsed.
Alternatively, you can use a stethoscope to listen for the telltale sound of a collapsed lifter. Once you’ve identified the problem, you’ll need to determine the root cause. Common culprits include low oil pressure or dirty oil that’s clogging the lifter.
In some cases, you may need to replace the lifter or even have the entire engine rebuilt. It’s best to consult with a mechanic to determine the best course of action for your specific situation. By identifying and addressing a collapsed lifter quickly, you can save yourself from costly repairs down the line.
Abnormal Engine Noises
Abnormal engine noises can be a disconcerting experience for any driver. It may be difficult to identify the problem, especially for those who are not mechanically inclined. However, it is important to pay attention to the sound of your engine as it can be an indication of more significant underlying issues.
A common cause of abnormal engine noises is worn out bearings or loose belts, which create a whining or screeching sound. In contrast, a knocking or rattling noise may be an indication of issues with the pistons or connecting rods. Similarly, a ticking noise may be due to low oil pressure or a damaged lifter.
It is essential to get these problems diagnosed and fixed to avoid further damage and costly repairs. Remember, a well-maintained engine ensures the longevity and efficiency of your vehicle. So if you notice any abnormal noises coming from your engine, take immediate action and get it checked by a professional mechanic.
Loss of Power or Performance
When your vehicle starts losing power or performance, it’s important to identify the underlying problem before it gets worse. Some common causes of this issue include a clogged air filter, faulty spark plugs, or a failing fuel pump. You can start by checking the air filter and spark plugs to see if they need to be cleaned or replaced.
If the issue persists, then it may be necessary to have a mechanic inspect and diagnose the problem. It’s important not to ignore the problem as it can eventually lead to serious damage and costly repairs. By identifying the problem early on and taking preventative measures, you can avoid further damage and ensure your vehicle runs smoothly.
So next time your car starts losing power, don’t hesitate to investigate the issue and get it fixed as soon as possible.
Tools and Materials Needed
Fixing a collapsed lifter can be a daunting task, but with the right tools and materials, it can be done. You’ll need a few key items: a socket set, oil filter wrench, breaker bar, screwdriver or allen wrench, gasket scraper, new lifter, oil filter, and oil. First, make sure the engine is turned off and cool.
Then, remove the valve cover and locate the collapsed lifter. Using the socket set and breaker bar, remove the rocker arm and pushrod. Next, use the oil filter wrench to remove the old lifter and replace it with the new one.
Reinstall the pushrod and rocker arm, then replace the valve cover. Finally, add new oil and a new oil filter to complete the job. With the right tools and materials, fixing a collapsed lifter can be easier than you think!
Pliers, Screwdrivers, and Wrenches
When it comes to DIY projects or repairs, having the right tools on hand is crucial. For any project involving pliers, screwdrivers, and wrenches, it’s important to have a variety of sizes and types available. For pliers, you’ll want a set that includes needle-nose pliers for tight spaces, cutting pliers for wires and cables, and adjustable pliers for more heavy-duty tasks.
Screwdrivers come in different types, including flathead and Phillips. It’s a good idea to have screwdrivers in various sizes for different projects. Wrenches are also available in different sizes, including adjustable wrenches and socket wrenches.
Having a set with a variety of sizes will ensure you have the right tool for the job. Don’t forget to invest in quality tools that will last and provide better results. Remember, having the right tools can make all the difference in successfully completing your DIY projects or repairs.
Replacement Lifters and Gaskets
If you’re planning on replacing your lifters and gaskets, it’s essential to have the right tools and materials on hand to make the job go smoothly. First, you’ll need a torque wrench and a socket set to properly tighten the bolts securing your lifters and gaskets in place. You may also require a valve spring compressor to help remove the lifters.
Additionally, you’ll need replacement lifters, gaskets, and possibly other parts such as rocker arm studs and pushrods. It’s important to use high-quality replacements to ensure that your engine runs smoothly and remains free from leaks or other issues. Take care to clean all surfaces thoroughly before installing new parts, and follow the manufacturer’s specifications for torque settings and other details.
With the right tools and materials, you can be confident in your ability to replace your lifters and gaskets and get back to enjoying a fully functioning engine.
Preparing for Repairs
If you’ve noticed that your engine has a loud ticking noise coming from the top end, chances are you have a collapsed lifter. A collapsed lifter is often caused by a lack of oil pressure, which can happen when oil levels are low or if the oil pump is failing. The first step in fixing a collapsed lifter is to determine which lifter is collapsed.
This can be done by removing the valve covers and using a mechanics stethoscope to listen to the lifters. Once you have identified the problematic lifter, the next step is to replace it. You can typically purchase a new lifter at your local auto parts store.
Be sure to lubricate the new lifter with engine oil before installing it. It’s also important to check your oil levels and pump to ensure they are functioning properly to prevent future lifter failures. By taking these steps, you can fix your collapsed lifter and get back on the road with a fully functioning engine.
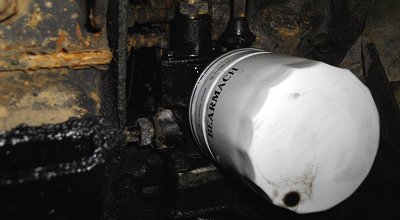
Disconnecting Battery and Draining Oil
When it comes to preparing for repairs on your vehicle, there are a few key steps you should take to ensure the process goes smoothly. First and foremost, it’s essential to disconnect the battery and drain the oil before getting started. This will prevent any electrical shocks or oil spills that could cause serious damage or injury.
Disconnecting the battery will also protect the electronic components of your vehicle from any accidental power surges during the repair process. As for draining the oil, it’s important to make sure the engine is completely cool before doing so to prevent any burns. It’s also a good idea to have a proper container to collect the used oil and dispose of it responsibly.
By taking these simple steps, you can ensure that your vehicle is safely prepped for repairs and that the process goes smoothly.
Removing Valve Covers and Rocker Arms
Prepping your engine for repairs can be a daunting task, especially if you’re new to the world of DIY auto maintenance. One of the first steps you’ll need to take is removing the valve covers and rocker arms from your engine. This is a necessary step to access the top end of your engine where many of the vital components are located.
Before you begin, make sure you have all the proper tools and safety equipment on hand. Start by disconnecting the battery to avoid any electrical mishaps. Next, locate the valve covers and carefully remove them with the proper socket and wrench.
Once the covers are removed, the rocker arms will be exposed and can be safely removed with a rocker arm removal tool. Remember to keep all parts organized and labeled to make reassembly a breeze. By following these simple steps, you’ll be on your way to successfully prepping your engine for repairs in no time.
Replacing the Collapsed Lifter
If you’re hearing an annoying ticking sound from the engine bay, or the engine is behaving abruptly, it’s possible that you have a collapsed lifter. The lifter is a component that regulates the valve clearance in the internal combustion engine. If it collapses or fails, it can cause a myriad of problems.
While fixing it is best left to an expert mechanic, it’s still worth understanding what’s happening inside your engine. Basically, the lifter is responsible for keeping the valve clearance within the manufacturer-specified tolerances. Over time, the lifter can wear out, or the oil passages can become blocked by debris, leading to a malfunction.
A collapsed lifter can cause a loss of power, misfiring, difficulty starting, and even engine failure. It’s best to have the lifter replaced as soon as possible to avoid further damage to the engine. So, if you’re experiencing any of these symptoms, take your car to a professional mechanic who can diagnose and replace the lifter quickly and efficiently.
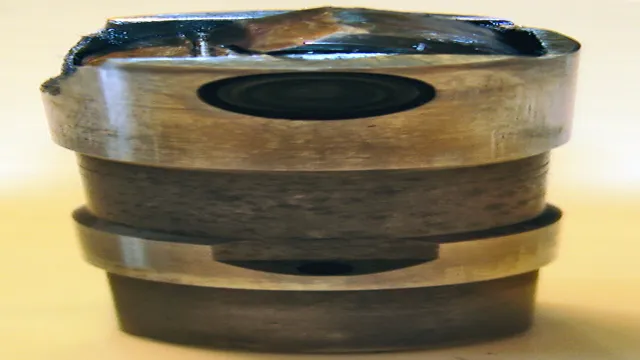
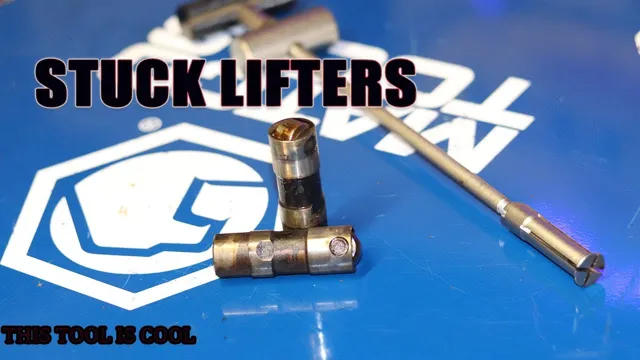
Removing Old Lifter and Cleaning the Area
If you’ve noticed an engine noise that sounds like a ticking or tapping noise, it may be a collapsed lifter. Before replacing the lifter, you’ll need to remove the old one and clean the area. Begin by removing the valve cover and finding the offending lifter.
Carefully remove the lifter using a lifter removal tool. You’ll need to replace the lifter, so don’t be too concerned if you damage it during removal. Once the lifter is removed, clean the area using a degreaser.
When you’re ready to replace the lifter, make sure you choose the correct type for your engine. It’s important to choose the right part to avoid future issues. Overall, replacing a collapsed lifter is a fairly straightforward process, but understanding the proper steps is important to ensure you don’t cause any further engine damage.
Installing the New Lifter and Gasket
If you hear a knocking sound in your engine, it could be a collapsed lifter. The good news is that you can fix the problem yourself by replacing the lifter and gasket. First, remove the valve cover and locate the lifter that needs to be replaced.
Then, remove the pushrod, lifter, and old gasket. Clean the lifter bore and install the new lifter, making sure it’s oriented correctly. Place the new gasket on top of the bore and reinsert the pushrod.
Finally, reattach the valve cover and start the engine to check for proper operation. By following these steps, you’ll be able to easily replace a collapsed lifter and ensure your engine runs smoothly again.
Reassembling and Testing
Fixing a collapsed lifter can be a daunting task, but with proper guidance, it can be done. Reassembling and testing the lifter is the final step in this process. Before that, one needs to ensure that all parts are at their best.
First, clean all the components with a degreaser, then use a lint-free cloth to dry them off. After that, apply a light coat of engine oil to each part. The next step is to reassemble the lifter with the same configuration as it was before.
It is essential to use the correct torque sequence. Once everything is in its place, it’s time to test the lifter. Run the engine for a few minutes to see if it’s producing any knocking or ticking sounds.
If there is no sound, then you’ve successfully fixed the collapsed lifter, and your engine is good to go. Overall, the process can take time, but it’s beneficial to do it yourself rather than paying someone else to do it.
Replacing Valve Covers and Rocker Arms
After successfully removing and replacing the valve covers and rocker arms on your engine, it’s time to reassemble everything and put the engine to the test. Before doing so, it’s essential to ensure that all parts are correctly aligned and bolts are tightened to the correct torque specifications. Double-checking and inspecting everything thoroughly will prevent any potential leaks or damage to the engine.
Once everything is reassembled, it’s time to fire up the engine and check for any abnormalities. Observe the engine for any unusual noises, vibration, or oil leaks. If everything looks good, take your car for a test drive to ensure that the new valve covers and rocker arms are performing as they should.
Overall, with proper reassembly and testing, your engine should be running smoothly and efficiently.
Refilling Oil and Checking for Leaks
Now that you’ve successfully refilled your oil and checked for leaks, it’s time to reassemble your car and give it a test run. Make sure you’ve reattached any components you may have removed during the oil change process and double-check that all bolts and screws are properly tightened. Once everything is in place, start your car and let it run for a few minutes.
Pay attention to the oil pressure gauge and keep an eye out for any possible leaks or strange noises. If everything seems to be running smoothly, take your car out for a short drive and pay attention to how it handles. Does it feel smoother? Does it make any unusual sounds? If all is well, congratulations! You’ve successfully completed an oil change and can now enjoy a smoothly running vehicle.
Remember to keep up with regular oil changes to keep your engine running efficiently and prolong its lifespan.
Testing Engine Performance and Noise Levels
After dissembling the engine and inspecting all the parts, it’s time to reassemble the engine and test its performance and noise levels. This is a crucial step in the engine rebuilding process as it determines whether the engine is functioning correctly and whether there are any abnormal noises. First, the engine is put back together, making sure all the parts are installed correctly and torqued to the proper specifications.
The engine is then placed on an engine stand, where it undergoes several tests. The first test is a compression test, which tests the engine’s ability to compress fuel and air in the combustion chamber. After this, the engine is started, and the noise levels are measured using a decibel meter.
Any abnormal noises are carefully examined, and adjustments are made if necessary. Once everything checks out, the engine is considered rebuilt and ready for use. It’s essential to test the engine thoroughly to ensure its reliability and safety on the road.
Conclusion
In conclusion, fixing a collapsed lifter is no small feat. It requires patience, perseverance, and a bit of elbow grease. But fear not, brave mechanic! With the right tools, a little know-how, and a whole lot of determination, you can get that lifter back in tip-top shape in no time.
And who knows? Maybe you’ll even impress your friends with your newfound expertise. So get out there, tighten those bolts, replace those parts, and show that collapsed lifter who’s boss!”
FAQs
What are the common symptoms of a collapsed lifter?
The common symptoms of a collapsed lifter are engine misfires, ticking or tapping noises, and decreased engine performance.
Can I drive my vehicle with a collapsed lifter?
It is not recommended to drive your vehicle with a collapsed lifter as it can cause further damage to the engine. It is best to have it repaired as soon as possible.
How do I diagnose a collapsed lifter?
You can diagnose a collapsed lifter by listening for ticking or tapping noises coming from the engine and checking for decreased engine performance. A mechanic can also use a stethoscope to pinpoint the lifter that is causing the issue.
What causes a collapsed lifter?
A collapsed lifter can be caused by lack of maintenance, debris or sludge buildup, worn valve springs, or a lack of oil pressure.