Effortlessly Replace Your Slave Cylinder: A Step-by-Step Guide
Have you been having trouble with your clutch lately? If you’re experiencing difficulty shifting gears or your clutch pedal feels spongy, it could be time to change your slave cylinder. Fortunately, with the right tools and a bit of know-how, you can easily tackle this task at home. In this step-by-step guide, we’ll walk you through the process of changing a slave cylinder, so you can get your clutch up and running again in no time.
Whether you’re a seasoned mechanic or a newcomer to DIY auto repair, our guide will help you navigate this process with ease. So, grab your wrenches and let’s get started!
Introduction
Trying to figure out how to change a slave cylinder can be a daunting task for someone who is not well-versed in auto mechanics. However, it is an important task that needs to be done to ensure the proper functioning of your vehicle. The slave cylinder is an important component of your car’s hydraulic clutch system, and when it starts to malfunction, you’ll likely have trouble shifting gears.
The good news is that changing a slave cylinder can be done by following a few simple steps. Firstly, you’ll need to locate the slave cylinder and remove it, being careful not to damage it in the process. Once you have the old slave cylinder out, it’s time to install a new one using the same steps in reverse order.
It’s important to bleed the clutch system after replacing the slave cylinder to ensure that there is no air in the system. With a bit of patience and attention to detail, changing out a slave cylinder can be accomplished in a matter of hours, saving you a potentially costly trip to the mechanic.
Understanding the Slave Cylinder
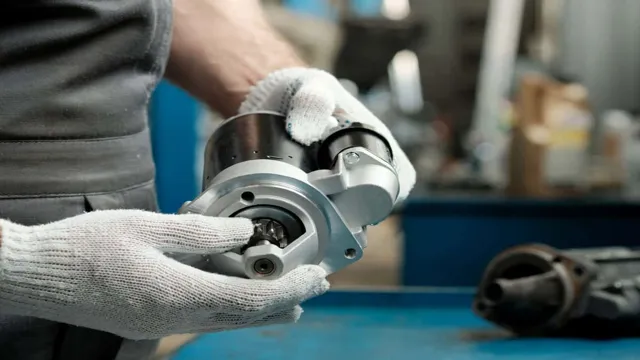
If you own a car, you’ve probably heard of the clutch, which is an essential component of the transmission system. One of the lesser-known parts of this system, however, is the slave cylinder, which is responsible for engaging and disengaging the clutch. This small but vital component attaches to the clutch fork and is hydraulically operated to transmit force to the clutch pressure plate.
The slave cylinder works together with the master cylinder to ensure seamless gear changes by providing the hydraulic pressure needed to disengage the clutch. Without a functioning slave cylinder, the clutch will not function properly, making it nearly impossible to shift gears. If you experience difficulty shifting gears or notice fluid leaking from the clutch reservoir, it may be time to inspect your slave cylinder.
Regular maintenance and inspections can prevent further damage and prolong the life of your vehicle.
When to Change the Slave Cylinder
If you notice that your clutch pedal is losing pressure or becoming harder to press, it might be time to check your slave cylinder. This component is a vital part of your vehicle’s hydraulic system, and it’s responsible for transferring hydraulic pressure from the master cylinder to the clutch fork, which engages and disengages your clutch. As with any part of your vehicle, the slave cylinder can wear out over time, and it may need to be replaced.
Ignoring the problem can lead to further damage and costly repairs. It’s essential to pay attention to these warning signs and take action before it’s too late. Make sure to have a professional mechanic inspect your clutch and hydraulic system to determine if a replacement is necessary.
Changing the slave cylinder regularly can help keep your vehicle running smoothly and prevent future problems.
Tools Required
If you need to change a slave cylinder, you’ll need a few specific tools to get the job done. First, make sure to have a jack and jack stands, as you’ll need to lift the car to work underneath it. You’ll also need basic hand tools like a wrench, ratchet and socket set, and pliers.
It’s a good idea to have brake cleaner or degreaser on hand to clean the area where you’ll be working. Lastly, you’ll need the replacement slave cylinder and the necessary gaskets or seals to ensure a proper fit. Having all of these tools ready before you begin the job will save you time and frustration in the long run.
With the correct tools and a little bit of know-how, you can easily change a slave cylinder and get your car running smoothly again.
List of Tools and Materials
When it comes to DIY projects, having the right tools is essential. Depending on the project, you may need a variety of tools from basic hand tools like screwdrivers and hammers to power tools like circular saws and drills. Before starting any project, it’s important to review the required tools and ensure you have them on hand.
Some tools you may need include measuring tape, level, wrenches, pliers, and a stud finder. For larger projects, you may need heavier machinery like a table saw or a belt sander. Don’t forget about safety equipment like goggles, gloves, and dust masks.
While it may be tempting to cut corners and use improper or improvised tools, it’s important to prioritize safety and invest in the proper equipment. By having the right tools on hand, you can tackle any DIY project with confidence and ease.
Steps to Change the Slave Cylinder
Changing the slave cylinder of your car can be a bit intimidating, but it’s important to understand the basics of your car before you attempt to do it yourself. The first step is to locate the slave cylinder, which is typically found near the transmission. Once you’ve located it, you’ll need to disconnect the hydraulic line from the cylinder.
Be sure to place a container underneath to catch any leaking fluid. Afterward, remove the bolts that secure the slave cylinder to the transmission housing and detach the cylinder from the vehicle. Before installing the new cylinder, ensure that it’s properly lubricated with brake fluid.
Once installed, reattach the hydraulic line and bleed the clutch to remove any air bubbles. Finally, test the clutch pedal to ensure that there is proper pressure. If you find this process too complex, don’t hesitate to consult a professional mechanic for assistance.
Remember, safety should always come first!
Step 1: Disconnect the Battery
If you’re experiencing issues with your clutch pedal or notice leaks around your transmission, it may be time to replace your slave cylinder. Thankfully, this is a task that can be accomplished by a DIY enthusiast with some mechanical experience and a little bit of patience. The first step in this process is to disconnect the battery.
This is done to avoid any electrical shocks while working on the system. Once you’ve ensured the battery is disconnected, locate the slave cylinder and identify the bolts that secure it in place. You’ll need a wrench to remove these bolts, and you may need to use a penetrating oil if they are stuck.
With the bolts removed, you can pull out the old slave cylinder and replace it with a new one. Remember to torque down the bolts to the manufacturer’s specifications and re-connect the battery to test your new slave cylinder. By following these simple steps, you can have a smoothly functioning clutch and transmission in no time.
Step 2: Locate the Slave Cylinder
When it comes to changing the slave cylinder in your car, one of the first steps is to locate it. The slave cylinder is typically located on the driver’s side of the car, near the transmission. You may need to remove some parts or covers to access it, so make sure you have the necessary tools before getting started.
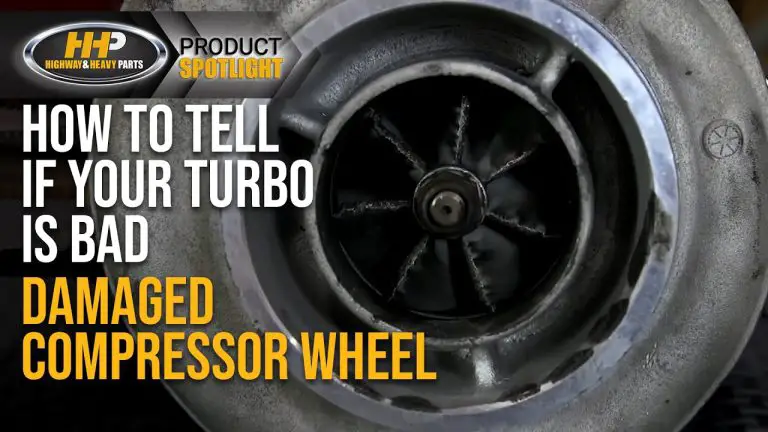
Once you’ve located the slave cylinder, it’s important to inspect it thoroughly to make sure it’s the source of the problem. Look for any signs of leakage or damage, as these can cause issues with your car’s clutch system. If you’re unsure about the condition of the slave cylinder, it’s best to consult a mechanic or professional before attempting to replace it on your own.
By taking the time to properly locate and inspect the slave cylinder, you can ensure a successful repair and a smoother driving experience.
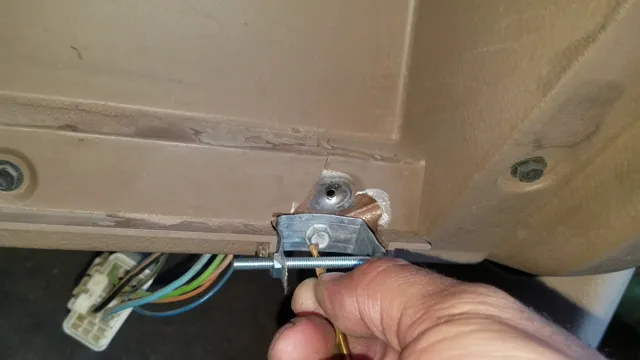
Step 3: Remove the Clutch Line
When changing the slave cylinder in your car, removing the clutch line is an important step that needs to be done carefully to prevent any damage. To start, locate the clutch line running from the clutch master cylinder towards the slave cylinder. Then, use a flare nut wrench to loosen the line’s fittings from the master and slave cylinders.
Be sure to place a suitable container under the line to catch any fluid that may leak out. Once the fittings are loose enough, slowly and gently remove the clutch line from both cylinders, taking care not to bend or damage it. It’s also essential to keep the opening to the fluid reservoir covered to prevent dirt or debris from entering.
After this step is complete, proceed to the next steps to change the slave cylinder and get your car back on the road. Remember to double-check your work after finishing to ensure all connections are tightly secured and leak-free.
Step 4: Remove the Slave Cylinder
The next step in changing the slave cylinder is to remove it. Begin by disconnecting the hydraulic line from the cylinder itself, using a wrench to loosen the fitting. Be sure to have a container handy to catch any brake fluid that may leak out.
Next, remove the bolts that are securing the slave cylinder in place. Depending on your vehicle’s make and model, there may be one or two bolts to remove. As you remove the bolts, be careful not to damage the threads or mounting holes.
Once the bolts are out, you should be able to gently pry the cylinder away from the transmission. Keep in mind that there may be a small amount of residual fluid still in the cylinder, so be prepared for a little bit of a mess. With the cylinder removed, you can move on to installing the new one.
Step 5: Install the New Slave Cylinder
Now that the old slave cylinder has been removed, it’s time to install the new one. First, make sure the replacement slave cylinder matches the make and model of your current vehicle. You can refer to the manufacturer’s instructions for guidance on this step.
Before installing, lubricate the end of the push rod with brake fluid and connect it to the clutch fork. Slide the new slave cylinder over the push rod, then tighten the mounting bolts. It’s important to torque the bolts to the manufacturer’s specifications to prevent any leaks or damage.
Once installed, it’s a good idea to bleed the hydraulic system to remove any air that may have gotten in during the installation process. This can help ensure the new slave cylinder operates smoothly. With the new slave cylinder installed, the clutch should now function properly, and you can enjoy a smooth and safe ride.
Step 6: Reconnect the Clutch Line
When changing the slave cylinder in your vehicle, there are several steps that you must follow to ensure everything is reconnected correctly. One of these crucial steps is reconnecting the clutch line. To do this, you must first remove the protective cap from the new slave cylinder’s clutch port.
Then, insert the clutch line fitting into the port and tighten it. Be cautious not to over-tighten the fitting, as this could cause damage to the line. Once you have secured the fitting, reattach the retaining clips to hold the clutch line in place.
Finally, bleed the clutch system to remove any air bubbles and ensure smooth operation. Neglecting to properly reconnect the clutch line could result in a loss of hydraulic pressure, leading to clutch slippage and failure. So, take your time and double-check that everything is securely connected and functioning correctly before hitting the road.
Step 7: Bleed the Clutch System
If you are planning to change the slave cylinder, it is essential to bleed the clutch system as well. Bleeding the clutch system removes any air trapped inside the hydraulic lines, ensuring that the system works smoothly. Start by opening the bleeder valve on the slave cylinder and allowing the fluid to drain out completely.
As you do this, have someone pump the clutch pedal several times to allow the trapped air to escape. Keep an eye on the fluid level in the reservoir and ensure it doesn’t run dry. Once clean fluid runs out, close the bleeder valve and top up the fluid in the reservoir.
Repeat the process until there is no more air coming out of the system. This step is crucial to ensure that the clutch slave cylinder functions correctly and gives you smooth and effortless gear changes. With the clutch system properly bled, you can confidently enjoy your car without any issues.
Conclusion
Changing a slave cylinder may seem like a daunting task, but with the proper equipment and know-how, it can be a breeze. Just like a personal growth journey, tackling a difficult challenge requires patience, determination, and a willingness to learn. Whether you’re a seasoned mechanic or a newbie DIY-er, following the proper steps and taking your time will ensure a successful outcome.
So next time you need to change a slave cylinder, don’t fret, just channel your inner mechanic and get ready to tackle the task head-on!”
Testing the New Slave Cylinder
If you suspect your slave cylinder is failing, it’s important to test it before replacing it completely. Here are the steps to perform a simple test to see if your slave cylinder is the problem: First, locate the bleeder valve, typically found on the slave cylinder or nearby. Second, attach a clear plastic tube to the bleeder valve and submerge the other end in a container partially filled with brake fluid.
Third, open the bleeder valve slowly while having a helper push down on the clutch pedal. If fluid comes out of the tube, your slave cylinder is probably functioning correctly. If not, it may need to be replaced.
Remember, always refer to your vehicle’s owner’s manual before attempting any repairs or testing on your own. By following these simple steps, you can avoid replacing a slave cylinder that is still functioning properly and save yourself time and money.
Precautions to Take
When changing the slave cylinder in your car, it’s important to take some precautions to ensure a successful replacement. Firstly, ensure that the car is on a flat and level surface, with the parking brake engaged and the transmission in first gear or park. This will prevent any unwanted movement of the vehicle during the repair process.
Next, disconnect the negative battery cable to avoid any potential electrical hazards. It’s also important to use the correct tools and equipment, such as a flare-nut wrench, socket set, and brake fluid catch basin. Before removing the old slave cylinder, be sure to clean the surrounding area to prevent any debris from entering the hydraulic system.
After installing the new slave cylinder, it’s important to properly bleed the brake system to remove any air pockets. By taking these precautions, you can replace your car’s slave cylinder safely and effectively.
Final Thoughts
Changing a slave cylinder can seem like a daunting task, but with the right tools and knowledge, it’s a task that you can easily accomplish. The first step is to locate the slave cylinder, which is usually located on the transmission bell housing. Once you have located it, remove the old cylinder by loosening the connecting bolts and removing the hydraulic line.
The next step is to install the new slave cylinder by securing it in place with connecting bolts and re-connecting the hydraulic line. Finally, bleed the system by having a helper depress the clutch pedal while you open the bleeder valve on the slave cylinder until all air bubbles have been expelled. With these steps completed, you’ll have successfully changed your slave cylinder and can rest easy knowing your clutch system is in top-notch condition.
FAQs
What is a slave cylinder and why do I need to change it?
The slave cylinder is a component of your vehicle’s clutch system and helps to engage and disengage the clutch. If your clutch is not disengaging properly or you are experiencing difficulty shifting gears, it may be necessary to replace the slave cylinder.
Can I change the slave cylinder myself?
While it is possible to change the slave cylinder yourself, it can be a difficult and time-consuming process. If you are not confident in your mechanical skills, it is recommended to seek the assistance of a professional mechanic.
What are the signs that my slave cylinder needs to be replaced?
Some common signs that your slave cylinder may need to be replaced include difficulty shifting gears, a soft or spongy clutch pedal, or leaking brake fluid near the clutch pedal.
How long does it take to change a slave cylinder?
The time it takes to change a slave cylinder can vary depending on the make and model of your vehicle, as well as the skill level of the mechanic. On average, it can take between 2-4 hours to complete the job.