Top Tips for Perfectly Adjusting Your Transmission Bands – A Step-by-Step Guide!
Do you experience slipping gears while driving your vehicle? Or perhaps you’ve noticed that your car struggles to accelerate as it once did. These issues might indicate that it’s time to adjust your transmission bands. Luckily, with a little know-how and the right tools, this task can be accomplished in your own garage.
In this step-by-step guide, we’ll discuss the process of adjusting your transmission bands, including how to identify the problem, what tools you’ll need, and the steps to take to adjust your vehicle’s transmission bands. So let’s get started and get your car back on the road in top shape!
Gather the Necessary Tools
Adjusting transmission bands can seem like a daunting task, but with the right tools, it can be done with ease. First and foremost, you will need a transmission jack to lift and support the transmission while you work on it. A set of wrenches will also be necessary, as you will need to remove bolts to access the transmission bands.
Additionally, you will need a torque wrench to properly tighten the bolts back in place. A feeler gauge will come in handy to measure the clearance between the bands and the drum. Lastly, don’t forget to have the correct transmission fluid on hand to refill the transmission once the bands have been adjusted.
With the right tools, you’ll be able to adjust your transmission bands like a pro in no time!
Tools Needed for the Job
Before any job, it’s important to gather all the necessary tools to ensure a smooth process. The main keyword used organically for this blog section is “Tools Needed for the Job”. Depending on the task at hand, some tools may seem unnecessary but ultimately facilitate the job and contribute to the quality of the final product.
It’s essential to pick high-quality tools that are durable and have the features required for the given job. For instance, when painting a room, selecting the right brushes, rollers, and paint varieties can alter the experience and outcome drastically. On the other hand, picking inferior or ineffective tools will cause frustration, extra work, and can even pose safety risks.
Therefore, taking the time to research, make a list, and gather the required items will help ensure a job completed efficiently and to the desired standard.
Preparation Steps Before Beginning
Before you start any project, it’s important to have all of the necessary tools. The same goes for preparing for your next DIY project. But what tools do you need? Well, it all depends on the project you plan on undertaking.
However, here are some of the most common tools you’ll need for any project: Power drill – this tool is a must-have for any DIY project. It’ll allow you to create holes in wood, plastic or metal, screw or unscrew bolts and screws, and much more.
Hammer – another essential tool for any DIY enthusiast, a hammer will make driving nails and breaking apart wood or other materials a breeze.
Jigsaw – this tool is perfect for cutting curves and shapes into your materials. It’s especially essential for woodworking projects.
Measuring tape – it’s vital to ensure that your measurements are accurate, to avoid mistakes and frustration later on. Safety equipment – safety should always be your number one priority.
Ensure you have protective gloves, goggles, and a mask to protect yourself from any hazardous materials. Overall, having the necessary tools at hand before you begin your DIY project will save you time and hassle in the long run. So, make a list of what you need, and prepare yourself accordingly – you’ll be glad you did!
Locate the Transmission Bands
Adjusting the transmission bands on a vehicle is an essential part of regular maintenance to ensure that the transmission shifts properly. One of the first steps to adjust the transmission bands is to locate them. The transmission bands are usually located on the outside of the transmission case.
On most cars, there are two bands. One is for the low gear, and the other is for the intermediate gear. On some vehicles, there may also be a band for the high gear.
Once you locate the bands, you need to loosen the adjustment bolt. This allows you to adjust the tension on the band. Adjusting the tension on the bands allows you to ensure that the gears in your vehicle will shift smoothly.
It’s important to make sure that the bands are adjusted correctly to avoid damaging the transmission. By adjusting the bands, you can extend the life of your transmission, saving you money in the long run.
Where to Find the Bands in Your Transmission
Locating the transmission bands in your car can seem like a daunting task, but it is actually very simple. These bands are a crucial part of the transmission and play a vital role in gear shifting. To find them, you need to locate your transmission.
Typically, this can be found towards the back of the engine. Once you have located the transmission, you should be able to see the two bands. One band will be for reverse, while the other will be for forward gears.
These bands can be found wrapped around drums inside the transmission, so it may take a bit of searching to find them. However, once you locate them, you will be able to see their important role in controlling the transmission’s gears. If you’re unsure about locating the transmission bands in your car, consult your owner’s manual or take your vehicle to a trusted mechanic.
They can provide guidance and even assistance with locating these important components. With a bit of patience and persistence, you’ll be able to locate the transmission bands in your car and be better equipped to maintain its transmission.
Identifying Different Types of Bands
To identify different types of bands, one must first locate the transmission bands. Transmission bands refer to the areas on the electromagnetic spectrum where signals are transmitted and received by devices. These bands are allocated by governments or regulatory bodies for specific purposes such as broadcasting or mobile communication.
Some of the well-known transmission bands are FM radio, AM radio, and cell phone bands. These bands have different frequencies and bandwidths, allowing them to carry different types of information over a specific distance. For example, FM radio has a wider bandwidth than AM radio, making it better suited for transmitting music and other high-quality audio content.
Identifying the transmission bands can help individuals choose the right device and frequency range for their needs, as well as avoid interference from other signals.
Loosen the Adjusting Screw
When it comes to adjusting your transmission bands, it’s important to first locate the adjusting screw. This screw is typically found on the side of the transmission and has a lock nut that will need to be loosened before you can make any adjustments. Once the lock nut is loose, turn the adjusting screw clockwise to tighten the band and counterclockwise to loosen it.
You’ll want to tighten the band gradually until it’s just snug against the drum, without over-tightening it. Over-tightening can lead to premature wear and damage to the band and drum. Once you’ve made your adjustments, be sure to tighten the lock nut back up to keep everything in place.
With a little bit of patience and the right tools, adjusting your transmission bands can be done easily and without too much hassle.
How to Properly Loosen the Screw
Loosening the adjusting screw is a simple process, but it’s important to do it correctly to avoid any damage or injury. First, you need to identify the adjusting screw that needs to be loosened. Typically, adjusting screws are used to regulate the tension on a particular component, such as a belt or chain.
Once you’ve found the adjusting screw, use an appropriate tool, such as a screwdriver or wrench, to loosen it. Make sure to apply gradual pressure and not to force it too much, as this can strip the screw or damage the component it’s attached to. It’s also important to keep track of how much you’re loosening the screw.
If you’re adjusting the tension on a belt or chain, you don’t want to loosen it too much and risk the component slipping or breaking. Overall, just take your time and be careful, and you should have no problem loosening the adjusting screw safely and properly.
Adjust the Transmission Bands
If you want your vehicle’s transmission to operate smoothly and efficiently, you need to make sure the bands are properly adjusted. The purpose of these bands is to hold the gears in place, helping to regulate the speed of your vehicle. Over time, these components can become worn or damaged, leading to a poor driving experience.
To adjust the transmission bands, start by locating the inspection cover on the side of the gearbox. Once you have removed the cover, rotate the engine until the access hole lines up with the band that you want to adjust. You can then use a wrench to loosen the locknut and adjust the band screw until a specific torque setting is achieved.
It’s a good idea to refer to your owner’s manual for specific instructions and torque settings. Proper adjustment of your transmission bands is crucial for an optimal driving experience, so make sure you get this maintenance task done regularly.
How to Make the Adjustment
Adjusting the transmission bands can be a daunting task, but it’s essential for proper transmission performance. Here’s how to make the adjustment. First, locate the transmission oil pan and remove it to access the bands.
Then, use a torque wrench and socket to loosen the adjustment screw. Next, use a feeler gauge to measure the distance between the band and drum. Tighten the adjustment screw until the proper clearance is achieved.
Finally, re-install the transmission pan and refill the fluid. It’s important to note that different vehicles may have different adjustment procedures, so it’s crucial to consult the manufacturer’s manual before attempting any adjustments. By properly adjusting the transmission bands, you’ll ensure optimal performance and extend the life of your transmission.
So, take the time to make this adjustment, and your vehicle will thank you for it.
How to Test the Adjustment
Adjusting the transmission bands is an essential step in making sure that your car’s gearbox runs smoothly. It’s important to test the adjustment regularly, especially if you’ve been noticing issues with slipping gears or grinding noises. To start, locate the transmission bands, which are usually found underneath the car’s transmission.
Once you’ve found them, you can use the adjusting bolts to tighten or loosen them as needed. You’ll want to take your car for a test drive after adjusting the bands to ensure that everything feels right. If you’re unsure about how to adjust the transmission bands, it’s always best to have a professional take a look to avoid any potential safety issues.
Overall, regularly testing and adjusting the transmission bands can help prolong the life of your vehicle and prevent more costly repairs down the road.
Secure the Adjusting Screw
When it comes to adjusting your transmission bands, one important step is to secure the adjusting screw. The adjusting screw is what allows you to adjust the tension on the bands so that they engage properly and ensure smooth shifting. To do this, you need to locate the adjusting screw on your transmission and use a wrench to tighten it down.
It’s important to make sure the screw is tight enough so that it doesn’t come loose while driving, but not too tight that it damages the threads or causes other problems. Finding the right balance can take some trial and error, but it’s worth it for a well-functioning transmission. Remember to double-check your work and take the necessary precautions to ensure your safety, such as wearing gloves and ensuring the transmission is cool before adjusting the bands.
With a little patience and attention to detail, you can successfully adjust your transmission bands and enjoy smoother shifting and better overall performance.
Making Sure the Screw is Tight
When it comes to working with machinery and tools, it’s essential to make sure everything is secure and in place before use. That’s why it’s crucial to focus on the adjusting screw. The adjusting screw is a small but powerful component that plays a massive role in maintaining the functionality and safety of machinery.
It’s vital to check the screw regularly and ensure it’s tight and secure. If the screw is loose, it can cause critical malfunctions and accidents, leading to injuries or even death. By securing the adjusting screw, you will prevent any unwanted issues and ensure that your machinery operates correctly and efficiently.
Remember to keep an eye on the screw and check it regularly to avoid any unnecessary complications.
Test Drive Your Vehicle
A transmission is an essential mechanical component of any vehicle that’s responsible for transmitting power produced by the engine to the wheels. If you’re experiencing issues such as slipping gears, a dragging clutch, or a noisy transmission, it may be due to misadjusted transmission bands. It’s important to regularly test drive your vehicle to ensure that your transmission bands are adjusted properly.
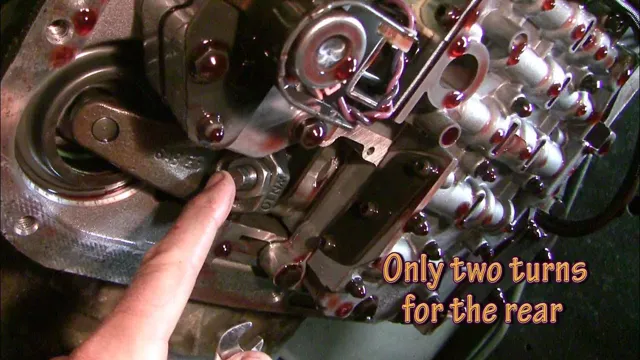
To do this, take your vehicle for a spin and pay attention to how the gears shift. If you notice any issues such as slipping or noisy shifts, it’s time to adjust your transmission bands. Start by locating the adjusting screw on the transmission and loosen it.
Next, tighten the adjusting screw until it’s snug, then back it off a half or full turn. Re-tighten the lock nut to secure the adjustment. Repeat the test drive to ensure that your gears are shifting smoothly.
Remember, adjusting transmission bands is a vital part of proper vehicle maintenance and will help keep your car running smoothly for years to come.
Ensuring Proper Functionality
Test Drive Your Vehicle It’s essential to test drive your vehicle to ensure proper functionality before hitting the road. Taking a quick test drive can uncover potential issues and gives you a chance to see how the car handles on the road. During your test drive, pay attention to how the brakes feel and how the steering wheel responds.
Does the car feel smooth when shifting gears? Does it make any unusual sounds? These are all things you want to be aware of before driving off into the sunset. Additionally, testing out different features like the air conditioning, radio, and other electronic options can help you determine if everything is working correctly. With a simple test drive, you can make sure your vehicle is road-ready and safe for you and your passengers.
Routine Maintenance Tips
If you’re experiencing slipping gears or transmission lag, it may be time to adjust your transmission bands. The purpose of these bands is to hold gears and clutches in place, so if they become loose, it can result in issues with shifting and overall performance. The adjustment process requires a bit of know-how and finesse, but it’s something you can do at home with the right tools and instructions.
First, locate the transmission pan and remove it to access the bands. From there, use a feeler gauge to measure the gap between the band and drum. If the gap is too wide or narrow, adjust the set screw accordingly.
It’s important to repeat this process for each band to ensure proper alignment. Once everything is in place, reassemble the transmission and take it for a test drive to ensure proper function. Regular maintenance like this can help prolong the life of your transmission and prevent costly repairs down the line.
When to Check and Adjust Transmission Bands
When it comes to maintaining your vehicle, checking and adjusting transmission bands should be part of your routine maintenance schedule. These bands are crucial for ensuring proper transmission shifts and preventing costly damage. But, when exactly should you check and adjust them? It’s recommended for car owners to check their transmission bands every 30,000 miles or sooner if they notice any issues such as slipping gears or difficulty shifting.
Adjustments should also be made if there is excessive wear on the bands or if they become loose. Think of it like changing the oil in your car – it’s a small task that can prevent major problems down the road. Keeping up with routine maintenance can also prolong the life of your transmission, saving you time and money in the long run.
By making sure to check and adjust your transmission bands regularly, you can keep your vehicle running smoothly and ensure a safer driving experience.
Conclusion
Adjusting transmission bands may seem like a daunting task but with a little knowledge and caution, it can be done smoothly. Remember to take your time, follow the manufacturer’s instructions, and above all, don’t be afraid to ask for help. Once you’ve successfully adjusted your transmission bands, you’ll feel like a master of the road, cruising down the highways with ease.
So, get under the hood, get your hands dirty, and discover the joy of a well-adjusted transmission. Your vehicle will thank you, and the roads will never be the same again.”
FAQs
What are transmission bands and how do they work?
Transmission bands are part of an automatic transmission that helps regulate gear changes. They work by controlling the movement of transmission components and applying pressure to clutch plates. If the bands are not adjusted properly, it can cause slipping or hard shifting.
How often should transmission bands be adjusted?
It is recommended to have the transmission bands adjusted every 30,000-60,000 miles or as recommended by the vehicle manufacturer. However, if you notice any issues with shifting or slipping, it is best to have them checked and adjusted as soon as possible.
Can transmission bands be adjusted at home?
While it is possible to adjust transmission bands at home, it is recommended to have a professional mechanic or technician perform the adjustment. This is because adjusting the bands requires specialized tools and knowledge, and improper adjustment can cause damage to the transmission.
How much does it cost to have transmission bands adjusted?
The cost of adjusting transmission bands can vary depending on the make and model of the vehicle and the location of the service provider. On average, the cost can range from $100 to $300. It is recommended to get a quote from a few different service providers before making a decision.