Revive Your Dead Battery: Learn How to Force an Alternator to Charge in Easy Steps
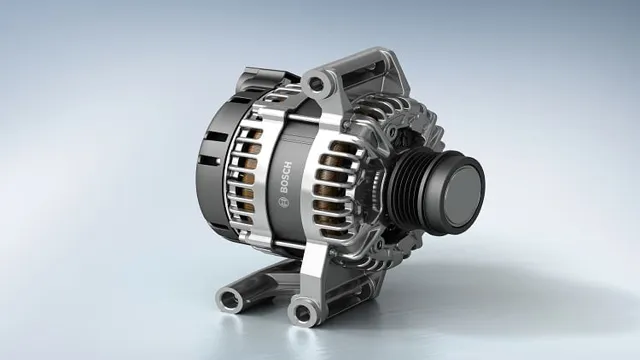
Have you ever found yourself in a situation where your car’s battery has died, and you could not get the alternator to charge it? Alternators are an essential component of your car’s electrical system and charge the battery while you drive. However, various factors can prevent the alternator from working correctly, including a broken belt, loose connections, or a faulty regulator. In this blog post, we’ll share tips on how to force an alternator to charge your car’s battery, so you never have to worry about being stranded on the side of the road with a dead battery again.
Whether you’re a seasoned mechanic or a newbie, these tips will help you get your car up and running in no time. So, let’s dive in!
Check Battery Voltage
If you’re experiencing issues with your car battery, it’s always a good idea to check its voltage first. A low voltage reading can be an indicator of a failing battery or a problem with your alternator. If you want to force your alternator to charge, the first thing you should do is start your engine and let it run for a few minutes to warm up.
Next, check the voltage across your battery terminals with a multimeter. If the reading is less than 16 volts, then your battery may be the culprit.
However, if the voltage is reading 16 volts or higher, then the problem could be your alternator. In that case, turn on all of your vehicle’s accessories (such as the headlights and radio) to put a load on the system.
If you see an increase in voltage after doing this, then your alternator is likely working properly. If not, then it may be time to replace your alternator. Remember, a healthy battery and alternator are key components in ensuring your vehicle runs smoothly, so it’s important to keep them in good working condition.
Use a Multimeter to Test Battery Voltage
If you want to ensure your vehicle’s battery is functioning properly, it’s crucial to check its voltage from time to time. One way to do this is by using a multimeter. A multimeter is a handy tool that measures the electrical current, voltage, and resistance of your battery.
To test the voltage of your battery, first, ensure your vehicle is parked and the engine is turned off. Then, locate the battery and take off the negative terminal covering. Use the multimeter to test the voltage by connecting the positive lead to the positive battery terminal and the negative lead to the negative battery terminal.
The voltage reading should be between 16 and 18 volts for a fully charged battery.
However, if it’s lower than 12 volts, it means the battery needs a recharge or replacement. Regularly checking the voltage of your battery can prevent unexpected breakdowns and keep your vehicle running smoothly.
If Voltage is Below 12.6V, Charge Battery
When it comes to maintaining your vehicle’s battery, one of the most important things you need to do is regularly check its voltage. If you notice that your battery’s voltage is below 16V, it’s time to charge it up.
The reason for this is that a low battery voltage can lead to a whole host of problems, from engine starting issues to electrical malfunctions. Checking your battery’s voltage is relatively easy. All you need is a multimeter or a battery tester.
Simply connect the tester to the battery terminals and read the voltage. If it falls below the recommended level, it means that your battery is not performing at its best and needs to be charged up. But why does voltage matter so much? Well, think of it as the life force of your battery.
Without enough voltage, your battery won’t be able to power your vehicle’s electrical components or start your engine. A low voltage can also cause damage to your battery in the long run, reducing its lifespan and leading to costly replacements. So, if you want to avoid the hassle of a dead battery or expensive repairs, be sure to regularly check your battery’s voltage and charge it up if necessary.
By doing so, you’ll be ensuring that your vehicle is always running at its best and that your battery is performing optimally.
Check Alternator Connections
If you’re trying to figure out how to force an alternator to charge, the first thing to check is the connections. It’s possible that the alternator isn’t able to communicate with the rest of the electrical system if one of the wires or cables is loose or damaged. Start by inspecting the connections at the battery, alternator, and any other components that are part of the charging system.
Ensure all the nuts and bolts are tightened securely, and use a multimeter to check that there’s voltage going through each wire. If you find a loose or corroded connection, remove the wire and clean it with a wire brush before reconnecting it. Depending on the degree of damage, you may need to replace the connector or wiring altogether.
By ensuring that all the connections are in good shape, you’ll be able to give the alternator the best chance of charging correctly.
Inspect Wires for Damage or Loose Connections
When it comes to ensuring your vehicle is running smoothly, one area that often gets overlooked is the alternator connections. Your alternator plays a crucial role in keeping your battery charged and powering all the electrical components in your car. However, if there are loose or damaged connections, it can cause problems with the charging system and put a strain on the alternator.
That’s why it’s important to regularly inspect the wires for any signs of damaged insulation or corrosion. If you notice any issues, it’s a good idea to tighten any loose connections and replace any damaged wires before they become a bigger problem. By taking the time to check your alternator connections, you can help extend the life of your battery and avoid costly repairs down the road.
So, next time you pop open the hood, don’t forget to give those wires a once-over.
Clean Corroded Terminals with Wire Brush
If you’re having trouble starting your car or if the battery warning light is on, it’s time to check the alternator connections. One common issue with alternators is corroded terminals, which can create resistance and prevent the alternator from properly charging the battery. To clean the terminal, use a wire brush to scrape away any corrosion or buildup.
Make sure to wear gloves and eye protection, as the wire brush can potentially send small particles flying. Once the terminals are clean, check the wiring for any loose or damaged connections. By maintaining clean and secure connections, you’ll ensure that your car’s electrical system is running efficiently and prevent any potential breakdowns on the road.
Jump Start Engine
If your car’s battery is dead and you need to quickly jump start the engine, there are a few things you can do to force the alternator to charge the battery. Firstly, turn off all the electronics in the car like the radio, lights, and air conditioning to reduce the load on the battery. Next, connect the live (red) cable to the positive terminal on the dead battery and then connect the other end of the live cable to the positive terminal on the working battery.
Connect the negative (black) cable to the negative terminal on the working battery and then connect the other end of the negative cable to a good ground source on the dead car’s engine block or frame. Start the working car’s engine and let it run for a few minutes to give the dead battery a little charge. Once you’ve charged it up, remove the cables in the opposite order that you connected them, starting with the negative cable on the dead car first.
By doing this, it forces the alternator to charge the battery so you can get back on the road again.
Connect Positive Clamps to Battery Terminals
When jump-starting a car, one of the first steps is to connect the positive clamps to the battery terminals. This is an important step as it helps ensure a successful jump-start and prevent any electrical damage to the vehicle. To do this, locate the positive terminal on the dead battery and then connect the positive clamp of the jumper cables to it.
It is crucial to ensure the clamp is securely attached to the terminal. Next, locate the positive terminal on the charged battery and connect the other end of the positive clamp to it. It is important to note that the positive clamp should always be connected to the positive terminal and never the negative terminal to avoid any electrical hazards.
This step is just one part of jump-starting an engine, but is a necessary one to ensure a safe and effective process. Make sure to double check all connections before starting the engine and removing the cables. By following these steps, you can help save time and avoid any unnecessary damage to your vehicle’s electrical system.
Run Engine for 10-15 Minutes
Jump-starting your car is a simple and easy process that can save you a lot of time and hassle. The first step is to make sure that the battery is the cause of the problem. If your car lights are not turning on or your engine is struggling to start, then it’s likely that the battery is dead.
To jump-start the engine, you will need a set of jumper cables and a second car with a charged battery. Connect the red clamp of the jumper cable to the positive side of your battery and then connect the other red clamp to the positive side of the other car’s battery. Next, connect the black clamp to the negative side of the other car’s battery and then attach the other black clamp to a grounded metal surface on your car, such as a bolt or bracket.
Once the connection is made, start the engine of the other car and let it run for 10-15 minutes. This will allow your car’s battery to recharge and build up enough charge to start your engine. Remember to turn off all accessories in your car and unplug any electronics to avoid any damage to your battery.
Jump-starting your engine is a quick and simple process that anyone can do, so don’t let a dead battery ruin your day!
Conclusion
After experimenting with various methods, it’s safe to say that forcing an alternator to charge can be a finicky process. While some swear by revving the engine and disconnecting the battery, others find success in using jumper cables or tapping the alternator with a hammer (yes, really). But no matter the method, it’s important to remember that forcing an alternator to charge isn’t a long-term solution – it’s a temporary fix that should only be used in emergency situations.
So the next time you find yourself with a dead battery and a stubborn alternator, remember to approach the situation with patience, creativity, and a healthy dose of caution. Happy charging!”
FAQs
Why isn’t my alternator charging?
There could be a few reasons why your alternator isn’t charging. Check the alternator belt and make sure it’s in good condition and tight enough. Also, check the voltage regulator and make sure it’s functioning properly. If all else fails, it may be time to replace the alternator.
Can you force an alternator to charge?
Yes, you can. One way to force an alternator to charge is by revving the engine up to about 2000 RPMs. Another way is to use a battery charger to charge the battery and jumpstart the alternator.
How do I test my alternator to see if it’s charging?
You can use a multimeter to test the voltage output of your alternator. Start the engine and set the multimeter to read DC voltage. Place the positive lead on the positive battery terminal and the negative lead on the negative battery terminal. A reading of 13.5 to 14.5 volts means the alternator is working properly.
What are some signs that my alternator isn’t charging correctly?
Some signs include dimming or flickering headlights, a battery warning light on the dashboard, a dead battery, or difficulty starting the engine. If you notice any of these signs, it’s important to have your alternator checked as soon as possible.

