6.0 Powerstroke Oil Cooler Removal Tools: Simple and Effective Solutions

Featured image for this comprehensive guide about 6.0 Powerstroke oil cooler removal tools
Image source: img.freepik.com
The Ford 6.0 Powerstroke diesel engine – a powerhouse for many, but also a source of notorious challenges for others. Among its well-documented quirks, the oil cooler stands out as a frequent culprit for headaches and expensive repairs. When this critical component inevitably clogs or fails, a cascade of other issues can follow, from failing EGR coolers to potentially devastating engine damage. Facing a 6.0 Powerstroke oil cooler replacement might seem daunting, especially given the engine’s compact design and the cooler’s inconvenient location beneath the intake manifold.
However, armed with the right knowledge and, more importantly, the correct 6.0 Powerstroke oil cooler removal tools, this complex job can be tackled with confidence and efficiency. Trying to improvise or force components can lead to stripped bolts, broken parts, and even more frustration. This comprehensive guide is designed to demystify the process, highlighting the essential general hand tools you’ll need, and shining a spotlight on the specialized equipment that transforms a gruelling task into a manageable one. We’ll delve into why these specific tools are indispensable and offer actionable tips to ensure your oil cooler service is as smooth and effective as possible.
Whether you’re a seasoned DIY mechanic or tackling this repair for the first time, understanding the arsenal of tools at your disposal is the first step towards success. From basic wrenches to highly specialized removal devices, we’ll cover everything required to perform a thorough and proper 6.0 Powerstroke oil cooler removal and installation. Let’s gear up and get ready to conquer one of the most significant maintenance tasks on your beloved 6.0 Powerstroke.
Quick Answers to Common Questions
What are the essential 6.0 Powerstroke oil cooler removal tools I’ll definitely need?
You’ll definitely want a good set of metric sockets (especially 8mm, 10mm, 13mm), wrenches, and a long ratchet with extensions to reach all the bolts. These are your core 6.0 Powerstroke oil cooler removal tools for getting the job done.
Are there any specialty 6.0 Powerstroke oil cooler removal tools that make the job much easier?
While not strictly mandatory, a swivel socket or a wobble extension for your ratchet can be a lifesaver for accessing bolts in tight, awkward angles. These specialty 6.0 Powerstroke oil cooler removal tools really cut down on frustration.
Can I perform 6.0 Powerstroke oil cooler removal with just my standard garage toolbox?
Absolutely! Most of the fasteners for 6.0 Powerstroke oil cooler removal are standard sizes, so a comprehensive metric socket and wrench set will get you through the majority of the work. You might just need a bit more patience for some of the trickier spots.
What if I encounter seized bolts during 6.0 Powerstroke oil cooler removal? What tools help then?
For stubborn or seized bolts during 6.0 Powerstroke oil cooler removal, a quality penetrating oil (like PB Blaster) and a breaker bar are your best friends. Sometimes a little heat from a small torch (used carefully!) can also help free things up.
Any other quick tips on 6.0 Powerstroke oil cooler removal tools to remember before I start?
Don’t forget a torque wrench for reassembly to ensure everything is tightened correctly, and consider having a magnet on an extendable stick ready for any dropped bolts. Having the right 6.0 Powerstroke oil cooler removal tools, including these small aids, makes a big difference.
📋 Table of Contents
- Understanding the 6.0 Powerstroke Oil Cooler: Why It Fails and Why Tools Matter
- Essential General Hand Tools for the Job
- Specialized 6.0 Powerstroke Oil Cooler Removal Tools: Making Life Easier
- Ancillary Tools and Supplies for a Complete 6.0 Powerstroke Oil Cooler Service
- Step-by-Step Tool Application & Best Practices (Simplified Overview)
- Preventing Future Issues: Maintenance and Upgrades
- Conclusion
Understanding the 6.0 Powerstroke Oil Cooler: Why It Fails and Why Tools Matter
The 6.0 Powerstroke oil cooler is a critical heat exchanger that uses engine coolant to regulate the temperature of your engine oil. It’s located in the “valley” of the engine, directly beneath the intake manifold, and plays a vital role in keeping oil temperatures within safe operating limits. When the oil cooler performs optimally, it ensures your engine oil maintains its lubricating properties, protects against wear, and prolongs engine life. However, this component is notoriously prone to failure, often due to clogging.

Learn more about 6.0 Powerstroke oil cooler removal tools – 6.0 Powerstroke Oil Cooler Removal Tools: Simple and Effective Solutions
Image source: clipart-library.com
The primary reason for 6.0 Powerstroke oil cooler failure stems from a design flaw combined with inadequate maintenance practices. Over time, casting sand left over from the engine block manufacturing process, combined with silicates from conventional coolants, can accumulate and form a sludge-like material. This debris clogs the small passages within the oil cooler, restricting coolant flow and, consequently, reducing its ability to cool the engine oil. A clogged oil cooler can lead to several severe problems:
| Tool | Primary Use for 6.0 Oil Cooler Removal | Common Specification / Type | Estimated Cost Range |
|---|---|---|---|
| Socket & Torx Bit Set | Removing fuel filter housing, intake manifold, oil cooler mounting bolts, various brackets. | Metric (8mm, 10mm, 13mm) & SAE (1/2″); Torx (T40 for intake manifold). | $30 – $150 (depending on set size & quality) |
| Ratchet & Extension Bars | Providing leverage and reach for recessed or hard-to-access fasteners. | 3/8″ drive, various lengths (3″, 6″, 10″), swivel/wobble extensions. | $25 – $75 (for a basic set of extensions) |
| Pry Bar / Panel Clip Remover | Gently separating the intake manifold, removing wiring harness clips and hoses. | Small to medium pry bar (6-12 inches), plastic clip removal tools. | $15 – $40 |
| Gasket Scraper / Razor Blades | Cleaning old gasket material from mating surfaces on the intake manifold and block. | Plastic or metal blade scraper, single-edge razor blades. | $5 – $20 (essential for a proper seal on reassembly) |
| Drain Pan (Large Capacity) | Collecting coolant and engine oil during the disassembly process. | 10-15 quart capacity (at least). | $10 – $35 |
- Elevated Engine Oil Temperature (EOT): Your oil temperature will be significantly higher than your engine coolant temperature (ECT). A difference of more than 15 degrees Fahrenheit (or about 8 degrees Celsius) at highway speeds is a strong indicator of a failing oil cooler.
- EGR Cooler Failure: The EGR (Exhaust Gas Recirculation) cooler relies on the same engine coolant that flows through the oil cooler. If the oil cooler is clogged, the EGR cooler receives insufficient coolant flow, leading to overheating, cracking, and eventual failure. This often results in coolant being introduced into the exhaust, which can then lead to hydro-locking the engine.
- Turbocharger Issues: High oil temperatures can degrade the lubricating properties of engine oil, leading to premature wear and failure of the turbocharger.
- Head Gasket Problems: While not a direct cause, chronic overheating from an inefficient oil cooler can contribute to overall engine stress, potentially exacerbating issues that lead to blown head gaskets.
Given its vital role and propensity for failure, a proper 6.0 Powerstroke oil cooler replacement is a necessity. The location of the cooler, buried beneath the intake manifold and numerous other components, makes it a labour-intensive job. This is precisely why having the right 6.0 Powerstroke oil cooler removal tools isn’t just a convenience; it’s a fundamental requirement for completing the job successfully and without causing additional damage. Attempting to use makeshift tools or shortcuts can strip bolts, damage delicate O-rings, or break plastic components, turning a challenging repair into a nightmare. Specialized tools are engineered to fit precisely, provide the correct leverage, and ensure components are handled with care, ultimately saving you time, money, and frustration.
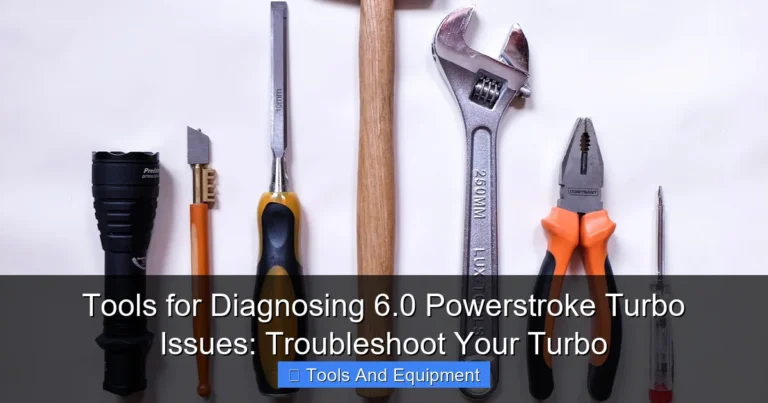
Essential General Hand Tools for the Job
Before diving into the specialized equipment, it’s crucial to ensure you have a solid foundation of general hand tools. These are the workhorses of any significant engine repair and are indispensable for a 6.0 Powerstroke oil cooler service. Many of these you likely already own, but a quick inventory check can prevent annoying delays once you start the job.

Learn more about 6.0 Powerstroke oil cooler removal tools – 6.0 Powerstroke Oil Cooler Removal Tools: Simple and Effective Solutions
Image source: storage.needpix.com
Socket and Wrench Sets
You’ll be encountering a wide variety of fasteners on the 6.0 Powerstroke. A comprehensive set of sockets and wrenches, both standard (SAE) and metric, is absolutely essential.
- Deep and Shallow Sockets: Ranging from 8mm to 24mm (and possibly larger for some frame components if needed for access). Both 1/4″, 3/8″, and 1/2″ drive sizes will be necessary.
- Extension Bars: Various lengths (3″, 6″, 10″, 12″) are critical for reaching bolts in tight spaces, especially around the turbo and intake manifold.
- Universal Joints/Swivel Adapters: Invaluable for accessing fasteners at awkward angles where a straight shot isn’t possible.
- Open-End and Box-End Wrenches: A full set to complement your sockets, particularly for hose clamps, line fittings, and nuts that can’t be reached with a socket.
Proper fitment of sockets and wrenches prevents rounding off bolt heads, a common frustration when dealing with rusty or seized fasteners.
Screwdrivers and Pliers
These fundamental tools will be used repeatedly throughout the 6.0 Powerstroke oil cooler removal process.
- Flathead and Phillips Screwdrivers: Various sizes for hose clamps, electrical connectors, and general prying.
- Needle-Nose Pliers: Excellent for reaching small parts, pulling vacuum lines, and manipulating electrical connectors.
- Channel Lock Pliers: For gripping larger hoses, stubborn connectors, or as a general utility grip.
- Diagonal Cutters: For cutting zip ties or old, stubborn hoses.
Torque Wrenches
Reassembly is just as critical as disassembly, and proper torque is paramount for preventing leaks and ensuring component longevity. You’ll need at least two torque wrenches:
- Small to Medium Torque Wrench (1/4″ or 3/8″ drive): For lower torque settings on smaller fasteners (e.g., fuel lines, sensor bolts).
- Large Torque Wrench (1/2″ drive): For higher torque settings on critical components like the intake manifold bolts, turbo pedestal, and exhaust up-pipes.
Never underestimate the importance of torquing fasteners to factory specifications, especially during a 6.0 Powerstroke oil cooler replacement, to prevent future leaks or component failure.
Fluid Drain Pans and Funnels
This job involves draining a significant amount of coolant and potentially some engine oil.
- Large Drain Pan: At least 5-gallon capacity for coolant.
- Smaller Drain Pan: For incidental spills or draining small amounts of fluid.
- Funnels: For neatly refilling coolant and engine oil.
Pry Bars and Scrapers
Some components, particularly old gaskets and seized parts, will require a bit of persuasion.
- Small to Medium Pry Bars: For gently separating components or gaining leverage. Be cautious not to damage sealing surfaces.
- Gasket Scrapers: Essential for removing old gasket material and ensuring clean mating surfaces for the new components. Plastic scrapers are excellent for aluminum surfaces to avoid gouging.
Shop Towels and Cleaners
A clean work environment is a safe and efficient one. Have plenty of shop towels, rags, and appropriate degreasers or brake cleaners on hand for cleaning up spills and preparing surfaces. Cleanliness is paramount when working on the 6.0 Powerstroke oil cooler to prevent debris from entering the engine.
Specialized 6.0 Powerstroke Oil Cooler Removal Tools: Making Life Easier
While general hand tools get you most of the way, certain components on the 6.0 Powerstroke are designed in such a way that specialized tools are almost a necessity for a smooth and damage-free removal and installation process. Investing in these 6.0 Powerstroke oil cooler removal tools will undoubtedly save you time, prevent frustration, and ensure the job is done correctly.
Fuel Filter Cap Wrench / Oil Cooler Housing Wrench
One of the first specialized tools you’ll likely encounter is the wrench for the oil cooler housing cap and the fuel filter caps. These caps often have a unique multi-fluted design that standard sockets struggle with, leading to rounding.
- Purpose: Specifically designed to fit the plastic caps of the primary (upper) fuel filter, secondary (lower) fuel filter, and the 6.0 Powerstroke oil cooler cap.
- Benefit: Prevents damage to the plastic caps, which are prone to cracking or stripping if improper tools are used. It provides even pressure across all flutes for easy, non-damaging removal.
Coolant Standpipe/Dummy Plug Removal Tool
The 6.0 Powerstroke engine has several standpipes and dummy plugs that are critical for the high-pressure oil system. During an oil cooler replacement, you’ll need to access and potentially remove them to get to the oil cooler housing. These can be incredibly tight and difficult to remove without the proper tool.
- Purpose: A specific socket or wrench designed to engage the often recessed hexagonal heads of the coolant standpipes and dummy plugs.
- Benefit: Allows for safe and effective removal without stripping the internal hex, which is a common problem with standard Allen keys or improvised tools. Some kits even include updated standpipes and dummy plugs, which are highly recommended for preventing future issues.
Intake Manifold / Oil Cooler Top Cover Lift Tool
The entire 6.0 Powerstroke oil cooler assembly is located beneath the intake manifold. Removing and repositioning this heavy, bulky manifold can be a significant challenge. Some specialty tools provide the necessary leverage.
- Purpose: A specific tool (often a shaped pry bar or specialized hook) designed to safely lift and separate the intake manifold from the engine valley without damaging sealing surfaces or fragile components.
- Benefit: Prevents damage to the manifold, surrounding wiring, and delicate sensors. It helps create the necessary clearance to access the oil cooler housing and the components beneath.
O-Ring Pick Set
Throughout the 6.0 Powerstroke oil cooler replacement, you’ll encounter numerous O-rings and seals that need to be removed and replaced.
- Purpose: A set of small, angled picks with varying hooks and angles, specifically designed for gently prying out old O-rings and seals from their grooves.
- Benefit: Minimizes the risk of scratching or damaging the sealing surfaces, which could lead to leaks down the line. Using a screwdriver or other sharp object can easily gouge aluminum surfaces, creating a permanent leak path.
Gasket Scraper / Surface Prep Tools
Ensuring clean, smooth mating surfaces is paramount for a leak-free reassembly after 6.0 Powerstroke oil cooler removal.
- Purpose: Specialized plastic or soft metal scrapers designed to remove old gasket material and carbon deposits without scratching or marring aluminum surfaces.
- Benefit: Essential for achieving a perfect seal. Any remaining gasket residue or imperfections on the mating surfaces can cause coolant or oil leaks immediately or shortly after the repair.
Hose Clamp Pliers (Various Types)
The 6.0 Powerstroke uses a variety of hose clamps, primarily spring-style clamps, which can be difficult to remove with standard pliers.
- Purpose: Designed to compress and release spring-style hose clamps easily. Some have long-reach capabilities for awkward positions.
- Benefit: Prevents hand fatigue, speeds up removal, and reduces the risk of damaging hoses or cutting yourself. Essential for the numerous coolant and turbocharger hoses.
Investing in these specialized 6.0 Powerstroke oil cooler removal tools is a wise decision. They not only simplify a complex task but also significantly reduce the risk of damage, ensuring your repair is durable and effective.
Ancillary Tools and Supplies for a Complete 6.0 Powerstroke Oil Cooler Service
Completing a 6.0 Powerstroke oil cooler replacement isn’t just about removing the old cooler and installing a new one. It involves several other crucial steps, from cooling system maintenance to post-installation diagnostics. Having the right ancillary tools and supplies on hand ensures a comprehensive service and prevents immediate or future problems.
Vacuum Fill Tool for Coolant System
Refilling the 6.0 Powerstroke’s cooling system properly is critical. Air pockets left in the system can cause localized overheating, especially in critical components like the EGR cooler or the new oil cooler.
- Purpose: This tool connects to an air compressor and creates a vacuum in the entire cooling system before you introduce new coolant.
- Benefit: Pulls a complete vacuum, indicating if there are any leaks in the system before filling, and then draws the new coolant in, virtually eliminating air pockets. This ensures proper flow and cooling efficiency from the start, a must-have for any 6.0 Powerstroke oil cooler service.
Air Tools (Impact Wrench, Die Grinder for Cleaning)
While not strictly necessary for every bolt, air tools can dramatically speed up the disassembly process and aid in cleaning.
- Air Impact Wrench (3/8″ or 1/2″ drive): For quickly removing exhaust manifold bolts, turbo pedestal bolts, and other large fasteners.
- Air Die Grinder with Abrasive Pads: Excellent for thoroughly cleaning gasket surfaces, especially in hard-to-reach areas, ensuring a perfect seal. Be careful to prevent debris from falling into the engine.
Diagnostic Tools (FORScan or Similar)
After completing the 6.0 Powerstroke oil cooler replacement, monitoring your engine’s vitals is crucial for confirming the repair’s success.
- Purpose: A diagnostic scanner (like FORScan with an OBD2 adapter, or a dedicated scan tool) that can read live data from your engine.
- Benefit: Allows you to monitor Engine Oil Temperature (EOT) and Engine Coolant Temperature (ECT) to confirm your EOT/ECT delta is within specifications (typically less than 15 degrees Fahrenheit difference at highway speeds). This provides definitive proof that your new oil cooler is functioning correctly.
Quality Replacement Parts and Coolant
The best tools in the world won’t matter if your replacement parts are subpar.
- New Oil Cooler: Consider a reputable aftermarket cooler with improved internal baffling or an OEM unit. Some choose to “bulletproof” by installing an upgraded unit.
- Updated Standpipes and Dummy Plugs: Essential to replace, as older designs are prone to leaks.
- Complete Gasket Kit: Includes all necessary gaskets for the intake manifold, turbo, oil cooler, and related components.
- New Coolant: Only use the Ford-approved gold coolant (Motorcraft Gold Premium Gold Coolant VC-7-B or equivalent) or a fully compatible Extended Life Coolant (ELC) that is silicate-free and nitrate-free if converting. Never mix coolant types.
- New Engine Oil and Filter: Since you’ll be draining some oil, it’s a good time for an oil change.
Having these ancillary tools and supplies on hand transforms a basic repair into a comprehensive service, ensuring your 6.0 Powerstroke operates reliably for years to come after its oil cooler replacement.
Step-by-Step Tool Application & Best Practices (Simplified Overview)
Understanding which 6.0 Powerstroke oil cooler removal tools to use and when to use them is key to a successful repair. While a full step-by-step guide is beyond the scope of this tool-focused article, we can highlight how specific tools are applied and outline some critical best practices. This ensures you approach the job with confidence and precision.
The General Sequence and Tool Application:
- Preparation & Draining: Begin by disconnecting batteries, draining the cooling system (using your large drain pan), and partially draining the engine oil. Use appropriate sockets and wrenches for drain plugs.
- Top-Side Disassembly:
- Remove the upper fuel filter cap using the fuel filter cap wrench.
- Disconnect various sensors, wiring harnesses, and hoses. Use appropriate sized sockets, screwdrivers, and hose clamp pliers for quick release.
- Remove the air intake system components leading to the turbo.
- Turbocharger Removal: This is often necessary for sufficient access. You’ll use a combination of sockets, extensions, and universal joints to unbolt the exhaust up-pipes and the turbo pedestal. An air impact wrench can greatly assist here.
- Intake Manifold & Oil Cooler Access:
- Remove the intake manifold bolts. Use deep sockets and extensions.
- Carefully lift the intake manifold. This is where the intake manifold lift tool or a carefully placed pry bar becomes invaluable to avoid damaging the manifold or engine valley components.
- Once the manifold is off, the 6.0 Powerstroke oil cooler housing is exposed.
- Oil Cooler Housing Disassembly:
- Remove the oil cooler cap (again, with the specialized wrench).
- Locate and remove the coolant standpipes and dummy plugs. This is where the coolant standpipe/dummy plug removal tool is absolutely critical to prevent stripping.
- Unbolt the oil cooler housing from the engine block using appropriate sockets.
- Cleaning & Surface Preparation:
- Remove the old oil cooler and all old gaskets and O-rings. The O-ring pick set is essential for this.
- Thoroughly clean all mating surfaces on the engine block, intake manifold, and new oil cooler housing using your gasket scrapers and cleaning agents. This is perhaps the most crucial step for a leak-free repair.
- Reassembly: Install the new oil cooler with new gaskets and O-rings. Reinstall all components in reverse order, ensuring every bolt and fastener is tightened to its specific torque specification using your torque wrenches.
- Fluid Refill & Diagnostics: Refill the cooling system using the vacuum fill tool to prevent air pockets. Refill engine oil. Start the engine and use your diagnostic tools (like FORScan) to monitor EOT and ECT delta to confirm successful operation.
Key Tools and Their Primary Function for 6.0 Powerstroke Oil Cooler Service
Here’s a quick reference table for the most crucial tools:
| Tool Type | Primary Function in 6.0 Oil Cooler Service | Why It’s Essential |
|---|---|---|
| Fuel Filter/Oil Cooler Cap Wrench | Removes fuel filter and oil cooler housing caps. | Prevents damage to fragile plastic caps. |
| Coolant Standpipe/Dummy Plug Tool | Removes and installs high-pressure oil system standpipes/plugs. | Prevents stripping recessed hex heads; crucial for access. |
| Torque Wrenches (various sizes) | Ensures all fasteners are tightened to manufacturer specifications. | Prevents leaks, component failure, and ensures structural integrity. |
| O-Ring Pick Set | Removes old O-rings and seals without damaging surfaces. | Crucial for preventing future leaks from damaged mating surfaces. |
| Gasket Scrapers/Surface Prep Tools | Cleans all gasket mating surfaces thoroughly. | Absolutely essential for a leak-free seal and long-term reliability. |
| Vacuum Coolant Fill Tool | Refills cooling system without introducing air pockets. | Prevents overheating, especially in the EGR and new oil cooler. |
| Diagnostic Scanner (FORScan) | Monitors EOT/ECT delta post-repair. | Confirms successful repair and proper oil cooler function. |
Remember, patience, meticulousness, and adherence to factory specifications are just as important as the tools themselves. Always consult a factory service manual or a reputable repair guide for detailed, component-specific torque values and procedures.
Preventing Future Issues: Maintenance and Upgrades
You’ve just invested significant time and effort into a 6.0 Powerstroke oil cooler replacement. The last thing you want is to repeat the process prematurely. Proactive maintenance and strategic upgrades can significantly extend the life of your new oil cooler and prevent common 6.0 Powerstroke issues. This section offers actionable advice to protect your investment.
Coolant Filtration Systems
One of the most effective ways to prevent future oil cooler clogging is to address the root cause: debris in the coolant.
- External Coolant Filters: Installing an aftermarket coolant filter kit is a highly recommended upgrade. These kits typically install in one of the heater core lines and catch casting sand, rust, and other contaminants before they can reach the delicate passages of the oil cooler.
- Regular Filter Changes: Just like your oil filter, the coolant filter needs periodic replacement. Follow the manufacturer’s recommendations, usually annually or every 15,000-30,000 miles.
This simple addition can dramatically extend the life of your 6.0 Powerstroke oil cooler and EGR cooler.
Regular Coolant Flushes and Proper Coolant Type
The type and condition of your coolant are paramount for the health of your 6.0 Powerstroke.
- Correct Coolant Type: Always use the Ford-approved Motorcraft Gold Premium Gold Coolant (VC-7-B) or a fully compatible Extended Life Coolant (ELC) that is silicate-free and nitrate-free. If converting to ELC, ensure the system is thoroughly flushed of all old Gold coolant. Silicates in conventional coolants are a major contributor to oil cooler clogging.
- Routine Flushes: Even with the correct coolant, it degrades over time. Perform regular coolant flushes according to Ford’s service intervals (typically every 5 years or 100,000 miles, but often recommended more frequently by enthusiasts for the 6.0). Ensure a complete flush, using a reputable flushing agent if needed, and refill with distilled water before adding concentrated coolant.
- Distilled Water: When mixing concentrated coolant, always use distilled water, not tap water, to prevent mineral deposits and scale buildup in the cooling system.
Monitoring EOT/ECT Delta
Even with preventative measures, ongoing monitoring is your best defence.
- Dedicated Monitor: Invest in a dedicated monitoring system (like an Edge Insight, Scangauge, or a smartphone app like FORScan paired with an OBD2 adapter) to constantly display your Engine Oil Temperature (EOT) and Engine Coolant Temperature (ECT).
- Know Your Delta: Under normal cruising conditions (e.g., highway speeds), the difference (delta) between your EOT and ECT should ideally be less than 15 degrees Fahrenheit (around 8 degrees Celsius). If you start consistently seeing higher deltas, it’s an early warning sign that your 6.0 Powerstroke oil cooler might be beginning to clog again, allowing you to address it before major damage occurs.
EGR Cooler Considerations
Since the EGR cooler is intricately linked to the oil cooler’s function, it’s often wise to consider its condition during an oil cooler service.
- Inspect and Replace: If your EGR cooler is original or has a history of issues, replacing it with an upgraded, “bulletproofed” unit (such as a welded stainless steel design) while you have the intake manifold off is a highly recommended proactive step. This saves you from performing the same labour twice.
- EGR Delete (Check Local Laws): In some regions and for off-road vehicles, an EGR delete is an option. This completely removes the EGR cooler, eliminating that failure point. However, be aware of local emissions laws and regulations before considering this modification.
By implementing these maintenance practices and considering strategic upgrades, you can significantly prolong the lifespan of your 6.0 Powerstroke oil cooler and enhance the overall reliability of your truck.
Conclusion
The 6.0 Powerstroke oil cooler replacement is undoubtedly one of the more involved maintenance tasks for this iconic diesel engine. However, as we’ve explored, it’s a repair that becomes significantly more manageable and less daunting when you’re equipped with the correct 6.0 Powerstroke oil cooler removal tools. From the foundational hand tools that form the backbone of any garage to the specialized wrenches and picks designed precisely for the unique challenges of the 6.0 Powerstroke, each tool plays a crucial role in ensuring a smooth, damage-free, and successful repair.
Investing in the right equipment isn’t just about convenience; it’s about precision, preventing costly mistakes, and ultimately, restoring your engine to optimal health. Beyond the removal and installation, adopting best practices like thorough surface cleaning, correct torque application, and proper cooling system refilling are equally vital. Furthermore, understanding the importance of ongoing maintenance – from coolant filtration to vigilant EOT/ECT monitoring – will empower you to prevent future failures and extend the life of your newly installed oil cooler.
So, whether you’re a seasoned mechanic or a determined DIY enthusiast, approach your 6.0 Powerstroke oil cooler service with confidence. Gather your tools, follow the steps meticulously, and remember that with the right preparation and knowledge, you can conquer this notorious repair. Your 6.0 Powerstroke, and your wallet, will thank you for it!
🎥 Related Video: Oil in Coolant Tank | Faulty Oil Cooler in Your Car
📺 Daily Hands DIY
Frequently Asked Questions
Why are specialized 6.0 Powerstroke oil cooler removal tools necessary for this job?
The 6.0 Powerstroke oil cooler is often deeply embedded and secured by stubborn bolts in tight spaces, making standard wrenches insufficient. Specialized tools, like specific sockets and removal kits, are designed to reach these areas and provide the necessary leverage without damaging surrounding components.
What are the most common or essential 6.0 Powerstroke oil cooler removal tools I’ll need?
Key tools typically include a specialized long 10mm socket for the cooler mounting bolts, a unique cooler line disconnect tool, and often a pry bar or slide hammer for cooler extraction. Having these 6.0 Powerstroke oil cooler removal tools greatly streamlines the process and prevents frustration.
Can I remove the 6.0 Powerstroke oil cooler without these specialized tools?
While some DIYers attempt it with conventional tools, it’s highly unadvisable and often leads to stripped bolts, broken lines, or significant damage. Specialized 6.0 Powerstroke oil cooler removal tools are designed for the specific challenges of this job, making it safer and more efficient.
How do specialized tools simplify the process of removing a 6.0 Powerstroke oil cooler?
These tools are precision-engineered to fit the unique fasteners and tight clearances of the 6.0 Powerstroke engine bay. They provide the correct reach, angle, and torque application, reducing the risk of component damage and significantly cutting down on removal time compared to improvised methods.
Are there different types of 6.0 Powerstroke oil cooler removal tools for specific steps?
Yes, different tools address various stages of the removal process. For instance, a long 10mm socket is for the mounting bolts, while a specialized disconnect tool is for the oil cooler lines. Some kits also include extraction tools for stubborn coolers, highlighting the utility of specific 6.0 Powerstroke oil cooler removal tools for each task.
Where can I find reliable 6.0 Powerstroke oil cooler removal tools for purchase?
You can typically find high-quality 6.0 Powerstroke oil cooler removal tools at automotive specialty tool retailers, reputable online parts stores like Amazon or Summit Racing, or even directly from Ford dealerships. Always ensure you’re buying from a trusted source to guarantee tool quality and fitment for your Powerstroke.