Step-by-Step Guide: Mastering the Art of Installing Zerk Fittings like a Pro
Have you ever found yourself in need of installing a zerk fitting on your machinery but have no idea where to begin? Fear not, for this step-by-step guide will provide you everything you need to know on how to install zerk fitting like a pro. Firstly, let’s start with understanding what a zerk fitting is. It is a small nipple-like metal fitting used to lubricate machinery components easily.
They are commonly found in automobiles, farming equipment, machinery, and other industrial applications. Now, let’s jump into the installation process. It’s crucial to ensure that the fitting you are about to install is compatible with your machinery before you get started.
Also, ensure that the fitting is clean and free from debris before installation. The next step is to locate the area where the fitting is going to be installed. Once this is done, use a wrench or pliers to tighten the fitting onto the machinery.
Tighten the fitting to the correct torque, which is specified in your machine’s manual to avoid over-tightening that can damage the machinery. In conclusion, installing a zerk fitting is relatively easy, but it’s essential to do it properly to avoid any unintentional harm to your machinery. So the next time you need to install one, follow this guide, stay patient, and take the necessary precautions to ensure a successful installation.
Materials Needed
When it comes to installing a zerk fitting, you’ll need a few materials to get the job done correctly. First and foremost, you’ll need the zerk fitting itself! Make sure to get the correct size and type for your specific application. You’ll also need a grease gun, which will be used to inject grease into the fitting once it’s installed.
Other materials you may need include a drill to make a hole for the fitting, a tap to thread the hole, and a wrench to tighten the fitting in place. It’s important to have all of these materials on hand before beginning the installation process to ensure a smooth and efficient process. With the right materials and a little bit of know-how, you can easily install a zerk fitting on your equipment and keep it running smoothly for years to come.
Grease gun and zerk fitting
When it comes to maintaining your machinery, having a grease gun and zerk fittings can make all the difference in ensuring the longevity and efficiency of your equipment. To get started, you’ll need a few essential materials, including a grease gun, zerk fittings, and lubricant grease. The grease gun is the most crucial tool, as it enables you to apply grease precisely where it’s needed.
This device utilizes hydraulic pressure to force the grease through the zerk fittings and into the machinery’s moving parts. It’s important to choose a grease gun with a comfortable grip that will allow you to maintain control and precision while applying the grease. The zerk fittings, also known as grease fittings, are small metal components that attach to the machinery’s moving parts.
They act as an entry point for the grease, enabling it to flow into the machinery’s internal components and lubricate them. It’s essential to select the right size zerk fittings for your machinery to ensure the grease flows smoothly and reaches all the necessary areas. Finally, you’ll need lubricant grease, which is a high-performance lubricant that reduces friction and wear between machinery’s moving parts.
This grease is specially designed to withstand high pressure and temperatures and provide long-lasting lubrication. It’s critical to choose the right type of lubricant grease for your machinery, taking into account its specific needs and operating conditions. In summary, a grease gun and zerk fittings are essential for maintaining your machinery’s longevity and efficiency.
By choosing the right materials and using them correctly, you can ensure your equipment stays in top condition and runs smoothly for years to come.
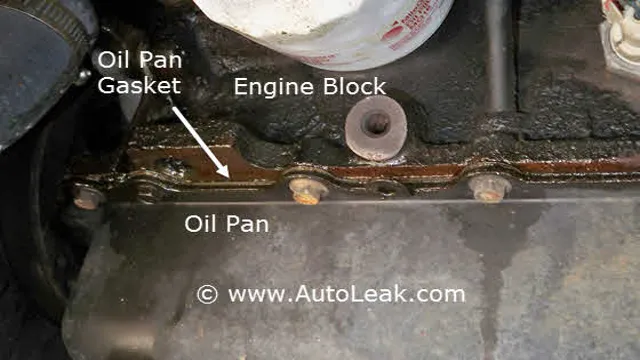
Identify Fitting Location
If you’re wondering how to install a zerk fitting, the first step is to identify the right location. This may require a bit of detective work, as there are a multitude of factors to consider. First, ensure that the fitting will actually fit on the device you’re working with.
Zerk fittings come in various sizes, so you’ll want to be sure that you have the right dimensions. Next, consider the purpose of the fitting. Are you installing it for lubrication purposes? If so, you’ll want to locate the area of the device that is lacking lubrication.
This may take a bit of trial and error, but you’ll likely be able to tell by examining where there is the most wear and tear. Once you’ve identified the right location, you’ll be ready to move on to the next step of the installation process. So don’t be afraid to get hands-on and do a little investigation – finding the perfect spot to install your zerk fitting is a crucial part of the process.
Locate fitting on machine or vehicle
To locate the fitting on a machine or vehicle, you need to identify the fitting location. This can be a bit tricky because fittings are not always easy to find. However, with a little bit of knowledge, you can locate fittings quickly and easily.
The first place to look for fittings is under the hood of your vehicle. Most fittings are located in this area, and they are usually easy to spot. Look for hoses or pipes that connect to various parts of the engine, such as the radiator or air filter.
Another place to look is underneath the car. Here, you may find fittings that connect the fuel tank to the engine or the brake lines to the wheels. If you are having trouble locating a fitting, consult your vehicle manual or reach out to a professional mechanic for assistance.
In order to identify a fitting, you need to be able to recognize its shape and size. Fittings are typically made of metal or plastic and come in a variety of shapes and sizes. Some may have a hexagonal shape, while others may be round or oval.
Fittings can also vary in size, with some being quite small and others being much larger. If you are unsure about the size or shape of a fitting, bring it to a professional mechanic for identification. In conclusion, locating and identifying fittings on machines and vehicles can be a bit challenging, but with some knowledge and guidance, it can be done quickly and easily.
Always consult your vehicle manual or a knowledgeable professional mechanic if you have any questions or concerns. Keep an eye out for hoses or pipes that connect to different parts of the engine, and be prepared to recognize fittings of various shapes and sizes. With a little bit of practice, you will be able to locate and identify fittings with ease.
Clean Fitting Area
When it comes to installing a zerk fitting, one of the most important steps is to ensure that the fitting area is clean. This means cleaning away any dirt or debris that could prevent the fitting from properly seating and forming a tight seal with the surface. A clean fitting area can also help prevent contamination of the lubricant being injected into the fitting.
Before beginning the installation process, use a cloth or brush to thoroughly clean the surface around the fitting. Once the area is clean, you can proceed with installing the zerk fitting with confidence, knowing that it will be properly seated and able to effectively deliver lubrication to the components that need it. By taking the time to clean the fitting area, you can ensure that your zerk fitting installation is successful and provides long-lasting benefits to your equipment or machinery.
Remove any dirt with a clean cloth or degreaser
When installing a new fitting, it’s important to start with a clean slate. That means cleaning the fitting area thoroughly to ensure a proper seal and prevent any leaks. To do this, grab a clean cloth and wipe away any dirt or debris that may have accumulated around the fitting area.
If there’s grease or oil present, you may need a degreaser to effectively clean the surface. Once the area is free of any contaminants, you’re ready to begin installing your new fitting. A clean surface allows for better adhesion of any adhesives used in the process, ensuring a tight seal and preventing any leaks.
Remember, a little bit of prep work goes a long way when it comes to fitting installation. So take the time to clean the fitting area properly so that you can enjoy a leak-free and hassle-free installation!
Attach Grease Gun
If you want to install a zerk fitting to your machinery or vehicle, attaching a grease gun is a crucial step in ensuring its effective lubrication. A grease gun is a device designed to deliver lubricant in small amounts and directly to a specific point, making it ideal for administering grease using a zerk fitting. To attach the grease gun, start by selecting the appropriate grease that matches the manufacturer’s specifications for your machine.
Then, locate the grease gun coupler and firmly attach it to the zerk fitting on your machine. Make sure that you align the coupler correctly and apply enough pressure to establish a secure connection. Once it’s attached, squeeze the trigger of the grease gun to begin administering the lubricant into the fitting.
When finished, release the trigger and remove the coupler from the zerk fitting. A fully-functioning attachment allows for a smooth flow of lubricant needed to keep your machinery in top condition.
Squeeze handle to prime grease gun
Attaching a grease gun may seem daunting at first, but it’s actually a simple process. First, locate the grease fitting on the machine or equipment you want to lubricate. Then, unscrew the cap on the grease gun and remove the plunger from the barrel.
Insert the barrel into the grease gun and screw it in place. Next, attach the hose to the barrel and tighten it firmly. Now it’s time to prime the grease gun.
Squeeze the handle of the grease gun repeatedly until you see grease coming out of the tip of the hose. Remember to apply grease in small amounts and frequently, as over-greasing can cause damage or create a mess. With this simple guide, you’ll be able to attach and use your grease gun with confidence.
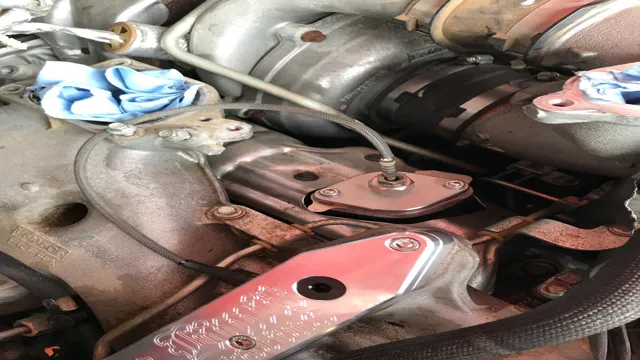
Insert Zerk Fitting
If you’re someone who’s never installed a zerk fitting before, it may seem intimidating at first. But the process is actually quite simple and straightforward. First, you need to determine where on your machinery you want to install the fitting.
Find a spot where it can easily be accessed with a grease gun. Once you’ve chosen your spot, take a drill and create a small hole in the metal. Make sure that the hole is the same size as the zerk fitting you have, this will ensure a tight fit.
Once the hole is drilled, simply screw the zerk fitting into the hole until it is tight and secure. Voila, you have successfully installed a zerk fitting! Now, all you need to do is attach a grease gun and fill the fitting with grease to keep your machinery running smoothly. Remember, professional installation is always recommended, but installing a zerk fitting can be a simple and quick DIY task for those who are mechanically inclined.
Thread fitting onto the grease gun nozzle
If you’re new to using a grease gun, fitting the zerk onto the nozzle can seem like a daunting task. However, it’s a simple process that just requires a bit of finesse. Firstly, ensure that the zerk fitting matches the size of the nozzle on your grease gun.
Once you’ve done that, you’ll need to align the zerk fitting with the nozzle and push down firmly. You’ll hear a clicking sound when it attaches correctly. It’s important to note that you shouldn’t force the fitting onto the nozzle as this can damage both the fitting and the grease gun itself.
A simple but effective technique is to twist the zerk fitting while applying downward pressure until it clicks into place. Once fitted correctly, you’re now ready to lubricate your machinery. Remember to follow the manufacturer’s instructions on lubrication and the type of grease to use.
Happy greasing!
Grease the Fitting
If you’re wondering how to install zerk fitting, one important step is to grease the fitting before attaching it to your machinery or equipment. You can do this by using a grease gun to inject grease into the fitting until you see a small amount of grease coming out of the other end. This ensures that the fitting is well-lubricated and ready to provide effective lubrication to your equipment.
It’s important to note that you should use the appropriate grease for your particular application, as using the wrong type of grease can lead to damage or malfunction. Additionally, make sure to screw the fitting in tightly to ensure that it doesn’t come loose during use. By taking the time to properly grease the fitting and ensure a secure fit, you can help prolong the life of your equipment and keep it running smoothly.
Slowly pump grease into the fitting
When it comes to maintaining machinery, greasing the fittings is an essential task. It ensures that the moving parts remain lubricated and don’t wear down excessively due to friction. Greasing fittings may seem like a simple task, but it is essential to do it correctly.
Firstly, ensure that the right type of grease is being used for the machinery. Once that’s done, attach the grease gun to the fitting and slowly pump in the grease. It is vital to go slow and steady to ensure that the fitting is not over-greased, which could cause damage to the machine.
Keep pumping the grease until you see it coming out of the other end of the fitting. Finally, remove the grease gun from the fitting. This process may seem simple, but it can make a significant difference in how long your machinery lasts.
With regular maintenance and proper greasing of the fittings, your machine will run smoothly and last longer. So, make sure to take the time to grease the fittings correctly.
Repeat on All Fittings
When it comes to installing zerk fittings, it’s important to remember to repeat the same process on all fittings. This means cleaning the area around each fitting to prevent contaminants from entering the lubrication system. It’s also important to ensure that the fittings are tightly secured, to prevent any leaks.
Applying lubricant to the fittings and ensuring that the lubricant is properly distributed is key to maintaining the life and efficiency of machinery. Repeating this process on all fittings helps ensure that each fitting is working as it should, and that the machinery stays well-lubricated. Remember, a properly lubricated machine can save time, money, and prevent costly breakdowns, making it worth the effort to install zerk fittings correctly.
Inspect and grease all fittings periodically
Inspecting and greasing all fittings periodically is an essential task that should not be overlooked by anyone who wants to ensure the smooth operation of their machinery. These fittings include things like bearings, hinges, and pivots, and should be checked at regular intervals to prevent any damage that may occur due to lack of maintenance. Proper cleaning and lubrication of these fittings will help reduce friction and wear, and ensure that the machinery can continue to perform at its best for an extended period.
Neglecting this task could lead to premature wear and tear, causing your machinery to break down and eventually become unusable. So, to avoid any unnecessary downtime, make sure to inspect and grease all fittings regularly. It’s a simple task that can make a significant difference in the life of your equipment.
By performing this task on all fittings, you can ensure that your machinery runs smoothly and efficiently, ensuring that you get the most out of your investment.
Conclusion
In conclusion, installing a zerk fitting may seem like a daunting task, but with the right tools and knowledge, it’s a breeze. Just remember to grease the skids of your project by ensuring your fittings are clean and secure. And when in doubt, don’t be too proud to ask for help or consult a manual.
With a little perseverance, you’ll be the zerk-fitting master in no time – your machinery will thank you for it!”
FAQs
What tools do I need to install a zerk fitting?
You will need a grease gun, pliers, and a wrench to install a zerk fitting.
Where do I install the zerk fitting?
The zerk fitting should be installed in the designated grease port on the equipment or machinery. If there is no grease port, consult the manufacturer’s instructions or a professional.
How do I clean the area around the grease port before installing the zerk fitting?
Use a degreaser and a clean rag to remove any dirt and debris around the grease port before installing the zerk fitting.
How often should a zerk fitting be greased?
This can vary depending on the equipment and manufacturer’s recommendations. Generally, it is recommended to grease the zerk fitting after every 8 to 10 hours of use or as specified in the equipment manual.