Boost Your Ride: Step-by-Step Guide on How to Install a Supercharger with Expert Tips
Ready to give your car a serious boost? Installing a supercharger can take your vehicle’s performance to a whole new level. But where do you begin? Don’t let the idea of adding a supercharger to your car intimidate you. With the right tools and a bit of know-how, you can complete the installation process and start enjoying the power and speed that come with a supercharged engine.
In this article, we’ll give you a step-by-step guide on how to install a supercharger on your car, covering the essential tools, safety precautions, and tips to ensure a successful installation. So buckle up and get ready to take your ride to the next level.
Gather Necessary Tools
Installing a supercharger can provide a boost in performance, but before getting started, it’s important to gather all the necessary tools. You’ll need basic hand tools such as sockets, wrenches, and screwdrivers, as well as specialty tools specific to your supercharger kit. It’s crucial to refer to the manufacturer’s instructions and recommended tool list to ensure you have everything you need.
Keep in mind that some supercharger kits may require modifications to the engine, so it’s important to also have access to a torque wrench and engine hoist if needed. By having all the necessary tools at hand, you’ll be able to tackle the installation with confidence and minimize any delays or complications along the way.
Check Owners Manual
When it comes to performing any maintenance on your car, it’s always a good idea to start by checking your owner’s manual. It contains detailed information on what tools you need, how to do the task correctly, and any safety precautions you should take. So, before you gather any tools, take the time to read through your manual, so you know what to expect and can prepare accordingly.
Once you have a good idea of what needs to be done and which tools you need, gather everything and make sure they are in good working condition. Having the right tools is crucial for the job to be done correctly and safely. So, whether you need a ratchet, socket wrench, torque wrench, or any other specific tool, make sure you have it before starting the job.
With everything in order, you’ll have the confidence to tackle any maintenance job your car needs with ease.
Purchase Supercharger Kit
When you’re ready to upgrade your vehicle’s performance, a supercharger kit is an excellent option. However, before you even begin installation, it’s important to gather the necessary tools. To start, you’ll need a socket set with both standard and metric sizes, pliers, screwdrivers, and a torque wrench.
Additionally, you may need specialty tools depending on your particular vehicle and the supercharger kit you’ve chosen. It’s always best to consult the instructions provided with your kit or seek the advice of a professional before beginning installation. With the right tools at your disposal, you’ll be well on your way to achieving the performance and power you desire.
So, don’t let a lack of tools hold you back from purchasing a supercharger kit. Get your hands on what you need, and get ready to take your vehicle to the next level.
Basic Hand Tools
Gathering the necessary basic hand tools is essential for any DIY or home improvement project. It’s important to make sure you have all the right tools for the job, not only to ensure your safety, but also to make the job easier and more efficient. Some important hand tools to have on hand include a hammer, screwdrivers (both flathead and Phillips), pliers, an adjustable wrench, a tape measure, and a level.
Additionally, a saw and a set of socket wrenches are useful for more advanced projects. It’s a good idea to invest in high-quality tools that will last longer and be more durable. Don’t forget to also consider safety equipment, such as gloves, safety glasses, and a dust mask, depending on the project.
By having the right tools and equipment on hand, you’ll be better equipped to tackle any DIY project that comes your way.
Mechanic’s Tool Set
When it comes to working on your car, having the right tools is essential. Investing in a mechanic’s tool set can save you time and money in the long run. But before you start purchasing tools, it’s important to gather the necessary information to know what to include in your set.
Start by researching the types of tools that are commonly used for basic car repairs. This may include sockets, wrenches, pliers, and screwdrivers. Consider the size of your car and the tasks you are likely to undertake when assembling your set.
It’s also important to pay attention to the material of the tools. Opt for high-quality, durable tools that will last longer and save you money in replacing them. Once you have all the necessary tools, you’ll be better equipped to tackle any car repair that comes your way.
Perform Car Preparation
Installing a supercharger can be a great way to enhance the power of your car’s engine. But before you begin installing a supercharger, it’s important to properly prepare your car to handle the added power. This can include upgrading the engine’s cooling system, installing a stronger clutch and transmission, and upgrading the fuel system to ensure it can handle the increased demands.
It’s also important to make sure your car’s electrical system is in good working order, as a supercharger will require additional power to operate. Once your car is properly prepared, you can move forward with installing your supercharger. Be sure to carefully follow the manufacturer’s instructions and consider seeking the help of a professional if you’re unsure about any aspect of the installation process.
By taking the time to properly prepare your car, you can get the most out of your supercharger and enjoy improved performance on the road.
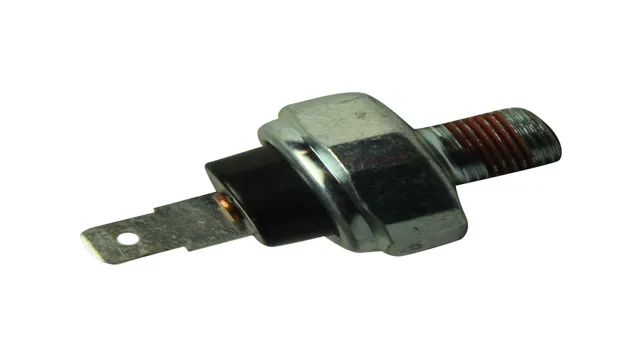
Disconnect Battery
Car Battery Preparation Before performing any maintenance on your car battery, it’s crucial first to disconnect the battery properly. Failing to do so can result in serious injury or damage to your vehicle since the battery is the source of power to the car. To disconnect the battery, you’ll want to start by turning off your car’s engine and removing the key from the ignition.
Next, use a wrench or a socket to loosen the negative terminal’s nut on the battery’s negative cable. Ensure that the cable is entirely disconnected. Repeat the same process with the positive terminal’s cable.
Once both cables are detached, carefully remove the battery from its cradle and place it in a safe area. While it may seem like a simple task, disconnecting the battery is crucial to your safety and your vehicle’s longevity. By taking the necessary precautions, you can prevent electrical mishaps that could result in a short circuit or, at worst, electrocution.
Remember to double-check that all cables are disconnected before conducting any maintenance on your car’s battery.
Remove Engine Cover
If you’re planning to work on your car’s engine, then one of the first steps would be to remove the engine cover. This is an important preparation task as it allows you to access the various components of the engine that you need to work on. However, before you can remove the engine cover, it’s important to make sure your car is prepared for the task.
Start by making sure the car is turned off and the engine is cooled down to avoid any accidents. Next, disconnect the negative battery cable to avoid any electrical shocks. Finally, remove any obstacles around the engine that may get in the way of removing the engine cover.
Once you’ve completed these steps, you can then proceed to remove the engine cover and begin working on your car’s engine. With the proper preparation, you can ensure that your engine work is done safely and efficiently.
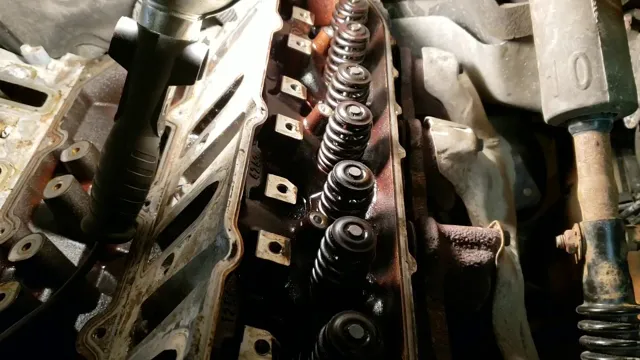
Remove Intake and Exhaust System
When it comes to preparing your car for high-performance modifications, removing the intake and exhaust system is a crucial step. This process involves taking out the current system in place and replacing it with a more efficient one, which can result in significant power gains and improved acceleration. It also allows for better airflow, reducing the amount of resistance that your engine faces and increasing horsepower.
However, this process requires a bit of skill and knowledge, and it’s essential to do it correctly to avoid causing damage to your car. It’s important to consult a professional and choose the right components for your car to ensure that everything fits together seamlessly. With the right preparation, you can transform your car and take your driving experience to the next level.
Install Supercharger Kit
So, you’ve decided to add a little boost to your ride by installing a supercharger kit. Congratulations! While the process may seem intimidating at first, it’s actually a relatively straightforward procedure that can be done with the right tools and a little bit of know-how. The first step is to gather all of the necessary components for your specific make and model of vehicle, including the supercharger itself, any necessary brackets and hardware, and any supporting components like intercoolers or upgraded fuel systems.
From there, you’ll need to remove your car’s intake manifold, install the supercharger, and make any necessary modifications to your car’s current systems to accommodate the boost. Once everything is installed and adjusted correctly, you’ll be able to enjoy a significant increase in horsepower and torque – but don’t forget to take it easy for the first few hundred miles while your car adjusts to its new setup. With a little bit of patience and a lot of attention to detail, you’ll be well on your way to experiencing the thrill of a supercharged ride.
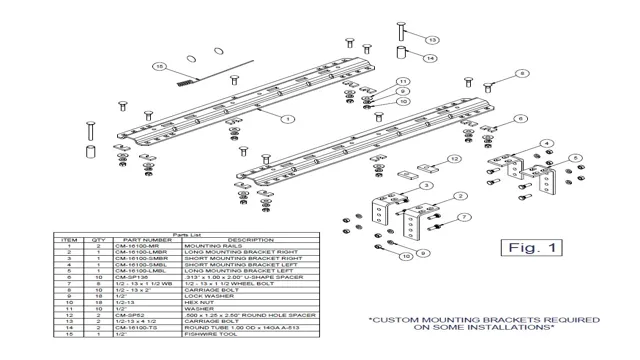
Mount Supercharger Bracket
Installing a supercharger kit is an exciting and worthwhile investment for individuals looking to improve their engine’s performance. One critical step in the installation process is mounting the supercharger bracket. This step can be tricky, but with the right tools and a bit of patience, it can be accomplished with ease.
The first step is to locate the bracket and ensure that it is the correct one for your specific supercharger kit. Once identified, ensure that the mounting location is clear of any debris or obstructions. Then, use the included hardware to firmly secure the bracket to the engine block or cylinder head.
It is crucial to ensure that the bracket is tightly secured, as any looseness can cause undue stress on the supercharger and its components. Once the bracket is mounted, you can move on to the next step of the installation process, feeling confident that your supercharger is mounted securely and will provide optimal performance.
Install Supercharger
Installing a supercharger kit can significantly enhance the performance of your vehicle by boosting its horsepower and torque. However, the task of installing a supercharger can often seem daunting and intimidating for many car enthusiasts. That’s where a professional mechanic comes in handy.
A trained mechanic can guide you through the process and ensure that the installation is executed correctly. The installation process typically involves the installation of various components, including a supercharger, intercooler, fuel pump, and ECU. Once installed, your vehicle’s performance will experience a boost like never before, with improved throttle response and acceleration.
It’s essential to ensure that the installation is completed correctly to prevent any damage or safety concerns. So, if you’re ready to take your vehicle’s performance to the next level, installing a supercharger kit might just be the way to go.
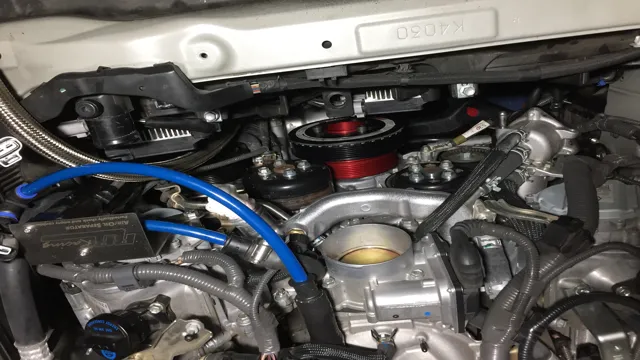
Install Pulley and Belt
Installing a supercharger kit can be an exciting project for car enthusiasts, but it requires a significant amount of precision and attention to detail. One crucial step is installing the pulley and belt properly. The pulley is responsible for driving the supercharger, while the belt transfers the power from the engine to the supercharger.
To install the pulley, you’ll need to remove the old one by loosening the bolts. Then, you’ll need to install the new pulley, making sure it’s aligned correctly. Finally, you’ll need to install the belt and adjust it to the appropriate tension.
It’s crucial to ensure that the belt is tight enough to prevent slipping, but not too tight that it causes excessive wear. Installing the pulley and belt correctly is vital to the overall function of the supercharger kit, so take your time and follow the manufacturer’s instructions closely.
Finish Installation Process
Installing a supercharger involves several steps, but once you’ve got all the necessary components laid out and in their proper places, the installation process itself can be relatively simple. Start by removing the factory airbox and other components from the engine, making sure to disconnect any electrical connections or hoses as necessary. Then, bolt the supercharger bracket into place and attach any necessary pulleys.
Next, bolt the supercharger onto the bracket and connect the intake system and any necessary hoses. Finally, adjust the belt tension and ensure that all connections are tight and secure before starting the engine. With a little patience and attention to detail, you can enjoy the benefits of a supercharger in no time.
Reinstall Intake and Exhaust System
Now that you’ve successfully removed and cleaned your old intake and exhaust system, it’s time to reinstall the new one. This final piece of the installation process can be a bit tricky, but with some patience and care, you’ll be able to get everything hooked up properly. Start by aligning the new exhaust system and securing it with the clamps.
Then, attach the new intake system and make sure all connectors are properly fastened. Make sure there are no gaps or loose connections that could lead to leaks. It’s always a good idea to check everything thoroughly before starting the engine to avoid any potential issues.
With your new intake and exhaust system in place, your vehicle should be running smoothly and efficiently. Remember to keep up with regular maintenance to ensure optimal performance.
Attach Battery Cables
Now that you’ve successfully installed your car’s new battery, the final step is to attach the battery cables. This may seem like a small detail, but it’s a crucial step to ensure that your car starts smoothly and runs efficiently. First, locate the positive and negative terminals on the battery.
The positive terminal will be marked with a “+” sign, and the negative terminal will have a “-” sign. Start by attaching the positive cable to the positive terminal, making sure that it’s securely fastened. Next, attach the negative cable to the negative terminal, ensuring that it’s also tightly secured.
You may hear a slight spark when making the connection, which is normal. Finally, give the cables a gentle wiggle to ensure that they’re firmly attached. Congratulations, you’ve successfully installed your new car battery!
Test Drive and Tune Supercharger
After installing a supercharger, it’s important to finish up the installation process by giving it a test drive and tuning it. This will help ensure that your car is functioning properly and efficiently. Take the car out for a spin and see how it feels.
Pay attention to the sound of the engine and how responsive the throttle is. If it sounds and feels good, then you’re on the right track. However, you need to plan on tuning the supercharger to get the most out of it.
Tuning involves adjusting the air/fuel ratio and ignition timing to optimize performance. A professional tuner can help dial in the supercharger for your specific vehicle and ensure that it’s functioning at its peak. It’s always a good idea to get your car dyno-tuned so you can see exactly how much power it’s making and ensure that everything is running smoothly.
By completing the installation process with a test drive and tune-up, you’ll be able to enjoy the benefits of your new supercharger for years to come.
Conclusion
In conclusion, installing a supercharger on your vehicle is not for the faint of heart. It requires a combination of mechanical skill, careful planning, and a willingness to get your hands dirty. But for those brave enough to take on the challenge, the rewards are worth it.
A supercharger can give your ride a serious boost in power and performance, making every drive a thrill ride. So if you’re ready to take your vehicle to the next level, roll up your sleeves, grab your tools, and get ready to feel the power of the supercharger!”
FAQs
What is a supercharger and how does it work?
A supercharger is a device that pumps more air into the engine to increase its power output. It works by compressing air and forcing it into the engine at a higher pressure, allowing more fuel to be burned and producing more power.
What are the benefits of installing a supercharger?
Installing a supercharger can increase engine power and torque, improve acceleration and throttle response, and enhance overall performance. It can also improve fuel efficiency by allowing the engine to burn fuel more efficiently.
Can any car be fitted with a supercharger?
Not every car is suitable for a supercharger. Typically, cars with large engines and strong drivetrains are better candidates for supercharger installations. Before installing a supercharger, it’s important to consult with a professional to determine if it is the right choice for your car.
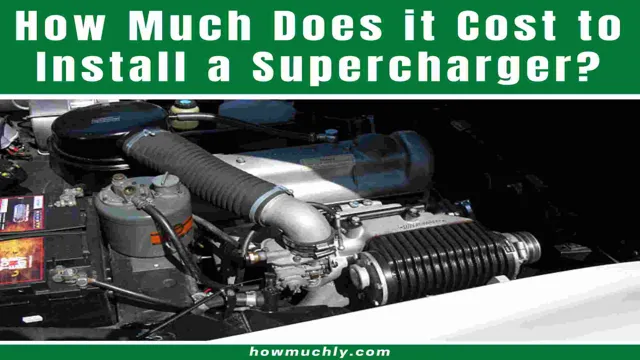
How much does it cost to install a supercharger?
The cost of installing a supercharger varies depending on the make and model of your car, the type of supercharger you choose, and other factors such as labor costs and additional modifications. Some supercharger kits can cost anywhere from $2,000 to $8,000 or more. It’s important to do your research and budget accordingly before committing to a supercharger installation.