Hone Like a Pro: Mastering Cylinder Polishing with Sandpaper
Do you have a cylinder that needs honing but don’t have access to specialized tools? Don’t worry, you can still achieve a smooth and polished surface with a few sheets of sandpaper and some elbow grease. Honing a cylinder with sandpaper might seem like a daunting task, but it’s simpler than you might imagine. With a bit of patience and the right technique, you can achieve a satisfactory finish that will ensure your cylinder functions effectively.
So, roll up your sleeves, grab your sandpaper, and let’s get honing!
Gather Supplies Needed
If you’re looking to hone a cylinder with sandpaper, the first step is to gather the supplies you’ll need. First off, you will need to get your hands on some sandpaper. It is recommended to use 400-grit and 600-grit sandpaper for a smooth finish.
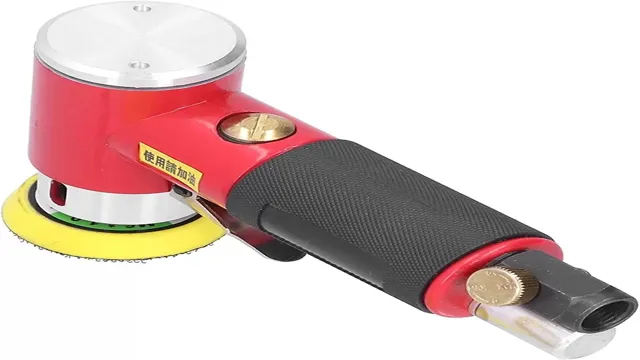
You will also require a honing mandrel, which is a long, metal rod that you will attach the sandpaper to and insert into the cylinder. Another essential supply is a lubricant, which you will use to keep the sandpaper wet and prevent it from clogging. You can use water or oil as a lubricant, but make sure it’s compatible with the type of cylinder you’re honing.
Lastly, you will need a cleaning brush or cloth to clean the residue off the cylinder after honing. Honing a cylinder with sandpaper can be a time-consuming process, but with the right tools and patience, you can get the job done and achieve a smooth and polished finish.
Sandpaper Grits
When it comes to DIY woodworking projects, sanding is an essential step to achieve a smooth and polished finish. To get the best results, it’s crucial to choose the right sandpaper grits. The first step in gathering supplies is to determine the grits needed for the project.
Sandpapers are categorized by numbers, and the higher the number, the finer the grit. For rough sanding and removing paint or varnish, lower grits like 40-80 are ideal. For smoothing and preparing surfaces, medium grits like 120-150 work well.
Finally, for fine sanding and achieving a polished finish, higher grits like 220-400 are the way to go. It’s important to start with lower grits and gradually work your way up to higher ones to avoid damaging the wood surface. By gathering the right sandpaper grits, you can achieve a professional-looking finish on your woodworking projects.

Safety Gear
When it comes to safety, having the right gear is essential. Whether you’re working on a construction site or exploring the great outdoors, it’s important to have the proper supplies to protect yourself from potential dangers. One of the most important things to consider is headgear.
A hard hat is crucial for anyone working in construction or other hazardous environments where falling debris is a risk. It’s also important to consider eye protection, such as safety glasses or goggles, to shield your eyes from flying debris, dust, and chemicals. Another crucial aspect of safety gear is footwear.
Work boots with steel toes are essential for anyone working in construction or performing heavy manual labor. High visibility clothing, such as reflective vests, is also important for anyone working in low light conditions. These supplies may seem like small details, but they can make all the difference when it comes to preventing injuries and staying safe on the job.
Prep the Cylinder
If you’re looking to hone a cylinder with sandpaper, the first step is to prep the cylinder. This means ensuring that the cylinder is clean and free of any debris or oil buildup. You can do this by wiping it down with a clean cloth or lightly sanding it with some fine-grit sandpaper.
It’s also important to inspect the cylinder for any signs of damage or wear, such as cracks or deep scratches. If you notice any significant damage, you may need to consider replacing the cylinder altogether. Once the cylinder is clean and inspected, you can move on to the honing process, which involves using sandpaper to smooth out the cylinder walls and create a uniform surface.
Make sure to use the appropriate grade of sandpaper for your specific cylinder and to take your time to ensure a thorough and even honing job. With some patience and attention to detail, you can hone your cylinder to perfection and ensure optimal performance for your engine.
Clean the Cylinder
When it comes to prepping the cylinder for maintenance or repair, cleaning is an essential step that shouldn’t be overlooked. To clean the cylinder, begin by removing any debris or contaminants from the outside. Use a soft cloth to gently wipe the surface and inspect for any signs of damage or corrosion.
Next, clean the inside of the cylinder, but be sure to use appropriate cleaning solutions and tools, such as a bore brush or cleaning snake. Pay attention to the type of cylinder you are working with and any restrictions on cleaning methods or chemicals. Keep in mind that a dirty cylinder can lead to further damage and downtime, so it’s important to take the time to clean it properly.
By doing so, you’ll not only ensure better performance but also extend the life of your cylinder.
Block off Cylinder Openings
When preparing a cylinder for maintenance or repairs, it’s crucial to block off the openings before proceeding. This ensures that no debris or foreign objects can fall into the cylinder and cause further damage. You can use rubber plugs or tape to securely seal the openings.
Once secured, you can then start cleaning and inspecting the cylinder without any worries. By taking this simple precaution, you’re essentially safeguarding the longevity of your cylinder’s lifespan and preventing further damage from occurring. So, before diving into any cylinder work, don’t forget to properly block off those openings first.
Safety first, always.
Begin Honing Process
So, you have a worn-out cylinder and want to bring it back to its former glory? Honing the cylinder with sandpaper is a great option to consider. But, before you begin honing, make sure you have all the necessary tools and equipment, including sandpaper, oil, and a honing tool. The first step is to thoroughly clean the cylinder, eliminating any debris, oil, or dirt that may hinder the process.
Once the cylinder is cleaned, attach the honing tool and apply oil to the cylinder wall. This will ensure a smooth honing process while preventing damage to the piston rings and cylinder walls. After applying oil, it’s time to start honing.
Begin by moving the honing tool up and down the cylinder wall, applying gentle pressure. Remember, honing is a gradual process, and it requires patience. Keep honing until you get the desired surface finish, which should resemble a crosshatch pattern.
Once you achieve the desired crosshatch pattern, clean the cylinder once again, ensuring that all debris and grit are eliminated. After cleaning the cylinder, inspect it to see if any areas need more honing. If necessary, repeat the process until you achieve an even surface finish across the entire cylinder wall.
In conclusion, honing a cylinder with sandpaper is a cost-effective way to rejuvenate a worn-out cylinder. With the right tools and technique, you can achieve an even surface finish that will prolong the life of your engine. So, grab your sandpaper, oil, and honing tool, and get started on the honing process today!
Select Grit Sandpaper
When it comes to honing metal, selecting the right grit sandpaper is crucial to achieving a smooth and polished finish. The grit number indicates the coarseness of the sandpaper, with lower numbers being rougher and higher numbers being smoother. For the honing process, it’s best to start with a lower grit sandpaper, around 120 or 220, to remove any rough spots or imperfections on the metal’s surface.
Once the rough spots are smoothed out, gradually move up to higher grit sandpaper, such as 400 or 600, to achieve a polished finish. It’s important to keep the sandpaper clean and free of debris throughout the honing process, as any leftover grit can cause scratching or damage to the metal. With patience and precision, the honing process can transform a dull and jagged piece of metal into a smooth and polished masterpiece.
Wrap Sandpaper Around Honing Tool
If you’re looking to sharpen your tools, honing is an essential step that shouldn’t be skipped. To begin the honing process, simply wrap sandpaper around your honing tool and hold it against the blade edge. Make sure the grit of the sandpaper matches your honing tool’s grit, so you don’t damage your blade edge.
Move the honing tool along the entire length of the blade, maintaining a consistent angle as you go. Honing helps to straighten out any burrs or dings in the blade, resulting in a sharper edge and a better-performing tool. By the time you’re finished, you’ll have a blade that’s sharper than ever before, ready for any task that comes its way.
Don’t forget to finish off the honing process with a good sharpening stone to give your blade that final touch of sharpness and polish. With a little bit of practice, honing your tools will become second nature.
Insert Honing Tool into Cylinder
When it comes to honing a cylinder, the first step is to insert the honing tool carefully. This process requires patience and precision, as any misalignment can lead to a poor job being done. The honing tool should be inserted at a slight angle and slowly turned until it is perpendicular to the cylinder walls.
From there, the honing process can begin. It’s important to note that honing should never be rushed, as taking the time to do it right will result in a smoother finish and longer-lasting engine performance. So, take your time and be gentle with the honing tool, and you’ll be able to achieve the desired result.
Repeat Honing Process with Finer Grits
Now that you’ve rough honed the cylinder wall with a coarse grit sandpaper, it’s time to refine the surface with finer grits. This step is crucial to promote a smoother surface finish and ensure a proper piston ring seal. Using sandpapers with grits ranging from 400 to 800, apply honing oil to the cylinder walls and polish them in a crosshatch pattern.
This enables the piston rings to seat properly and form a tight seal that’s crucial for optimal engine performance. Be sure to clean the cylinder walls properly after each honing session to avoid any contamination or debris that could lead to engine damage. Repeat the honing process with progressively finer grits of sandpaper until you reach the desired surface finish, typically ranging from 800 to 1500 grits.
Remember, honing with sandpaper requires accuracy, patience, and a steady hand, but the results are worth it.
Clean Cylinder After Each Grit Change
When honing your engine cylinder, it’s important to clean the cylinder thoroughly after each grit change. This ensures that all the grit from the previous honing process is removed, preventing any scratching or damage to the cylinder walls. Once you’ve cleaned the cylinder, you can repeat the honing process with finer grits for a smoother finish.
Using progressively finer grits allows you to remove any remaining imperfections in the cylinder walls for a perfectly polished finish. Keep in mind that it’s essential to use the correct honing oil with each grit to ensure smooth operation and prevent any damage to the cylinder. Taking the time to properly hone your engine cylinder can make a big difference in its performance and longevity, so don’t rush the process.
With each step, you’ll be bringing your engine one step closer to peak performance.
Inspect Cylinder
If you want to learn how to hone a cylinder with sandpaper, then you’ve come to the right place! Honing a cylinder involves using a honing tool, which is typically made up of abrasive stones or bits. But, if you don’t have access to a honing tool, you can use sandpaper to achieve a similar result. Start by inspecting the cylinder to make sure there are no cracks or damage present.
If the cylinder is in good shape, then wrap a strip of sandpaper around a dowel or a hone and insert it into the cylinder. Using a light pressure, rotate the hone back and forth while moving it up and down the cylinder walls. Make sure to use a consistent motion and keep the hone lubricated with oil to avoid damaging the cylinder.
Keep honing until you achieve the desired finish, and remember to clean the cylinder thoroughly before reassembling the engine. With a little patience and practice, honing a cylinder with sandpaper is a simple and effective way to restore old or worn cylinders.
Check for Proper Honing
The final step in the engine honing process is to inspect the cylinder for a proper finish. This is crucial to ensure the longevity of your engine. Look for any scratches or imperfections in the cylinder walls.
If they are too deep or plentiful, the cylinder may need to be replaced. However, if the cylinder walls are smooth and consistent, this is a good sign that the honing process was successful. It’s important to note that proper honing should create a crosshatch pattern in the cylinder walls.
This pattern allows the piston rings to properly seat and achieve maximum compression. Without this pattern, your engine may experience low compression and reduced power. So, it’s important to check for the crosshatch pattern and ensure it’s consistent throughout the cylinder walls.
By doing so, you can ensure that your engine will run efficiently and reliably for years to come.
Verify Correct Cylinder Clearance
When inspecting a cylinder, verifying the correct cylinder clearance is a vital step. Cylinder clearance refers to the degree of space between the cylinder wall and the piston of an engine. An incorrect clearance can cause problems such as reduced power and performance, engine knock, excessive heat, and even engine failure.
To properly verify cylinder clearance, you can use feeler gauges to measure the distance between the piston and the cylinder wall. It’s important to consult manufacturer specifications to ensure the clearance is within the recommended range. Moreover, cylinder inspection is a meticulous process that requires attention to detail and precision.
Taking the time to verify correct cylinder clearance can save you from costly and inconvenient engine repairs in the future.
Conclusion
So, there you have it folks! Honing a cylinder with sandpaper like a pro is as easy as pie, well almost. With some patience, elbow grease, and the right tools, you can transform a rough, jagged cylinder into a smooth, polished marvel that will make Picasso proud. Not only will it improve your engine’s performance, but it’ll also save you some bucks that you’d have spent at the mechanic’s.
So, grab your sandpaper, put on your favorite tunes, and get to honing. And remember, slow and steady wins the honing race!”
FAQs
What is honing a cylinder with sandpaper?
Honing a cylinder with sandpaper is the process of removing any roughness or imperfections from the cylinder walls to improve the piston seal and increase engine performance.
Why is honing a cylinder important?
Honing a cylinder is important because it allows the piston rings to seat properly, which can improve engine compression, reduce oil consumption, and increase horsepower.
What type of sandpaper should be used to hone a cylinder?
It is recommended to use a fine-grit sandpaper, such as 220 or 320 grit, to hone a cylinder. Coarser grits can remove too much material and damage the cylinder wall.
Can honing a cylinder with sandpaper fix cylinder wear or damage?
Honing a cylinder with sandpaper can improve the surface finish and remove minor scratches or imperfections, but it cannot fix severe wear or damage such as deep grooves or cracks in the cylinder wall. In such cases, the cylinder may need to be replaced or professionally repaired.