Cracked Coolant Reservoir? Here’s How to Fix It Like a Pro!
Have you ever noticed that your car engine seems to be running a bit hotter than usual? You pop the hood and notice that your coolant reservoir is cracked and leaking coolant. It’s a frustrating problem to have, but luckily, it’s one you can fix yourself. In this step-by-step guide, we’ll walk you through the process of fixing a cracked coolant reservoir so that you can get back on the road in no time.
First things first, you’ll need to gather the necessary tools and supplies. This includes a replacement coolant reservoir, a socket wrench, a flathead screwdriver, and a pair of pliers. Once you have everything you need, you can begin the process of removing the old coolant reservoir.
The first step is to remove any hoses or wires that are connected to the old reservoir. This may require using pliers or a flathead screwdriver to loosen any clamps or connections. Once all of the hoses and wires are disconnected, you can use a socket wrench to remove the bolts holding the reservoir in place.
With the old reservoir removed, you can now install the new one. Simply follow the reverse process of removing the old one. Make sure all hoses and wires are properly connected and tighten any clamps or connections.
Finally, use a socket wrench to tighten the bolts holding the new reservoir in place. Congratulations, you have successfully fixed your cracked coolant reservoir! Just make sure to check for any leaks and top off your coolant before hitting the road. Remember, fixing a cracked coolant reservoir is just one example of the many DIY car maintenance tasks you can tackle yourself.
Not only can it save you money, but it can also give you a sense of satisfaction and accomplishment. So next time you notice an issue with your car, don’t be afraid to roll up your sleeves and give it a try.
Tools you need
If you’re in a bind and need to fix a cracked coolant reservoir, there are a few tools you’ll need. First, you’ll want to make sure you have a replacement coolant reservoir on hand. You’ll also need a socket wrench set, a torque wrench, and a socket extension bar.
To start, make sure your engine is cool and then disconnect the negative battery cable. Next, remove any components that may be blocking access to the coolant reservoir. Once you have access, use the socket wrench set and the socket extension bar to remove the bolts securing the coolant reservoir.
When you’ve removed the reservoir, inspect the surrounding area for damage and replace any damaged components if necessary. When you install the new reservoir, use a torque wrench and properly tighten the bolts to ensure a proper seal. Refill your coolant and start your engine to verify proper operation.
With the right tools and a little bit of know-how, you can fix a cracked coolant reservoir and keep your engine running smoothly.
Required Materials for Repair
When it comes to repairing things on your own, having the right tools is essential. Whether you’re fixing a piece of furniture, a gadget, or your car, having the right tools can make the process smoother and even save you some money. So, what are the essential tools you need for a repair? For starters, a set of screwdrivers in different sizes would be helpful.
You should also have pliers, wire cutters, a wrench, a hammer, and a measuring tape. These tools will come in handy for various types of repairing tasks. Additionally, depending on the type of repair you’re carrying out, you might need more specialized tools such as a soldering iron or a drill.
Make sure to get high-quality tools that are sturdy and durable. Investing in good tools once can save you money in the long run as they can last for years. Don’t forget that having the right tools will not only make the repair process more effortless but also more enjoyable!
Tools required for Repair
When it comes to repairing anything, the right tools are essential. Without them, you may end up causing more harm than good. Depending on the type of repair you need to do, you may need different tools.
However, some tools are staples in any repairman’s toolbox. These include a set of screwdrivers, pliers, a wrench, a hammer, duct tape, and a flashlight. Depending on the repair, you may also need a multimeter, a heat gun, a soldering iron, or a power drill.
It’s important to remember that investing in quality tools is always worth it, as they will save you time and money in the long run. Additionally, always make sure you have the proper safety gear, such as gloves, goggles, and a dust mask, to protect yourself during repairs. With the right tools and safety precautions, any repair can be a success.
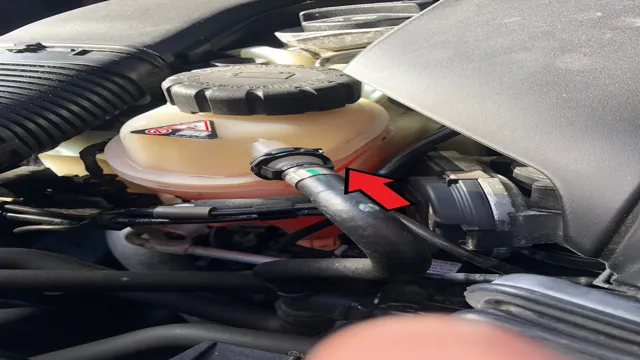
Identify the Cracked Reservoir
If you suspect that your coolant reservoir is cracked or damaged in any way, the first step is to identify the location of the crack. Start by visually inspecting the reservoir for any signs of physical damage or cracks. If you can’t see any visible signs of damage, it may be necessary to pressurize the cooling system and look for leaks.
You can use a pressure tester to pressurize the cooling system, which will make locating the leak much easier. Once you have identified the source of the leak, you can determine whether it is necessary to replace the entire reservoir or if a repair can be made. In most cases, small cracks or leaks can be easily repaired with a silicone sealant or epoxy, but larger or multiple cracks may require replacement of the entire reservoir.
Remember, the coolant reservoir plays a critical role in maintaining the overall health of your engine, so it’s essential to address any damage as quickly as possible to avoid more significant problems down the road.
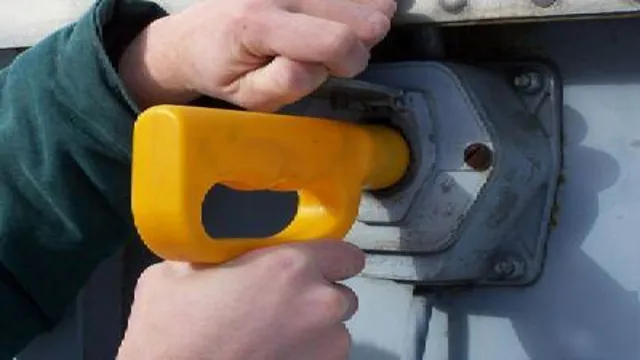
Locate the Reservoir
When it comes to identifying a cracked reservoir in your vehicle, the first step is to locate the reservoir itself. Depending on the make and model of your vehicle, the reservoir can be found in a variety of locations. In most cars, the power steering fluid reservoir is located near the engine and is easily recognized by its small size and black color.
On the other hand, the brake fluid reservoir is usually located near the firewall and is slightly larger in size. Once you’ve located the reservoir, your next step is to identify if it has any cracks. This can be done by visually inspecting the surface of the reservoir for any visible signs of damage.
Cracks can often be difficult to spot, so it’s important to thoroughly examine the entire surface of the reservoir. If you do find any cracks, it’s crucial to have them repaired as soon as possible to avoid any potential safety hazards on the road.
Examine the Damage
When examining the damage in your car’s cooling system, it is important to identify the cracked reservoir. This component plays a crucial role in maintaining the proper level of coolant, and its failure can lead to engine overheating and serious damage. To determine if the reservoir is cracked, start by looking for visible signs of damage, such as cracks or leaks.
If you cannot find any obvious damage, check for changes in the coolant level or signs of air bubbles in the system, which can indicate a crack or leak. Keep in mind that determining the location of the crack may require removing the reservoir for a closer examination. By identifying and addressing a cracked reservoir early on, you can prevent further damage to your car’s cooling system and keep your engine running smoothly.
Preparing for Repair
Fixing a cracked coolant reservoir may seem daunting, but it’s actually quite simple with the right tools and preparation. Firstly, turn off the ignition and let the engine cool down completely before attempting any repairs. Next, locate the coolant reservoir and examine the crack carefully to determine the extent of the damage.
If the crack is small, it may be possible to fix it with sealant or epoxy. However, for larger cracks, replacing the entire reservoir may be necessary. Make sure to consult the vehicle’s manual or a professional mechanic for guidance on the appropriate replacement part and installation procedure.
Once you have the necessary supplies, follow the instructions carefully and double-check all connections and seals before starting the engine again. With patience and attention to detail, you can successfully fix a cracked coolant reservoir and ensure smooth engine performance.
Drain Coolant
When it comes to preparing for a repair on your vehicle, one important step is draining the coolant. Coolant, also known as antifreeze, is essential for regulating the temperature of your engine and preventing it from overheating. However, over time, it can become contaminated, which can lead to ineffective cooling and potential engine damage.
Draining the coolant involves locating the drain plug or valve on your radiator and opening it up to allow the old fluid to flow out. It’s important to make sure the engine is cool before doing this to avoid the risk of being burned by hot coolant. Once the coolant has been drained, it’s time to dispose of it properly and refill with fresh coolant.
This is a crucial step in ensuring your vehicle runs smoothly and efficiently. If you’re not comfortable with draining the coolant yourself, it’s always best to seek the help of a professional mechanic to avoid any mistakes or potential damage to your vehicle.
Clean Damaged Area
When preparing to repair a damaged area, the first step is to clean the area thoroughly to ensure proper adhesion and a smooth finish. Start by removing any debris, dirt, or loose materials using a stiff brush or scraper. If the area is particularly dirty, you may need to wash it with soap and water, then dry it completely before moving on to the next step.
Be sure to wear protective gloves and eyewear to avoid injury, and keep pets and children away from the area. The goal is to create a clean and dust-free surface that is ready for repair. By taking the time to properly clean the damaged area, you can ensure that your repair will have a strong and long-lasting finish.
So, take your time, be thorough, and get ready to make that damaged area look good as new!
Repairing the Reservoir
Repairing a cracked coolant reservoir can be a daunting task, but it is not impossible. The first step is to identify the location of the crack on the reservoir. Once you have located the crack, clean the area around it thoroughly using a rag and some brake cleaner.
Next, use a plastic welding kit to weld the crack back together. If the crack is too large, you may need to replace the entire coolant reservoir. It is essential to ensure that the new reservoir is the same size and shape as the old one.
Additionally, you may want to consider using a sealant to prevent any leaks in the future. After replacing the reservoir, test the coolant system for any leaks, and refill the reservoir with coolant. It is important to note that if the coolant reservoir is beyond repair, it must be replaced immediately, as a leak can cause severe engine damage.
Epoxy Adhesive Repair
Epoxy adhesive repair is an effective solution for fixing cracks and leaks in reservoirs. If you’re facing this issue, there’s no need to panic. First, you need to identify the location of the damage.
It’s recommended that you clean the area thoroughly before beginning the repair. Once the surface is clean and dry, apply the epoxy adhesive, making sure to coat the damaged area evenly. Allow the adhesive to cure for the recommended amount of time before testing the repair.
Epoxy adhesive is a strong and durable compound that can withstand exposure to water and harsh weather conditions. Therefore, you can be confident that your repair will last for a long time. Always make sure to follow the instructions provided with the product to ensure the best results.
Don’t let a damaged reservoir cause havoc in your life – give epoxy adhesive repair a try and fix the problem for good!
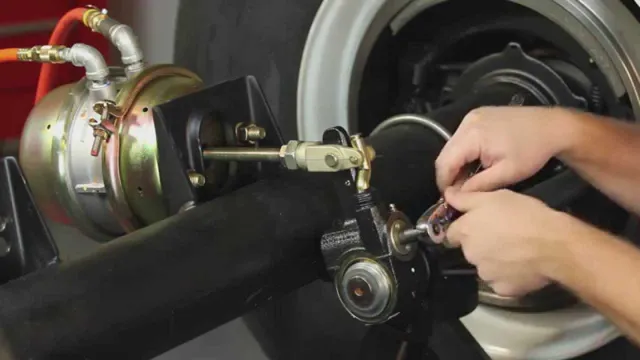
Welding Repair
If you are facing issues with your water reservoir, welding repair could be the solution you need. Damage to a reservoir can lead to leaks and water loss, which can be detrimental to your water supply. A skilled welder can restore your reservoir, ensuring it is structurally sound and your water is contained.
Welding repair involves fusing metals together, which requires expertise to ensure the weld is strong and there are no further leaks. Think of it like repairing a leaking bucket, but instead of patching the hole, the damaged area is cut out and a new piece is welded in. This process is especially crucial for large reservoirs, as they must be able to withstand the weight of the water and any environmental factors.
By utilizing welding repair, you can extend the life of your reservoir and ensure a constant supply of water for your needs.
Plastic Welding Repair
Plastic welding repair is a quick and easy solution for fixing cracks and leaks in plastic reservoirs. If you have a broken plastic reservoir that needs fixing, plastic welding repair can be the perfect solution. By melting and fusing the plastic back together, you can fix the crack or hole in your reservoir and get it back in working order.
Plastic welding repair can be done with a variety of tools, including heat guns, soldering irons, and specially designed plastic welders. With the right equipment and a bit of know-how, you can easily complete a plastic welding repair on your own. So don’t despair if you have a broken plastic reservoir – with plastic welding repair, you can fix it up and get back to using it as good as new!
Reassembling the Reservoir
If you’ve found yourself with a cracked coolant reservoir, don’t panic! With a bit of know-how and some tools, you can fix it yourself. The first step is to locate the crack and clean the area thoroughly. Then, apply a sealant specifically designed for plastic automotive parts such as a two-part epoxy or plastic welding kit.
Allow ample time for the sealant to dry or cure. Once it’s dry, reattach the reservoir to the vehicle and refill it with coolant. Be sure to check for leaks or other damage before driving your vehicle.
If you’re unsure about tackling this repair on your own, it’s always best to consult with a mechanic or professional before attempting it. With the right tools and a little education, you’ll have your coolant reservoir working like new again in no time!
Refill the Coolant
Once you’ve cleaned out your coolant reservoir, it’s time to put it back together and refill it with coolant. Start by reassembling the reservoir. If you removed the filter, put it back in place.
Then, attach the reservoir cap and tighten it securely. You’ll need to locate the radiator hose and open the valve to allow coolant to enter the system. Pour new coolant into the reservoir until it reaches the appropriate level, as indicated by the markings on the reservoir.
Be sure to use the correct type of coolant for your vehicle, as mismatched coolant can cause serious damage to your engine. Once you’ve refilled the reservoir, close the valve and top off the coolant as necessary. Keep an eye on the coolant level for the next few days to check for any leaks or issues.
With these steps complete, you can feel confident that your engine will stay cool and running smoothly.
Pressure Test
After successfully disassembling the reservoir for cleaning, the next step is reassembling it to safely contain and test the pressure of the fluid. But before beginning the reassembly process, it is crucial to make sure that all the components are free from dirt and debris. Once the parts are clean and dry, start with attaching the O-ring to the lid of the reservoir then place it on top of the tower.
Tighten the bolts securely using a torque wrench, but do not overtighten them. This will ensure that there are no leaks and the pressure test will be successful. As an analogy, reassembling the reservoir is like putting together a puzzle.
Each piece needs to be correctly placed, and if one is missing or not in the correct spot, the whole structure will not be complete. By taking your time and following each step carefully, the pressure test will be a success and your equipment will be ready for use.
Conclusion
So there you have it, folks! Fixing a cracked coolant reservoir may seem like a daunting task, but it can be easily done with the help of some basic tools, a little DIY know-how, and a dose of creativity. Whether you prefer to patch it up or opt for a replacement, always remember that prevention is key. Regular maintenance checks and avoiding extreme temperature changes can go a long way in keeping your engine running smoothly.
But if the worst does happen and your reservoir cracks, fear not! With these simple fixes, you’ll be back on the road in no time, ready to outwit even the toughest of driving conditions!”
FAQs
What causes a coolant reservoir to crack?
Coolant reservoirs can crack due to several reasons such as overheating, prolonged exposure to extreme temperatures, physical impact or damage, and material degradation over time.
Can I still drive with a cracked coolant reservoir?
It is not recommended to drive with a cracked coolant reservoir as it can lead to coolant leaks, engine overheating, and other serious issues. It is best to get the reservoir fixed or replaced as soon as possible.
How much does it cost to fix a cracked coolant reservoir?
The cost to fix a cracked coolant reservoir can vary depending on the make and model of your vehicle and the severity of the damage. Generally, it can cost anywhere from $50 to $300 for the repair or replacement of a coolant reservoir.
Can I repair a cracked coolant reservoir myself?
While it is possible to repair a cracked coolant reservoir yourself, it is not advised unless you have the necessary skills and experience. It is best to take your vehicle to a professional mechanic who can assess the damage and recommend the appropriate repairs.