Say Goodbye to AC Hassles: Learn How to Fix a Clogged Orifice Tube Like a Pro!
Have you noticed that your car’s air conditioning is not working as efficiently as it used to? It could be an issue with the orifice tube. The orifice tube is an essential component of your car’s AC system that controls the flow of refrigerant into the system. Over time, it can become clogged with debris, reducing the flow of refrigerant and causing your AC to blow warm air.
Fixing a clogged orifice tube can be a simple task for those with some experience in car maintenance. However, for those who have never done it before, it can seem like a complex and daunting task. But don’t worry – we’re here to help you understand the process and get your AC working like new again.
In this blog post, we’ll walk you through the steps involved in fixing a clogged orifice tube. We’ll cover everything from identifying the problem to removing and replacing the orifice tube. By the end of this post, you’ll feel confident in your ability to tackle this task on your own.
So, sit back, grab a cup of coffee, and let’s dive into the world of fixing a clogged orifice tube.
Diagnosing the Problem
If your car’s air conditioner isn’t blowing cold air, a clogged orifice tube could be the culprit. The orifice tube is a small, metering device located in the A/C system that controls the flow of refrigerant. Over time, debris and moisture can accumulate and clog the tube, causing a restriction in the system’s flow and ultimately leading to reduced cooling performance.
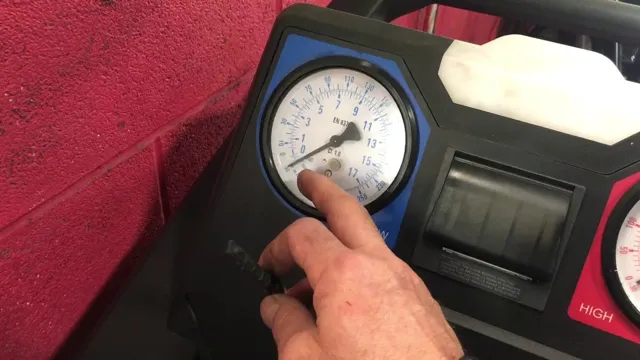
One way to diagnose a clogged orifice tube is to use a pressure gauge to measure the pressure on both sides of the tube. If the pressure difference is greater than normal, then it’s likely that the tube is clogged. To fix the problem, the orifice tube needs to be removed and replaced with a new one.
It’s essential to ensure that all debris and moisture in the system are removed before installing the new tube to prevent future clogs. A professional mechanic can help with this process, but it’s also possible to do it yourself with the right tools and knowledge. Remember, proper maintenance is crucial for keeping your car’s A/C system functioning correctly.
Symptoms of a Clogged Orifice Tube
If you’re experiencing reduced cooling power in your vehicle’s air conditioning system, it’s possible that a clogged orifice tube may be the culprit. This small component is responsible for regulating the flow of refrigerant through the system, ensuring that it reaches the evaporator at the right pressure and temperature. However, if it becomes clogged with debris or fails due to normal wear and tear, the system won’t function as intended.
Symptoms of a clogged orifice tube may include warm air coming from your vents, diminished air flow, and odd noises from your A/C system. If you suspect a problem with your orifice tube, it’s best to have your vehicle inspected by a qualified mechanic who can diagnose the issue and recommend the appropriate repairs.
Checking the Orifice Tube
Diagnosing the problem with your car’s air conditioning system can be a frustrating experience. One potential culprit for poor cooling performance could be a clogged or malfunctioning orifice tube. This component regulates the flow of refrigerant, so if it becomes restricted or blocked, it can severely impede the system’s efficiency.
One sign that the orifice tube may be the issue is if the air conditioning blows cool at low speeds but not at high speeds. To check the orifice tube, the technician will need to locate its position in the refrigerant line, remove it, and inspect it for any blockages or debris. If necessary, they can replace it with a new one and recharge the system.
Proper maintenance of the orifice tube can help prevent more costly repairs down the line and keep your car’s air conditioning running smoothly.
Removing the Orifice Tube
If you’ve experienced a decrease in your vehicle’s AC performance, a clogged orifice tube might be the culprit. The orifice tube is a small component of your vehicle’s AC system that controls the flow of refrigerant and can become clogged with debris or metallic shavings over time. Thankfully, replacing the orifice tube is a relatively simple process that can be performed at home.
Begin by locating the evaporator outlet and the AC accumulator. Disconnect the evaporator outlet and remove the connection from the orifice tube. Remove the orifice tube using a small pair of pliers or a similar tool.
Before installing a new orifice tube, be sure to flush the AC system to remove any debris that may have caused the original clog. Overall, taking the time to replace a clogged orifice tube can greatly improve your AC’s overall performance and help keep you cool during the hot summer months.
Tools Required
If you’re planning to remove the orifice tube from your car, there are several tools you’ll need to have on hand. Firstly, you’ll need a pair of safety glasses to protect your eyes during the process. Additionally, you’ll need a set of wrenches, including a 5/8 inch wrench, to disconnect the AC line from the compressor.
You’ll also need a pair of needle-nose pliers to remove the orifice tube from the AC line once it’s been disconnected. It’s important to have the right tools handy to ensure a smooth and safe removal process. Without the proper equipment, you risk damaging your car’s AC system or injuring yourself in the process.
Take the time to gather the necessary items before you begin, and always exercise caution when working with vehicle components.
Step-by-Step Instructions
Removing the orifice tube from your vehicle’s air conditioning system may seem like a daunting task, but with the right tools and step-by-step instructions, it can be done easily. First, locate the orifice tube; it is usually located in the high-pressure liquid line near the firewall. Next, remove the line by using a wrench or pliers to loosen the fitting where it connects to the evaporator.
Once the line is removed, use an orifice tube removal tool to extract the orifice tube from the line. Be sure to save the old orifice tube so you can replace it with a new one later. Installing the new orifice tube is simply the reverse of the removal process.
Remember to add a small amount of refrigerant oil to the new orifice tube before installing it. This will help to lubricate the system and prevent damage. By following these simple steps, you can remove and replace the orifice tube in your vehicle’s air conditioning system without a fuss!
Cleaning the Orifice Tube
If you’re experiencing AC problems and have isolated the issue to a clogged orifice tube, cleaning it can be a simple and cost-effective fix. The orifice tube is a small part located in the AC system that regulates the flow of refrigerant. When it becomes clogged with debris or dirt, it can cause a disruption in the flow, leading to inadequate cooling or even system failure.
To clean the orifice tube, you’ll need to first remove it from the system. Using a specialized cleaner or solvent, flush the tube to remove any buildup and debris. Once clean, reinstall it into the AC system.
By addressing a clogged orifice tube proactively, you can avoid expensive repairs down the line and keep your AC system running smoothly.
Tools Required
When it comes to cleaning the orifice tube of your vehicle’s air conditioning system, you’ll need a few tools to get the job done properly. First and foremost, you’ll need safety goggles to protect your eyes from any debris that may be dislodged during the cleaning process. You’ll also need a small screwdriver to remove the orifice tube, a rag to clean the surrounding area, and an aerosol can of pressurized air to blow out any debris that may have accumulated in the tube.
It’s essential to use high-quality tools to prevent damage to the orifice tube and ensure that it functions properly after cleaning. By taking the time to gather the right tools beforehand, you’ll be able to clean your vehicle’s orifice tube with ease and peace of mind.
Step-by-Step Instructions
When it comes to maintaining your car’s air conditioning system, cleaning the orifice tube is an important step that shouldn’t be skipped. The orifice tube helps regulate the flow of refrigerant and can become clogged over time, reducing the efficiency of your A/C. First, locate the orifice tube, which can typically be found near the evaporator coil or the high-pressure line.
Remove the orifice tube carefully, making sure not to damage it. Next, use a can of compressed air to blow out any debris or buildup that has accumulated on the inside of the tube. Alternatively, you can soak the tube in a cleaning solution to help break up any stubborn blockages.
Once you’ve thoroughly cleaned the tube, reinsert it back into its original position and test your A/C. Regularly cleaning the orifice tube will ensure that your car’s A/C system operates at peak performance and provides you with cool, refreshing air all summer long.
Reinstalling the Orifice Tube
If you’re dealing with a clogged orifice tube, you’re likely experiencing a myriad of issues with your AC system. Fortunately, fixing this issue isn’t too difficult. Once you’ve located and removed the clogged orifice tube, the next step is to reinstall a new one.
Before doing so, it’s important to ensure that any debris or contaminants have been fully flushed out of the system. Once you’re certain that the system is clean, you can go ahead and install the new orifice tube. This involves properly aligning the tube with the system, and then securing it in place with the retaining clip.
Be sure to consult the manufacturer’s instructions for specific details on the installation process. Once you’ve got everything installed, go ahead and reassemble the system, and test it out. With any luck, you’ll now have an AC system that’s functioning like new once again, and you can put the issue of the clogged orifice tube behind you for good.
Tools Required
When it comes to reinstalling the orifice tube in your AC system, you’ll need a few essential tools. Firstly, you’ll need a set of pliers to remove the old orifice tube and insert the new one. Additionally, you’ll require a proper lubricant to ensure a smooth installation and prevent any damages to the new part.
A UV light, also known as a black light, will prove helpful in finding any leaks in the AC system so that you can fix them while you’re at it. A deep socket set with various sizes is also necessary to get to all the bolts and screws in tight spaces. You might also need a couple of wrenches and a vacuum pump to remove any moisture in the system.
Remember to keep all the new parts clean and free of debris before inserting them to ensure the smooth running of your AC unit. With these tools in your arsenal, you’re ready to undertake this job and bring back the chill in your car’s AC.
Step-by-Step Instructions
If you are experiencing issues with your vehicle’s air conditioning, the orifice tube might be the culprit. Reinstalling the orifice tube is a relatively simple process, but it requires attention to detail and patience. The first step is to locate the orifice tube within the system – it’s usually located near the condenser or evaporator.
Once you’ve located it, you need to carefully remove the tube using a pair of pliers or a removal tool. Be sure to inspect the tube for any damage or debris before installing the new one. To reinstall the orifice tube, apply a small amount of lubricant to the O-rings on the tube and gently insert it into the opening.
Double-check that it is properly seated and secure before reassembling the system. With patience and attention to detail, reinstalling the orifice tube will get your vehicle’s air conditioning system up and running once again.
Conclusion
When faced with the frustratingly clogged orifice tube, fear not! With a few simple steps and a little elbow grease, you can fix the blockage and restore your air conditioning to its former glory. And if all else fails, just remember the wise words of our HVAC ancestors: when in doubt, tap it out!”
FAQs
What causes an orifice tube to become clogged?
An orifice tube can become clogged due to debris or contaminants in the AC system, such as metal shavings or moisture.
How do I know if my orifice tube is clogged?
Common signs of a clogged orifice tube include reduced cooling performance, high pressure readings on the AC gauge, and frost buildup on the AC evaporator.
Can a clogged orifice tube be cleaned or must it be replaced?
In most cases, a clogged orifice tube must be replaced rather than cleaned. Attempting to clean it can cause further damage to the AC system.
How do I replace a clogged orifice tube?
The process of replacing a clogged orifice tube involves evacuating the AC system, removing the old orifice tube, installing the new one, and recharging the AC system with refrigerant. It is recommended to have a professional mechanic perform this task for best results.