Silence the Alarm: A Step-by-Step Guide to Disabling Your Low Oil Pressure Chime
Are you tired of the annoying chime that alerts you about low oil pressure in your car? It can be quite frustrating, especially when everything seems to be perfectly fine with your vehicle. But don’t worry, you’re not alone in this situation, as many drivers also encounter this issue and want to know how to disable it. In this step-by-step guide, we’ll show you how to do it yourself and get rid of that pesky chime once and for all.
Think of it as silencing the annoying alarm clock that goes off too early in the morning. So, let’s get started and see how you can have a peaceful ride without the low oil pressure chime intruding.
Introduction
Many drivers find the low oil pressure chime to be an annoying feature on their vehicle. Fortunately, it is possible to disable this function with a few simple steps. Firstly, consult your vehicle’s manual to understand how to access the warning settings.
Next, locate the specific setting for the low oil pressure chime and disable this function. It is important to note that while disabling this warning sound may provide a more peaceful driving experience, it is essential to still regularly monitor your vehicle’s oil levels to prevent damage to the engine. By following these steps, you can successfully disable the low oil pressure chime and enjoy a quieter ride.
Understanding Why You May Want to Disable the Low Oil Pressure Chime
Have you ever found the low oil pressure chime in your car annoying? If so, you’re not alone. While this warning signal is meant to alert you to potential engine problems, it can also be a source of frustration for some drivers. If you’re wondering why you might want to disable this feature, there are a few potential reasons.
For one, if you have a car that tends to have lower oil pressure, you might get false alarms that can distract you from driving. Additionally, if you’re someone who is well-versed in car maintenance and knows how to keep an eye on oil levels, you might not need the chime at all. Whether you’re looking to disable this feature for convenience or just to reduce unnecessary noise in your car, it’s important to do so safely and responsibly.

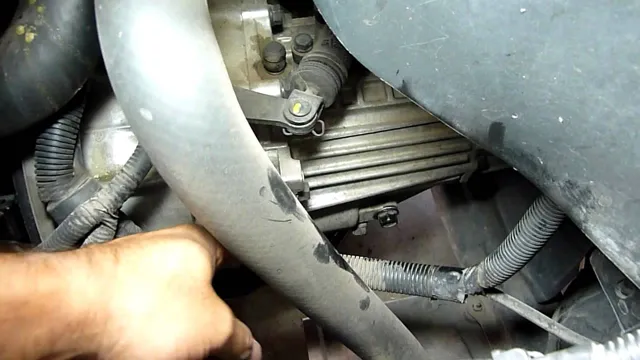
Step 1: Locate the Fuse Box
If you’re tired of the low oil pressure chime constantly beeping every time you start your car, the first step to disabling it is to locate the fuse box. This is usually located under the dashboard on the driver’s side or in the engine compartment. Once you’ve located it, you’ll need to find the fuse that controls the chime.
Check your car’s owner manual or the fuse box cover to identify the correct one. Then, simply remove the fuse to disable the chime. Keep in mind that this will also disable other sounds or alerts that may be controlled by the same fuse, so be sure to double-check that it’s only the low oil pressure chime that you want to turn off.
With this simple step, you can enjoy a quieter ride without the annoying chime reminding you to check the oil pressure.
Finding the Fuse Box on Your Vehicle
The first step in finding the fuse box on your vehicle is to locate it. Typically, most cars will have a fuse box located under the dashboard near the driver’s side. Some vehicles may also have an additional fuse box located under the hood near the engine.
To locate the fuse box, begin by examining your car’s owner’s manual. It should have a diagram that shows the fuse box’s location and which fuses are located inside. Another way to locate the fuse box is by simply looking for a rectangular box with a removable lid and a series of small fuses inside.
Remember to always consult your owner’s manual before attempting to replace a fuse, as there may be specific procedures to follow. With a little investigative work, locating the fuse box on your vehicle should be a breeze!
Step 2: Locate the Oil Pressure Sensor Fuse
Once you’ve found the oil pressure sensor in step one, the next step in disabling the low oil pressure chime is locating the oil pressure sensor fuse. This fuse is often located in the engine compartment fuse box, which can typically be found near the battery or the firewall. However, it’s important to consult your vehicle’s owner manual to ensure that you locate the fuse correctly and prevent any damage to your car’s electrical system.
Once you’ve located the fuse, consult the owner’s manual to determine which fuse controls the oil pressure sensor. Use a fuse puller or a set of pliers to remove the fuse and disable the chime system. However, keep in mind that disabling this alarm can be dangerous, so make sure to regularly monitor your oil levels and have your car serviced as needed.
Identifying the Oil Pressure Sensor Fuse in Your Fuse Box
When looking for the oil pressure sensor fuse in your fuse box, it’s crucial to know how to identify it. The oil pressure sensor fuse can be found in different locations, depending on your vehicle’s make and model. To locate it, you need to know what the fuse looks like and its location in the fuse box.
Typically, it’s a small, rectangular-shaped fuse that’s either red or black. Once you’ve identified the fuse, examine the legend or diagram on the fuse box’s cover to determine where the oil pressure sensor fuse is located. The legend or diagram usually indicates the circuit’s name, so you can easily find the oil pressure sensor fuse among the various circuits in the fuse box.
If you’re having difficulty locating the fuse, consult your vehicle’s user manual or ask for assistance from a mechanic. Remember that the oil pressure sensor fuse is the component that ensures proper oil pressure management in your engine. So, it’s imperative to locate and check the fuse regularly to keep your engine running smoothly.
Step 3: Remove the Fuse
If you’re tired of hearing the low oil pressure chime every time you start your car, you can disable it by removing the fuse. The fuse box can usually be found under the dashboard or in the engine compartment. Look for the fuse that is associated with the chime, which may be labeled as “Low Oil Pressure” or “Oil Pressure Sensor.
” Once you locate it, gently pull it out. However, keep in mind that removing the fuse will disable the chime completely, which means that you won’t be alerted when your oil pressure is actually low. So, make sure to keep an eye on your oil levels and regularly check your engine for any signs of damage or issues.
Overall, disabling the low oil pressure chime is a simple task that requires a bit of caution and responsibility on your end.
How to Safely Remove the Oil Pressure Sensor Fuse
Now that you have located the oil pressure sensor fuse, it’s time to remove it safely. To do this, you will need a pair of pliers or a fuse puller tool. Before touching the fuse, you must first turn off the engine and remove the key from the ignition.
This will prevent any accidental electrical shocks or damage to the fuse. Once the engine is off, use your pliers or fuse puller tool to gently grab the fuse and pull it straight out of the holder. Be careful not to twist or bend the fuse as this can damage it and make it difficult to replace.
It’s essential to handle the fuse with care as it is a delicate component that is susceptible to damage. With the oil pressure sensor fuse now removed, you can move on to the next step in resolving your oil pressure issue. Remember to handle fuses with care to prevent any unnecessary damage.
Step 4: Test Your Vehicle
So, you’ve completed the process of disabling your low oil pressure chime, but before you hit the road, it’s important to test your vehicle. Start by checking the oil pressure gauge and ensuring that it reads within the manufacturer’s recommended range. Then, start your engine and listen for any unusual noises or vibrations.
Take your car for a short drive to see how it handles and make sure there are no leaks or issues with the oil pressure. It’s crucial to regularly monitor your oil levels and pressure, as neglecting these can lead to severe engine damage. Now that you’ve taken the necessary precautions, you can enjoy a more peaceful drive without the constant nagging of the low oil pressure chime.
Remember, a well-maintained vehicle is a safer and more reliable vehicle.
Starting Your Vehicle to Confirm That the Low Oil Pressure Chime Has Been Disabled
When it comes to disabling the low oil pressure chime in your vehicle, it’s always important to test your vehicle and make sure it’s functioning properly. Step 4 in the process is to start your vehicle and confirm that the low oil pressure chime has been disabled. This step may seem obvious, but it’s crucial to ensure that the modification was done correctly and your vehicle is safe to drive.
After starting your vehicle, pay attention to any warning lights or strange noises that may indicate an issue with your oil pressure. If you don’t notice any problems, you can rest assured that disabling the chime was successful. Remember, it’s always better to be safe than sorry when it comes to your vehicle.
Taking the time to properly test your vehicle can prevent potential hazards down the road. So go ahead, start your engine and enjoy the peace and quiet of a car without a persistent low oil pressure chime.
Conclusion
Congratulations, my dear friend. You have successfully learned how to silence the pesky low oil pressure chime. No longer will you be tormented by its incessant beeping.
With this newfound knowledge and a trusty pair of wire cutters, you can now live in peace and quiet, cruising down the road without a care in the world. Just remember to keep an eye on your oil levels, lest you want to be reminded with that dreaded chime once again. Happy driving!”
Keep Your Vehicle Running Smoothly Without the Low Oil Pressure Chime
Now that you’ve gone through the steps to keep your vehicle running smoothly without the low oil pressure chime, it’s time to put it to the test. Before you hit the road, start your vehicle and listen for any abnormal noises. If everything sounds good, take your car on a short trip around the block and pay close attention to how it feels.
Does it accelerate smoothly? Are there any sudden jolts or jerks? If everything seems fine, take your vehicle for a longer drive, but be sure to stay alert and focused. Remember, just because you’ve taken these steps doesn’t mean your car is invincible. Regular maintenance is still crucial to keeping your vehicle in tip-top shape.
So if you start to notice anything unusual, don’t hesitate to take your car in to get checked out by a professional. Being proactive about your car’s health will save you time and money in the long run, and help ensure that you can keep cruising down the road with confidence.
FAQs
What causes the low oil pressure chime to activate?
The low oil pressure chime activates when the oil pressure in your engine drops below a certain level, which can be caused by a variety of factors, including low oil level, a malfunctioning oil pump, or a clogged oil filter.
Can the low oil pressure chime be disabled permanently?
Yes, you can disable the low oil pressure chime permanently by disconnecting the wire that leads to the oil pressure switch. However, we strongly recommend against doing this, as it can prevent you from being alerted to a potentially serious problem with your engine.
How can I temporarily disable the low oil pressure chime?
To temporarily disable the low oil pressure chime, you can remove the fuse that controls the chime. This will silence the chime but still allow other warning signals to operate.
Is it safe to drive my vehicle if the low oil pressure chime is activated?
It is not safe to drive your vehicle if the low oil pressure chime is activated, as this indicates a serious issue with your engine that could cause significant damage if left unaddressed. It is best to pull over to a safe location and check your oil level or have your vehicle towed to a mechanic for inspection.