Pro Tips for Efficiently Cleaning Your Oil Cooler Radiator: Enhance Your Vehicle’s Performance Today!
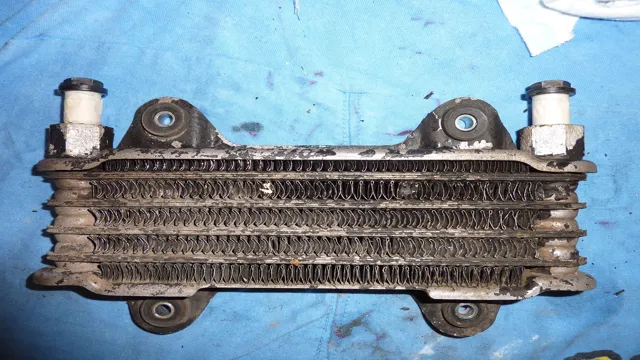
If you own a vehicle or heavy machinery, you know that the oil cooler radiator is an important component to keeping your engine from overheating. It’s a separate small radiator that sits in the coolant system and allows the engine oil to dissipate heat while cooling it down. Over time, the oil cooler radiator can accumulate dirt, debris, and other contaminants which can cause corrosion or even block the radiator’s fins.
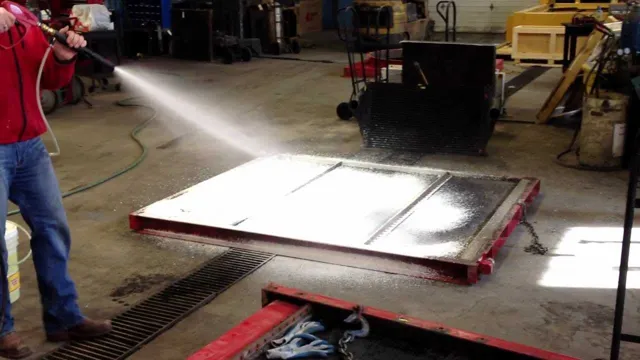
This can lead to engine damage or even failure. So, how can you clean your oil cooler radiator? First, it’s important to note that cleaning the oil cooler radiator can be a time-consuming process, but it’s a necessary one. The easiest way to clean the oil cooler radiator is to use a pressure washer or a high-pressure air hose.
This will allow you to remove any loose dirt or debris that has accumulated on the fins. If you use a pressure washer, be sure to keep the pressure low to avoid damaging the fins. After removing the loose debris, you can use a degreaser to clean the oil cooler radiator thoroughly.
Be sure to follow the instructions on the degreaser as some products may require the radiator to be rinsed with water afterward. Finally, use a soft bristle brush to remove any remaining dirt or debris from the fins. Cleaning your oil cooler radiator is essential to ensure the longevity of your engine and to prevent any major malfunctions.
If you’re unsure about how to clean your oil cooler radiator, it’s always recommended to consult with a professional mechanic to avoid causing damage to your vehicle.
What You Will Need:
If you’re wondering how to clean your oil cooler radiator, you’ve come to the right place. Cleaning your oil cooler radiator is crucial to keep it working efficiently and to prevent any damage to your engine. Here’s what you will need to get started: Firstly, you’ll need a degreaser or a specialized cleaner for oil coolers.
These can be found at your local auto parts store or online. Secondly, you’ll need a hose for flushing out the radiator, gloves to protect your hands and safety glasses to protect your eyes. Lastly, you’ll need a bucket or a pan to collect the old coolant and debris.
Before starting the cleaning process, make sure that the engine is cool. Begin by removing the oil cooler from your vehicle. Disconnect the hoses that are connected to the cooler, and take off the cooler from its mounting brackets.
Once removed, place the cooler on a flat surface. Next, apply the degreaser or specialized cleaner to the radiator’s exterior and interior, and let it sit for a few minutes. Scrub the radiator with a soft-bristled brush, making sure to clean the fins and all crevices thoroughly.
Rinse the radiator with the hose until all the cleaner and debris have been removed. Now, gently shake the radiator to remove any excess water, and let it dry completely before reinstalling it back into your vehicle. Once you’ve reconnected the hoses, refill the radiator with new coolant, and check for any leaks.
In conclusion, cleaning your oil cooler radiator is a simple and crucial task that should not be overlooked. With the right tools and steps, you can keep your engine running smoothly and avoid any costly repairs.
Rags or towels
When it comes to cleaning surfaces around your home, rags or towels are essential items that can get the job done. However, choosing between them depends on the type of cleaning and the surface you want to clean. If you are looking to clean delicate surfaces such as glass or mirrors, a microfiber cloth is ideal because it is soft, non-abrasive, and does not leave streaks or scratches.
For tougher cleaning tasks like wiping down kitchen counters or scrubbing bathroom tiles, cotton rags are perfect because they are absorbent and can withstand repeated washing. To ensure that the rags or towels you use are effective, it is important to choose the right size and texture. For example, large rags are suited for general cleaning tasks while smaller ones can be used for more precise cleaning.
Additionally, soft towels are perfect for wiping off dust and dirt while rough ones are better for removing tough stains and grime. One thing to keep in mind is hygiene. Avoid using the same rag or towel for different cleaning tasks, as this can transfer germs or bacteria from one surface to another.
To prevent this, designate specific rags or towels for specific cleaning tasks or surfaces. Additionally, wash your rags or towels regularly with warm water and detergent to keep them clean and fresh. In conclusion, rags or towels are versatile cleaning tools that can be used to keep your home free of dust, dirt, and grime.
Choosing the right one depends on the surface or task at hand, but always remember to keep them clean and hygienic for optimal performance.
Degreaser or oil cleaner
When it comes to bike maintenance, one of the most essential tasks is cleaning the chain. To do this, you will need either a degreaser or oil cleaner. So which one should you choose? It ultimately depends on your personal preference and the type of chain you have.
If your bike chain is heavily soiled with dirt and grime, a degreaser is the way to go. This powerful cleaner is specially designed to cut through tough grease, oil, and dirt, leaving your chain looking brand new. However, be mindful that some degreasers can be harsh on certain materials, such as aluminum or carbon fiber.
Before applying any degreaser, be sure to check the label to see if it’s safe for your bike’s materials. Alternatively, if your chain is only mildly dirty, an oil cleaner may be sufficient. This type of cleaner is designed to remove light to moderate debris from your chain while leaving behind a light coating of oil.
Not only will this help protect your chain from further damage, but it will also ensure that it runs smoothly and quietly. In the end, both degreasers and oil cleaners have their benefits. If your chain is really dirty, a degreaser is your best bet.
If your chain just needs a little touch-up, an oil cleaner will do the trick. Just be sure to follow the instructions carefully and always choose a product that’s safe for your bike’s materials. With the right cleaner, your bike’s chain will look and perform better than ever before.
Garden hose or pressure washer
When it comes to cleaning outdoor surfaces, a common question that arises is whether to use a garden hose or a pressure washer. Both tools have their own advantages and disadvantages, and it ultimately depends on the task at hand. For light cleaning, such as rinsing off patio furniture or washing a car, a garden hose with a spray nozzle attachment will suffice.
It’s also a more economical option since it doesn’t require a large upfront investment and uses less water than a pressure washer. However, for tougher cleaning jobs, a pressure washer is the way to go. It has the power to blast away dirt, grime, and stains on surfaces like driveways, sidewalks, and decks.
A pressure washer is also more time-efficient since it can clean larger areas in a shorter amount of time. One thing to keep in mind is to use a pressure washer with caution. The high pressure can cause damage to surfaces like wood or paint if not used properly.
It’s important to follow the manufacturer’s instructions and start with a lower pressure setting before gradually increasing it as needed. In conclusion, while both a garden hose and pressure washer have their own benefits, it really depends on the cleaning job that needs to be done. For lighter tasks, a garden hose will work just fine, but for tougher jobs, a pressure washer is the better option.
Just remember to use caution and follow the instructions when using a pressure washer to avoid any damage.
Step-by-Step Guide:
Cleaning your oil cooler radiator is an important maintenance task to ensure optimum performance of your vehicle. Here is a step-by-step guide on how to do it. First, remove the oil cooler radiator from your vehicle and place it on a flat surface.
Then, use a cloth or paper towel to wipe away any loose debris or dirt from the outside of the radiator. Next, use a spray bottle filled with a mixture of water and degreaser to thoroughly clean the fins and other areas of the radiator. Let the degreaser soak in for a few minutes before using a soft-bristled brush to gently scrub away any stubborn grime or dirt.
Rinse the radiator with a hose or pressure washer, being careful not to damage the fins. Once it’s clean, let the radiator dry completely before reinstalling it in your vehicle. Regularly cleaning your oil cooler radiator is an easy way to prolong the life of your engine and keep it running smoothly.
Step 1: Remove the Radiator
Removing a radiator may seem like a daunting task, but with the right tools and a little bit of know-how, it can be done relatively quickly and easily. The first step in the process is to turn off the power to your heating system and drain the water from the pipes. Once that’s done, you can start removing the radiator itself.
First, use a wrench to loosen the nuts on the valves that connect the radiator to the pipes. Place a bucket or tray underneath the valves to catch any water that may spill out. Then, use a radiator key to loosen the bleed valve at the top of the radiator to release any remaining water.
After that, you can use a spanner to unscrew the brackets attaching the radiator to the wall and carefully lift it off the brackets. Don’t forget to tilt it slightly to drain any remaining water before you move it. With the radiator safely removed, you can now move on to the next step in your heating system maintenance or replacement.
Step 2: Apply Degreaser
After properly preparing the bike for cleaning, the next step is to apply a degreaser. This is an essential step in removing all the gunk and grime that has built up on the chain and other components. When selecting a degreaser, ensure it’s formulated for bikes and eco-friendly, as it’s better for both your bike and the environment.
Begin by applying a generous amount of the degreaser to the chain, cogs, and derailleurs, making sure to cover all the components thoroughly. Allow the degreaser to sit for a few minutes to penetrate the buildup, and then use a stiff brush to scrub off all the dirt. For better results, it’s recommended to use a chain cleaner tool that helps to clean the chain’s teeth and the cogs more efficiently.
Once everything is scrubbed, rinse off the degreaser and dirt with clean water, and the bike will look brand new again. Remember to apply lubricant to the chain after cleaning to make it run smoothly.
Step 3: Scrub the Fins
Now it’s time to move on to step three: scrubbing the fins. This step is crucial in keeping your air conditioner running smoothly and efficiently. Over time, the fins can become clogged with dirt, dust, and debris, which can prevent proper airflow and reduce the unit’s efficiency.
To start, turn off the power to your AC unit. Then, using a soft-bristle brush, gently scrub the fins in an up-and-down motion to remove any buildup. Avoid using a power washer or anything that could damage the fins.
It’s also important to not bend the fins, as this could further impede airflow. Take your time with this step and be thorough in your cleaning. Once you’ve finished scrubbing, use a hose to rinse off the fins and any remaining debris.
With this step complete, your AC unit should be running like new again!
Step 4: Rinse with Water
After scrubbing and cleaning your face thoroughly with your preferred cleanser, it’s vital to rinse it off with water. It would be best if you used warm water to ensure all the remaining products are washed away. Splashing your face with water can be equally effective as using a water-filled sink.
Also, gently splash the water onto your face until all the cleanser is off, ensuring it doesn’t leave any residue that can cause skin irritation. Once finished, ensure you gently pat your face dry with a clean towel, so you don’t irritate your skin. Remember, overwashing or using too hot or cold water can also damage your skin, leading to dryness or excessive oil production that can lead to breakouts.
Therefore, it’s essential always to rinse your face with warm water, ensuring it’s never too hot or too cold for the skin to tolerate. Following these simple steps is key to maintaining healthy, glowing skin for many years to come.
Step 5: Reinstall the Radiator
Reinstalling the radiator is the final step in fixing your car’s overheating problem. To reinstall the radiator, you need to follow a step-by-step procedure. First, you need to align the radiator with the mounting brackets and slide it into place.
After that, reconnect the upper and lower radiator hoses and any electrical connections. Then, reattach the transmission cooler lines and add a radiator flush solution. Lastly, fill the radiator with coolant and test the car’s engine for leaks.
Make sure you use the correct type of coolant and consult your car manual for the right amount. Reinstalling the radiator can be a challenging task, but it’s doable with the right tools and knowledge. By following these steps, you can efficiently complete the process and enjoy a fully functioning cooling system in your car.
Tips and Precautions:
If you have an oil cooler radiator, it’s important to keep it clean and functioning properly. First, make sure the engine is off and the oil cooler has time to cool down before attempting to clean it. Then remove any debris or dirt with a soft-bristled brush or compressed air.
Next, use a degreaser and a cloth to clean any grease or oil buildup. Be sure to rinse thoroughly with water and dry completely before putting it back into operation. Remember to never use a high-pressure washer as it can damage the radiator fins and always wear gloves to protect your hands.
By following these tips, you can ensure that your oil cooler radiator operates efficiently and lasts longer.
Wear gloves and eye protection
When it comes to handling certain materials or chemicals, it’s always important to take proper precautions to avoid any potential harm or injury. This is where wearing gloves and eye protection comes into play. Not only will they protect your skin and eyes, but they also serve as a barrier against harmful substances.
Keep an eye out for any potential hazards in your working environment and take action to protect yourself. It’s always better to be safe than sorry, and investing in quality gloves and safety goggles will go a long way in ensuring your overall well-being. Remember, just because you may not immediately notice any effects or symptoms of exposure to substances doesn’t mean that there aren’t any long-term underlying issues that can arise.
By taking care of yourself and utilizing the appropriate safety gear, you can minimize any potential risks and work more confidently.
Avoid using harsh chemicals
When it comes to cleaning and disinfecting our homes, it’s important to be mindful of the chemicals we use. Many cleaning products contain harsh chemicals that can be harmful to our health and the environment. To avoid these potential risks, consider using more natural and eco-friendly products.
Some options include vinegar, baking soda, and essential oils. These ingredients are not only safer but can be just as effective at cleaning and disinfecting. Additionally, be sure to read the labels on cleaning products carefully and use them only as directed.
Always wear gloves and avoid mixing different cleaning products, as this can cause dangerous chemical reactions. By taking these precautions, we can protect ourselves and our environment while still maintaining a clean and healthy home.
Clean the radiator regularly
Cleaning your car’s radiator is an important step in maintaining your vehicle’s health. Over time, dust, dirt, and debris can accumulate on the radiator’s surface, blocking airflow and causing the engine to overheat. To avoid these issues, it is essential to clean the radiator regularly.
But before you begin, make sure to follow some simple precautions. Firstly, wait for your engine to cool down before attempting to clean the radiator. Secondly, make sure to wear gloves and eye protection, as some debris may be sharp or harmful.
Once you’ve taken these precautions, you can begin cleaning the radiator. Start by removing any debris that has accumulated on the radiator using a soft-bristled brush. Then, use a low-pressure hose or pressure washer to flush out any remaining debris from the radiator’s fins.
Finally, make sure to replenish any lost coolant and check for any leaks once you’ve finished cleaning. By following these simple tips and precautions, you can ensure your radiator stays clean and your engine stays cool!
Conclusion
Well folks, there you have it – a step-by-step guide on how to clean your oil cooler radiator. While it may seem like a daunting task at first, taking the time to give your radiator a good scrubbing can make all the difference when it comes to keeping your engine running smoothly. And who wouldn’t want their engine running like a well-oiled machine? So, grab your goggles, throw on some gloves, and get ready to tackle that radiator like a true grease-fighting hero!”
FAQs
What is an oil cooler radiator and why is it important for my vehicle?
An oil cooler radiator helps to keep the engine oil cool, which is crucial for optimal engine performance and longevity. It does this by dissipating the heat generated by the engine oil as it circulates through the cooler.
How often should I clean my oil cooler radiator?
It is recommended to clean your oil cooler radiator at least once a year or after every 12,000 to 15,000 miles of driving, whichever comes first. However, if you frequently drive in dusty or dirty conditions, it may be necessary to clean it more frequently.
What is the best method for cleaning my oil cooler radiator?
The best method for cleaning your oil cooler radiator is to use a high-pressure washer or spray nozzle to flush out any dirt and debris that has accumulated. You may also want to use a cleaning solution specifically designed for radiator cleaning to ensure a thorough clean.
Can I clean my oil cooler radiator myself or should I take it to a professional?
You can clean your oil cooler radiator yourself, but it is important to have a basic understanding of your vehicle’s cooling system and to follow proper safety precautions. If you are unsure or uncomfortable with cleaning it yourself, it may be best to take it to a professional mechanic or radiator shop.

