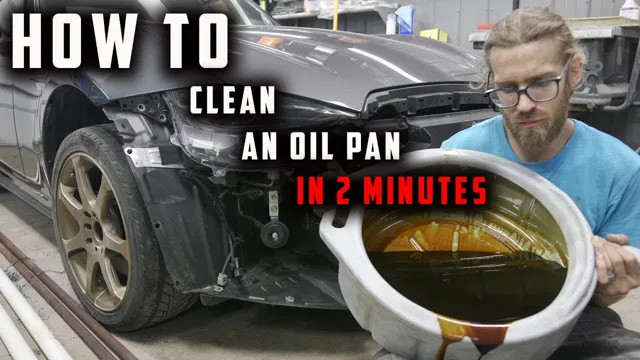
Master the Art of Oil Pan Cleaning: A Step-by-Step Guide
If you’re a car owner, you know how vital it is to keep your vehicle’s engine running smoothly. One of the critical components of the engine system is the oil pan, which holds the lubricant that keeps the engine parts working correctly. Over time, debris and sludge accumulate in the oil pan, compromising the engine’s efficiency and lifespan.
To avoid significant engine damage, it’s essential to know how to clean an oil pan and maintain it correctly. In this blog post, we will discuss some effective ways to clean your oil pan and extend the longevity of your vehicle’s engine. Let’s dive in!
Gather Supplies
Before you begin cleaning your oil pan, it’s important to gather all the necessary supplies. The first thing you’ll need is a large container to drain the oil into. Make sure the container is able to hold the amount of oil in your pan, usually 4-5 quarts.
Next, you’ll need a wrench or socket set to remove the drain plug from the pan. You may also need a scraper or brush to remove any built-up debris and a funnel to pour the new oil in once you’re finished. It’s also a good idea to have some disposable gloves and rags on hand to protect your skin and keep the mess to a minimum.
Once you have all your supplies, you’re ready to get started on cleaning your oil pan using the best methods for removing all the built-up dirt, grime, and sludge that accumulates as your car runs.
Oil Drain Pan, Degreaser, Scrub Brush, Gloves, Water Hose
If you’re planning on changing your car’s oil yourself, there are several essential supplies you’ll need to gather beforehand. First and foremost, you’ll need an oil drain pan to collect the used oil safely. It’s important to make sure the pan is the right size and shape for your car’s oil filter and drain plug, as well as has a secure lid to prevent spills or leaks.
Next, you’ll need a degreaser solution to clean any excess oil and grime from the oil pan and other parts of your engine. A scrub brush can also come in handy to get rid of any persistent residue. It’s crucial to wear gloves to protect your skin and avoid any potential irritation from the degreaser or used oil.
Finally, you’ll need a water hose to rinse everything off thoroughly once you’re done. With these supplies at your disposal, you’ll be ready to take on the task of changing your car’s oil with ease and confidence. So, grab your oil drain pan, degreaser, scrub brush, gloves, and water hose, and get ready to give your car a fresh start!
Drain Oil
If you are planning on cleaning an oil pan, the first thing you need to do is to drain all the old oil from the pan. To do this, you will need to locate the drain plug at the bottom of the oil pan. Use a wrench to loosen the drain plug and carefully remove it so that the oil starts to flow out into a container.
Once all of the old oil has been drained, clean the oil pan thoroughly to remove any sludge or debris that may have accumulated in the pan. After the pan is thoroughly cleaned, you can replace the drain plug and refill the pan with fresh oil. Keep in mind that you should always use the manufacturer’s recommended oil for your particular vehicle, and be sure to check the oil level before and after you start the engine.
By following these steps, you can keep your engine running smoothly and avoid costly repairs down the road.
Use Oil Drain Pan to Collect all Oil from the Pan
When it comes to changing the oil in your car, it’s important to do it right to ensure your vehicle stays in top condition. One important step in this process is to use an oil drain pan to collect all the oil from the pan. This prevents any oil from spilling onto the ground or into any unwanted areas.
The oil drain pan is designed to fit under the oil pan of your car and catch all the oil as it drains out. It’s important to choose the right size drain pan for your vehicle to ensure that it can hold all the oil without overflowing. Once the oil has drained into the pan, simply dispose of it properly at a local collection center.
By using an oil drain pan, you can easily collect all the oil from your vehicle and ensure a cleaner oil change experience.
Remove Loose Debris
When it comes to cleaning an oil pan, the first step is to remove any loose debris that may have accumulated over time. This can include dirt, grime, and even small particles of metal that can pose a risk of damaging your engine. To do this, start by placing a large drain pan under the oil pan, so that you can catch any debris that falls out.
Next, use a scraper or wire brush to gently remove any loose debris that may be stuck on the surface of the pan. Be sure to take your time and work carefully, so as not to cause any damage to the pan itself. Once you have removed all the loose debris, take a clean cloth or paper towel and wipe down the pan to remove any remaining dirt or grease.
This will help ensure that the inside of your oil pan is free of debris, so that it can function properly and help keep your engine running smoothly.
Scrape Off any Large Pieces of Debris with Scrub Brush
When it comes to cleaning, the first step is always to remove any loose debris before moving onto the deeper cleaning. This is especially true when it comes to scrubbing surfaces with a scrub brush. So, before you get started, take a few minutes to scrape off any large pieces of debris from the surface you’re cleaning.
This could be anything from dirt and rocks on a patio to food remnants on a kitchen counter. Use a bristled scrub brush to gently remove any loose debris, taking care not to scratch or damage the surface. This initial step may seem small, but it can make a big difference in the overall cleanliness of the area you’re scrubbing.
By removing loose debris first, you allow your cleaning solution to penetrate deeper and more effectively. So go ahead, grab your scrub brush, and get rid of any large debris before diving deeper into your cleaning routine.
Apply Degreaser
When it comes to cleaning an oil pan, using a degreaser is an important step in the process. A good degreaser is designed to break down and dissolve any built-up grease and oil on the surface, making it much easier to clean. There are many different types of degreasers available, from spray-on formulas to more heavy-duty options.
When choosing a degreaser, it’s important to consider the type of oil or grease you’re dealing with and select a product that’s specifically designed for that type of cleaning. Once you have your degreaser, simply apply it to the surface of the oil pan and let it sit for a few minutes. Then, use a soft-bristled brush to gently scrub away any dirt and grime.
Rinse the pan thoroughly with water and dry it off with a clean cloth. With a bit of elbow grease and the right degreaser, cleaning an oil pan can be a quick and easy task.
Spray or Pour Degreaser Directly onto the Pan
When it comes to cleaning a greasy, oily pan, using a degreaser is essential. But to get the best results, you need to know how to apply the degreaser properly. One of the most effective ways to apply a degreaser to your pan is by spraying or pouring it directly onto the surface.
This method allows the degreaser to penetrate tough stains and break down the grease quickly and effectively. Plus, it saves you time and energy compared to using a cloth or sponge to apply the degreaser manually. As you apply the degreaser, make sure you cover the entire surface of the pan, paying particular attention to any stubborn stains or crevices.
A high-quality degreaser like “XYZ Degreaser” is the perfect solution to get your pan sparkling clean in no time. Just remember to rinse the pan thoroughly with warm water once the degreaser has worked its magic. With these tips, your pots and pans will be as good as new in a flash!
Scrub the Pan
Cleaning an oil pan can seem like a daunting task, but with the right techniques, it’s actually quite simple. One of the most important steps is to scrub the pan thoroughly. First, make sure to remove as much of the excess oil as possible by tipping the pan over a container and allowing it to drain.
Then, using a non-scratch scrub brush or sponge, gently scrub the pan with warm water and a mild detergent. Be sure to pay extra attention to any areas with buildup or stubborn debris. For particularly difficult spots, you can use a mixture of baking soda and vinegar to help break down the grime.
Once you’ve finished scrubbing, rinse the pan thoroughly with warm water and dry it completely. By following these steps, your oil pan will be clean and ready for use in no time!
Use Scrub Brush to Vigorously Scrub Entire Surface of the Pan
When it comes to cleaning pots and pans, sometimes scrubbing isn’t enough. For tough stains and stuck-on food, a scrub brush can be a real lifesaver. Unlike sponges or cloths, scrub brushes are designed to get into every nook and cranny of a pan’s surface, making cleaning a whole lot easier.
To use a scrub brush effectively, start by wetting your pot or pan and adding a bit of soap. Then, use your scrub brush to vigorously scrub the entire surface of the pan, focusing on any areas where there’s stuck-on food. Be sure to get into all the corners and edges, and use some elbow grease if necessary.
With a little bit of effort, your pan will be back to its sparkling clean self in no time! And if you’re looking for a great scrub brush, there are plenty of options available online and in your local store, so you can find one that works best for you.
Rinse and Repeat
So, you need to clean an oil pan, huh? Well, the good news is that it’s not as difficult as it may seem. First things first, you’ll need to drain the old oil from the pan. Once that’s done, use a scraper or putty knife to remove any sludge or debris from the pan.
Next, fill the pan with a cleaning solution – this can be as simple as hot water and dish soap, or you can use an automotive-specific cleaner. Let the solution sit for a few minutes before scrubbing the pan with a stiff brush. Rinse the pan thoroughly with clean water and dry it completely before reinstalling it.
If the oil pan is particularly dirty or has old, hardened oil stuck to it, you may need to repeat these steps a few times until the pan is completely clean. Remember, it’s important to keep your oil pan clean to prevent any debris or contaminants from getting into your engine. So, next time you’re due for an oil change, don’t forget to clean your oil pan while you’re at it!
Rinse Pan Thoroughly with Water Hose and Repeat Steps as needed
After using a frying pan to cook your favorite meal, it’s essential to give it a thorough rinse and repeat these steps as needed. Start by removing any leftover food residue with a spatula and discarding it in the trash. Next, turn on a water hose and rinse the pan thoroughly, paying close attention to any crevices or hard-to-reach areas.
Ensure that all soap, grease, and food particles are fully removed until the water runs clear. After rinsing, inspect the pan for any remaining residue and repeat the process until it’s fully clean. Remember, it’s crucial to rinse and repeat until the pan is spotless because leftover food particles can cause cross-contamination and affect the taste of future meals.
So, take the time to give your frying pan the care it deserves, and it will reward you with delicious, perfectly cooked meals every time.
Dry the Pan
Now that your oil pan is squeaky clean, the final step is to make sure it’s completely dry before storing it. You don’t want any water droplets or moisture left in the pan, as this could lead to rust or other types of corrosion. The easiest way to dry the pan is to simply let it air dry upside down in a well-ventilated area for a few hours.
If you’re short on time, you can also use a clean towel or cloth to wipe the inside and outside of the pan until it’s completely dry. Make sure to check all the nooks and crannies, as water can easily get trapped in these areas. Once your pan is dry, you can store it safely until the next time you need to use it.
Remember, taking the time to properly clean and dry your oil pan will extend its lifespan and ensure you get the most use out of it.
Use Towel to Wipe Down Pan and Air Dry Completely Before Reinstalling
After washing your pan, it’s essential to dry it completely before reinstalling it. Leaving any moisture behind can lead to rust or other unpleasant surprises down the line. The best way to dry your pan is to use a clean towel and give it a thorough wipe down.
Be sure to get into all the nooks and crannies, especially if it’s a cast iron or non-stick pan. Don’t forget to dry the handle, too! Once you’ve wiped everything down, let the pan air dry completely. It’s best to leave it out on the counter for at least an hour to ensure that all the moisture has evaporated.
If you’re in a rush, you can use a paper towel to speed up the process. Just be sure not to rush this step – a little patience here will save you a lot of headache later on. Remember, a dry pan is a happy pan!
Conclusion
In conclusion, cleaning an oil pan may seem like a tedious task, but it’s worth it to keep your engine running smoothly and avoid costly repairs. Whether you use degreaser, baking soda, or a trusty toolbox scraper, make sure to thoroughly clean both the inside and outside of your oil pan. And remember, the key to a successful oil pan cleaning is patience and persistence.
So roll up your sleeves, put on some old clothes, and get ready to give your engine the TLC it deserves. Happy cleaning!”
FAQs
What are the necessary tools needed to clean an oil pan?
The necessary tools needed to clean an oil pan include a drain pan, a wrench, a scraper, a cleaning solution, and a brush.
How often should I clean my oil pan?
It is recommended to clean your oil pan every time you change your oil; however, if you notice any debris or buildup, it is best to clean it immediately.
Can I reuse the same cleaning solution for multiple oil changes?
No, it is recommended to use a fresh cleaning solution for each oil change to ensure the best results.
What is the best cleaning solution to use for an oil pan?
The best cleaning solution to use for an oil pan is one specifically designed for cleaning engine parts, such as degreaser or engine cleaner. Make sure to follow the manufacturer’s instructions when using the cleaning solution.