How to Easily Diagnose and Fix ABS Light on Your Trailer: A Comprehensive Guide
Have you ever seen the ABS light on your trailer illuminated and wondered what it means? It’s easy to panic and assume the worst, but in reality, it could be a simple fix. Your trailer’s ABS system is designed to prevent your wheels from locking up during braking, ensuring maximum stability and safety. However, when the ABS light comes on, it indicates that there is a problem with the system.
Don’t worry, though, as checking the ABS light on your trailer is a straightforward process that can be done by anyone. In this blog, we’ll explore the easy steps for checking the ABS light on your trailer, so you can get back on the road with confidence.
Diagnostic Tool
Are you wondering how to check the ABS light on your trailer? It’s important to make sure your anti-lock braking system is functioning properly, as it can make a big difference in preventing accidents on the road. Thankfully, checking the ABS light is a simple process. First, turn on your vehicle and trailer and look at the dashboard.
If the ABS light comes on and stays on, it means there’s a problem with your braking system. However, if the light comes on and goes off quickly, it simply means that the system is performing a self-check and everything is functioning normally. If you notice any issues with your ABS light, it’s best to have a professional diagnose and fix the problem.
Don’t wait until it’s too late – ensure your trailer’s braking system is in top condition.
Use an OBD2 scanner to read the ABS codes.
An OBD2 scanner is a valuable tool to have on hand when diagnosing issues with your vehicle’s ABS system. This diagnostic tool is designed to read and interpret the codes stored in your car’s computer, providing you with valuable information about any issues that may be present. With an OBD2 scanner, you can quickly and easily identify the cause of any ABS-related problems, such as a faulty sensor or a damaged wiring harness.
By using this tool, you can save yourself time and money in costly repairs at the mechanic’s shop. So if you’re experiencing problems with your ABS system, consider investing in an OBD2 scanner to get to the root of the issue quickly and accurately.
Connect the scanner to the trailer’s OBD2 port.
When it comes to diagnosing problems with your trailer, connecting a diagnostic tool to the OBD2 port can be incredibly helpful. This is where the scanner comes in, allowing you to read diagnostic information from the OBD2 system. When using the scanner, it’s important to first connect it to the OBD2 port on your trailer.
This port is typically located under the dashboard on the driver’s side, and is usually labeled with “OBD2” or “Diagnostic Link Connector.” Once you’ve located the port, simply plug the scanner in and turn on your trailer’s engine. With the scanner properly connected, you can now begin to diagnose any issues that might be present, such as sensor malfunctions or engine misfires.
By using a diagnostic tool in combination with the OBD2 port, you can quickly and easily identify any problems with your trailer’s engine, allowing you to take appropriate action and get back on the road as soon as possible. So, if you’re experiencing issues with your trailer, don’t hesitate to connect a scanner to the OBD2 port and start diagnosing the problem today!
Power on the scanner and follow the prompts to check the ABS system.
When it comes to diagnosing issues with your ABS system, a diagnostic tool is essential. Powering on the scanner and following the prompts will allow you to check the system thoroughly. A diagnostic tool is a powerful device that can identify any issues within the ABS system, including sensor malfunctions or wiring problems.
Once the tool is powered on, it will guide you through the process of checking the ABS system. This will be an easy, step-by-step process that will require no technical experience. The tool will also provide you with a detailed report that outlines any identified issues with the system, allowing you to address them quickly.
Overall, a diagnostic tool is a must-have for any vehicle owner, as it helps to keep your car safe and roadworthy. So, if you notice any issues with your ABS system, be sure to use a diagnostic tool to diagnose and fix the problem quickly. Always consider safety when operating a vehicle, and never ignore warning lights or unusual noises coming from your car.
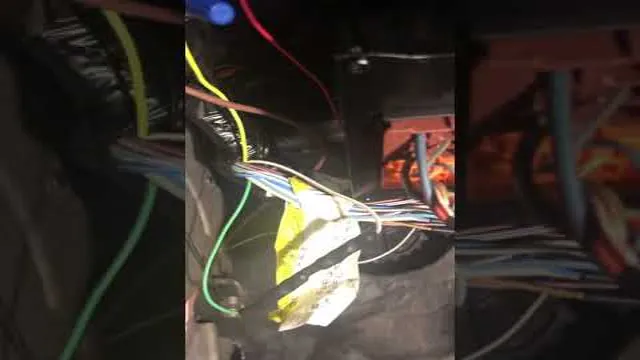
Check the Wiring
When it comes to trailers, one common issue you might face is an illuminated ABS light. But what should you do about it? One thing you can check is the wiring. This may seem like a simple solution, but it’s important to make sure all connections are secure and not frayed or damaged.
Start by inspecting both the trailer and tow vehicle’s wiring harnesses for any signs of wear or tear. If there are any damaged wires, they will need to be replaced. Additionally, make sure there aren’t any loose connections at the plug-in points.
A loose connection could cause a short circuit, which could trigger the ABS light. By ensuring that all wiring is in good condition and properly connected, you may be able to resolve the ABS light issue on your trailer.
Inspect the trailer’s wiring for damage.
When it comes to inspecting your trailer, checking the wiring should be at the top of your list. Wiring damage can lead to a variety of issues, from dim taillights to complete electrical failure. It’s important to give the wiring a thorough visual inspection, looking for cracks, fraying, or corrosion.
If you notice any damage, it’s time to replace the affected wire. Don’t forget to check connections for signs of damage as well – loose or corroded connections can cause electrical issues too. Think of it like the veins and arteries of your trailer; if they’re not functioning properly, nothing else will either.
By taking the time to inspect your wiring, you can help avoid potential headaches and ensure a safe and smooth journey on the road.
Look for frayed wires or loose connections.
When it comes to checking the safety of your electrical system, one of the key things you should keep an eye out for is frayed wires or loose connections. These little faults in your wiring system can easily go unnoticed until it’s too late and result in serious damages such as electrical shock, fire or even death. Whether you’re inspecting a new property or just trying to keep your current one in good shape, it’s essential to inspect all electrical wiring and connections before using them.
You can start by checking all electrical outlets, switches, and appliances for signs of wear and tear including fraying, cracking or discoloration of the cords or plugs. If you notice any of these faulty areas, do not hesitate to call an electrician to repair or replace the damaged wiring and connections as soon as possible. By checking your wiring system periodically, you mitigate the risks that could arise and help keep your family or customers safe from any potential danger.
Keep in mind that damaged wiring can be caused by various things such as moisture, rodents, old age, or poor installation. Ensuring that your system is in good working condition also contributes to the longevity of your appliances, and ensures that they operate as expected. Not only does this protect you and your property, but it saves you money in repair costs down the line.
Take some time to inspect your wiring today and be proactive against any potential hazards – your safety is more important than anything else.
Repair any damaged wires and secure connections.
When it comes to electrical work, safety always comes first. Before you start any repairs, make sure that you turn off the power to the area you will be working on. Once you have done this, you should start by checking the wiring.
This can be done by inspecting the wires for any damage or fraying. If you notice any damaged wires, it’s important to repair them immediately to prevent any further damage or potential fire hazard. You can do this by splicing the wires together or replacing the damaged wire entirely.
It’s also important to ensure that all connections are secure and tight. Loose connections can cause electrical arcing, which is not only dangerous but can also damage the wire and cause it to fail. Overall, checking the wiring is an essential part of any electrical repair job, and as long as you take your time, follow precautions, and pay attention to detail, you should be able to get the job done safely and effectively.
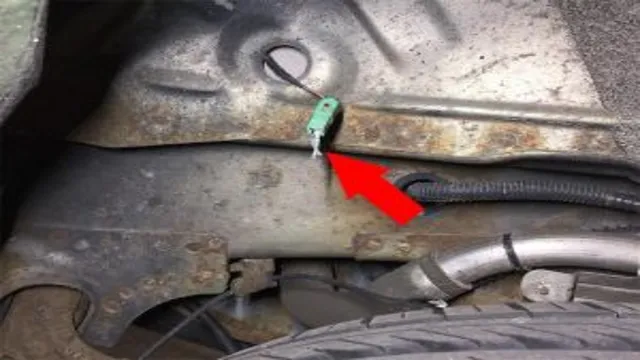
Check the Brake Fluid Level
If you’re noticing the ABS light on your trailer turning on, it could be a sign that your brake fluid needs attention. Checking the brake fluid level is simple and should be done regularly. Begin by locating the brake fluid reservoir, typically found under the hood or near the brake pedal.
The reservoir should have a minimum and maximum line that indicates the fluid level. If the fluid is between these lines, then it’s okay. However, if it’s below the minimum line, then it’s time to add more fluid.
Be sure to use the recommended fluid type specified in your trailer’s manual. Low brake fluid levels can not only trigger the ABS light but can also impact the functionality of your brakes, increasing the chances of accidents. Checking the brake fluid level regularly is a small effort that can help keep you and your trailer safe on the road.
Locate the brake fluid reservoir on the trailer.
As a responsible trailer owner, it’s essential to know where the brake fluid reservoir is located on your vehicle and check the brake fluid level regularly. The brake fluid is a vital component that ensures your brakes work effectively, and low levels can affect braking performance and even cause accidents. Thankfully, locating the reservoir is relatively easy.
On most trailers, it’s located on the master cylinder, which is typically on the driver’s side of the vehicle, close to the firewall. To check the brake fluid level, you must first ensure the trailer is level before opening the reservoir cap carefully. The fluid level should be at or slightly above the “Minimum” mark.
If the level is below, you’ll need to top it up with the appropriate brake fluid type, being careful not to overfill, as this can cause more significant problems. Checking your brake fluid level is a simple yet crucial task that can prevent potential accidents and costly repairs.
Check the fluid level and add or replace as necessary.
Checking the brake fluid level is an important step in keeping your car in tip-top shape. It’s a simple task that can help prevent brake failure and keep you safe on the road. Start by locating the brake fluid reservoir, which is usually located on top of the master cylinder.
Check the fluid level by looking for the minimum and maximum lines on the reservoir. If the level is below the minimum line, add brake fluid until it reaches the maximum line. Be sure to use the type of fluid specified in your car’s owner’s manual, as different types of brake fluid can have different properties.
It’s also a good idea to replace your brake fluid every two years to keep it fresh and free from moisture, which can cause corrosion in the brake system. Checking and maintaining your brake fluid level is an easy and important step in keeping your car’s brakes functioning properly, so don’t skip it!
Conclusion
Checking the ABS light on your trailer is the key to unlocking a safe journey on the road. It’s like looking both ways before crossing the street – an act of caution that can save you from a major headache down the line. So, don’t just drive blindly ahead – take the time to inspect your trailer’s ABS light and stay on top of any potential issues.
Trust us, your brakes (and your fellow drivers) will thank you for it!”
FAQs
What does it mean when the ABS light on my trailer comes on?
When the ABS light comes on, it means there is an issue with the trailer’s anti-lock braking system. This could indicate a problem with the sensors, wiring, or the actual brakes.
How can I check if my trailer’s ABS system is working properly?
The easiest way to check if your trailer’s ABS system is working properly is to perform a brake test. Start by pulling the trailer onto a flat, level surface and applying the brakes. If the ABS system is working properly, you should feel the brakes pulsing, which is the ABS system engaging.
What are some common causes of ABS system failure on trailers?
Some common causes of ABS system failure on trailers include damaged wiring, faulty sensors, or worn brake pads and rotors. Regular maintenance and inspections can help catch these issues before they lead to system failure.
Can I still drive my trailer if the ABS light is on?
While it may be possible to drive your trailer with the ABS light on, it is not recommended. The ABS system is an important safety feature and driving with a malfunctioning system could be dangerous. It is best to have the system inspected and repaired before using the trailer.