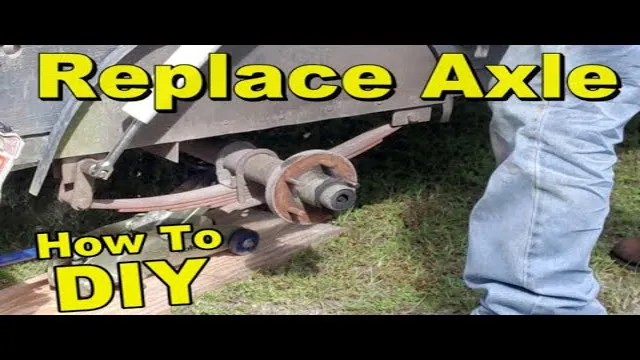
Step-by-Step Guide: The Ultimate DIY Tutorial to Change the Axle on Your Trailer
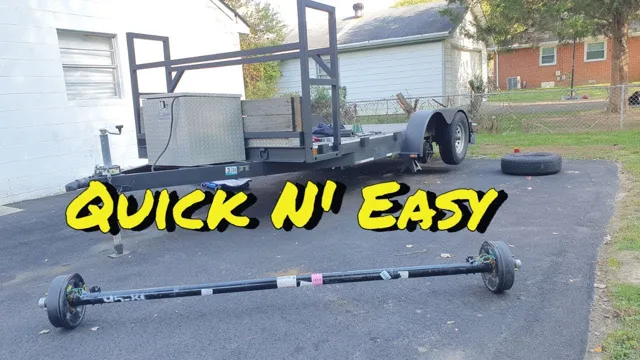
Changing a trailer axle can be a challenging task, especially if you’re new to trailer maintenance. If you’re unsure where to start or what tools to use, don’t worry – we’ve got you covered. In this blog post, we’ll walk you through the step-by-step process of how to change a trailer axle, so you can get back on the road with peace of mind.
First things first, it’s important to understand what a trailer axle is and why it’s important. A trailer axle is the part of your trailer that carries the weight of the trailer and its contents. It’s responsible for supporting the trailer’s weight and keeping it stable while you’re towing it.
Unfortunately, over time, trailer axles can wear out or become damaged. This can happen due to normal wear and tear, accidents, or other factors. When your trailer axle needs to be replaced, it’s important to do so as soon as possible.
Not only can a damaged axle lead to unsafe towing conditions, but it can also cause damage to your trailer’s tires, suspension, and other components. Now that you understand why it’s important to change your trailer axle when necessary, let’s dive into the steps you’ll need to take to do so. We’ll cover everything from assessing the damage and gathering the necessary tools, to removing the old axle and installing the new one.
By the end of this blog post, you’ll have all the knowledge you need to confidently change your trailer axle like a pro.
Tools Needed
Changing an axle on a trailer can be a challenging task, but it can be done quickly and efficiently with the right tools. The tools that you will need to change the axle on your trailer include a jack, jack stands, a wrench, pliers, a pry bar, a socket set, and a torque wrench. The jack and jack stands will allow you to raise the trailer and put it on stable supports while you work on it.
A wrench, pliers, and pry bar are essential for loosening and removing bolts and other fasteners. The socket set will be used to remove the bolts that are holding the axle in place, while a torque wrench will be needed to tighten the bolts to their proper torque specifications. With these tools in hand, you’ll be ready to tackle the job of changing the axle on your trailer and get back on the road in no time.
– Jack stands
If you’re someone who likes to do their own car maintenance or repair work, then having the right tools is key. One important tool to have in your arsenal is jack stands. These simple yet essential tools are used to hold your vehicle steady and safely off the ground while you work.
The last thing you want is for your car to come crashing down while you’re underneath it, so investing in a good set of jack stands is crucial. When choosing jack stands, make sure to get ones that are rated to hold the weight of your vehicle and have a wide base for added stability. With the right jack stands and other necessary tools, you’ll be able to confidently work on your car and keep it running smoothly for years to come.
– Lug wrench
When it comes to changing a tire, having the right tools is essential. One of the most important tools needed for the job is a lug wrench. A lug wrench is a simple yet effective tool that is designed to remove the lug nuts that hold the tire onto the wheel hub.
There are several types of lug wrenches available, each with its own benefits. The most common type is the cross-shaped wrench, which is often included with the vehicle’s spare tire. Another type is the socket wrench, which has a socket that fits over the lug nuts.
This type of wrench is often used by mechanics and can be attached to a power drill for faster removal. Whatever type of lug wrench you choose, make sure that it is the right size for your vehicle’s lug nuts and that it is sturdy enough to handle the amount of torque needed to remove or tighten the nuts. With the right lug wrench on hand, changing a tire can be a quick and easy task, giving you peace of mind on the road.
– Socket set
If you’re looking to embark on a DIY project or simply need to perform some repairs around your home, having the right tools is essential. One tool that’s often overlooked but incredibly useful is a socket set. A socket set typically consists of a ratcheting wrench and a collection of interchangeable sockets in various sizes, allowing you to easily tighten or loosen nuts and bolts of different sizes.
With a socket set, you’ll be able to tackle a plethora of projects with ease, from assembling furniture to working on your car’s engine. Additionally, the compact size of socket sets make them easy to store and transport, ensuring you always have the right tool on hand. So if you’re looking to take your DIY skills to the next level, be sure to add a socket set to your toolkit.
– Pry bar
If you’re planning to do some home renovation or construction work, having a pry bar in your toolbox is crucial. A pry bar is a simple yet versatile tool that can be used for a variety of tasks. It comes in different sizes and shapes, but all of them are made to be strong and durable, able to pry, lift, and remove objects with ease.
Whether you’re tearing down a wall, removing old tiles, or prying open a stubborn window or door, a pry bar can make your job easier and faster. With its sharp pointed end, you can easily insert it into small crevices or gaps and lever out whatever you need to move. When choosing a pry bar, it’s important to consider the size and shape of the tool to suit your specific needs.
Make sure to choose a pry bar that’s made of high-quality materials and feels comfortable in your hand. So, go ahead and add a pry bar to your toolbox – you never know when you might need it.
– Hammer
When it comes to hammering things, a hammer is an essential tool you don’t want to be caught without. But not all hammers are created equal; there are various types of hammers, each serving a unique purpose. For instance, claw hammers are commonly used for woodworking tasks, while sledgehammers can help you break concrete and other tough materials.
When selecting the right hammer for the job, it’s essential to consider the grip and weight. Is the grip comfortable, and it can easily fit in your hand? Is the weight appropriate and can you handle it for extended periods without suffering from hand fatigue? Ideally, you want to select a hammer that’s comfortable to hold and use while still being able to deliver the right amount of force. Additionally, a hammer may differ in head shape, and some may come with a smooth or textured face, based on your needs.
Ultimately, investing in a good-quality hammer can make your home renovation and DIY projects a lot less challenging while helping you get the work done in no time.
Removing the Old Axle
If you’re wondering how to change an axle on a trailer, the first step is to remove the old one. This is a process that requires a bit of strength, as the axle can be quite heavy. First, you’ll need to jack up the trailer and secure it with jack stands to prevent it from falling while you work.
Then, remove the wheels and tires from both sides of the axle. Next, remove the bolts that hold the axle to the leaf springs and frame. You may need to use a breaker bar or impact wrench to loosen them, especially if they’re rusted or corroded.
Once you have all the bolts removed, you can carefully lower the old axle to the ground. Be sure to have a second person on hand to help you, as the axle can be quite unwieldy. With the old axle out of the way, you’re ready to install the new one and get back on the road.
– Loosen lug nuts
Loosening lug nuts is the first step in removing an old axle. This might seem like a simple task, but it’s essential to do it correctly to avoid any damage to the axle or wheel. Start by using a lug wrench or socket wrench to loosen the nuts.
Turn them counterclockwise until they are loose enough to remove by hand. Don’t remove them completely yet, just loosen them enough to make removing the wheel easier. If the lug nuts are particularly tight, you can use your body weight to break them loose by standing on the wrench or adding a metal pipe for leverage.
Once the lug nuts are loosened, you can jack up the vehicle and remove the wheel to access the axle. Remember to keep the wheel and lug nuts in a safe place where they won’t get lost or damaged. By taking proper precautions, you can successfully remove the old axle without any mishaps.
– Raise trailer with jack stands
When you’re replacing an old axle on your trailer, the first step is to raise the trailer with jack stands. This is important for safety reasons, as it ensures that the trailer is stable and won’t tip over while you’re working on it. Once you’ve raised the trailer, you can start removing the old axle.
This may involve disconnecting the brakes and the suspension system, as well as removing any bolts or attachments that are holding the axle in place. It’s important to be careful when removing the old axle, as it may be heavy and difficult to maneuver. Make sure you have the right equipment and tools for the job, and don’t be afraid to ask for help if you need it.
By taking your time and being methodical, you can successfully remove the old axle and get ready for the installation of the new one. So, let’s get started!
– Remove wheels and brake drums
Removing the old axle from your vehicle can seem like a daunting task, but with the right tools and know-how, it can be accomplished easily. To start, you’ll need to remove the wheels and brake drums to access the axle. This can typically be achieved using a lug wrench to loosen and remove the lug nuts, followed by gently pulling off the wheel and brake drum assembly.
Once this is done, you can then move on to removing the bolts that secure the axle to the vehicle’s suspension system. It’s important to note that these bolts may be rusted or corroded, so applying some penetrating oil beforehand can make the job much smoother. With the bolts removed, you can then carefully slide the old axle out of the vehicle, ensuring not to damage any surrounding components in the process.
By taking the time to remove the old axle correctly, you can ensure a smooth and hassle-free installation of the new one, ensuring your vehicle performs at its best.
– Disconnect brake lines and electrical wiring
When it comes to removing the old axle, one of the first steps you’ll need to take is disconnecting your brake lines and electrical wiring. This not only helps with the removal process but also ensures that your old axle and its components can be safely disposed of without any lasting damage. Disconnecting your brake lines can be done using a brake line wrench, while electrical wiring can be removed using a simple screwdriver or pliers.
It’s always a good idea to have a friend or mechanic assist you during this process, as it can be physically demanding and require special tools. By taking the time to properly disconnect your brake lines and wiring, you’ll be on your way to a safer and more efficient axle replacement.
– Remove axle bolts or U-bolts
Removing the old axle is a crucial step when replacing or upgrading your vehicle’s axle. To do this, you need to remove the axle bolts or U-bolts. These bolts hold the axle in place, making it challenging to remove.
If your axle is held in place by an axle bolt, you need to use a socket or wrench to remove it. On the other hand, if your axle is held in place by U-bolts, you’ll need to use a socket or wrench to remove the nuts that secure them. Once you’ve removed the bolts or U-bolts, you can take out the old axle from your vehicle.
It’s vital to remember the position of any shims, spacers, or other parts before removing the old axle, so you can install the new one correctly. By taking your time and carefully removing the old axle, you’ll have a smoother transition when replacing it, and your vehicle will run efficiently and safely on the road.
– Pry old axle out of position
Removing an old axle can be a daunting task, especially if you have little experience with vehicle maintenance. Pry the old axle out of position can be a bit tricky, but with the right technique, you can make the process less frustrating. It is essential to ensure that your car is in a stable position before attempting to remove the old axle.
You can use jack stands or blocks to make sure your vehicle is secure. Once your car is secure, locate the old axle and determine whether you need to remove any bolts or clips before prying it out of position. It is crucial to be patient during this step and avoid using too much force, as this can damage your vehicle’s suspension.
With a steady and gentle hand, pry the old axle out of position, supporting it with your other hand until it is entirely free from the vehicle. It’s that easy! Once the old axle is removed, you can now begin the process of installing the new one. Keyword: old axle.
Installing the New Axle
If you’re wondering how to change an axle on a trailer, don’t worry, it’s not as complicated as you might think. First, you’ll need to lift the trailer off the ground and remove the old axle. Make sure to support the frame with jack stands and use a jack to support the weight of the trailer and lift it off the ground.
Once you’ve removed the old axle, it’s time to install the new one. You’ll want to align the new axle with the existing holes on your trailer frame and secure it in place. Make sure to replace any bolts and nuts with new ones.
Once you’ve completed this, make sure to check the alignment of the wheels. If you notice any misalignment, adjust the new axle until the wheels are properly aligned. Finally, test the trailer out on the road to make sure everything is working properly.
With a little bit of patience and attention to detail, changing the axle on your trailer should be a breeze.
– Slide new axle into place
Installing a new axle can be a bit daunting, but with a little patience and some tools, it’s a job that you can do yourself. First, make sure that the new axle matches the old one in length and diameter. Then, slide the new axle into place and make sure that it’s properly lined up with the axle housing.
You may need to rotate the axle a bit to get it to line up correctly. Once the axle is in position, tighten the bolts that secure it in place. Make sure that the bolts are torqued to the manufacturer’s specifications to prevent them from getting loose over time.
With the new axle securely in place, you’re one step closer to getting your vehicle back on the road and driving smoothly again. Remember to always take safety precautions when working on your vehicle, wear protective gear, and keep your workspace clean and well-organized.
– Secure with bolts or U-bolts
When it comes to installing a new axle on your vehicle, it’s important to make sure it’s secure with bolts or U-bolts. This step is critical for your safety while driving, as a loose or improperly installed axle could lead to disastrous consequences on the road. To start, make sure you have all the necessary tools and hardware for the job.
Once you’ve removed the old axle, carefully position the new one in place. Then, thread the bolts or U-bolts through each end of the axle, tightening them down with a socket wrench or torque wrench. It’s important to ensure that the bolts are torqued down to the manufacturer’s specifications for a tight and secure fit.
This will give you peace of mind knowing that your axle is properly installed and ready to handle the demands of the road. Don’t take any chances when it comes to your vehicle’s safety – make sure to secure your new axle with bolts or U-bolts.
– Reconnect brake lines and electrical wiring
Installing a new axle can be a daunting task for many car owners, but with patience and the right tools, it can be done easily. One crucial step in this process is reconnecting the brake lines and electrical wiring. These components must be carefully reattached to ensure proper functioning of the brake system and electrical features once the new axle is in place.
It’s essential to double-check that all connections are secure and tight. Improper or loose connections could lead to brake failure or malfunctioning electrical components, which could be dangerous while driving. Always take your time and refer to the manufacturer’s instructions to ensure a successful installation.
By following these steps, you can have a new axle installed in no time and have your car back on the road safely. Remember to always prioritize safety first, and never hesitate to seek professional help if you encounter any difficulties during the installation process.
– Replace brake drums and wheels
When installing a new axle, it’s important to replace the brake drums and wheels as well. The brake drums work in tandem with the wheels to enable smooth and safe braking, so it’s essential to ensure that these components are in top shape. To start the process, you’ll need to remove the old axle and inspect the brake drums and the wheels for any signs of wear and tear.
If you notice any cracks or damage, it’s best to replace them with new components to avoid any future issues. Once you’ve replaced the brake drums and wheels, it’s time to install the new axle. This is a fairly straightforward process, but it’s important to ensure that the new axle is aligned correctly with the brake drums and wheels to prevent any future issues.
With a bit of patience and attention to detail, you can install a new axle with no problems and enjoy a smooth and safe ride.
Test the Trailer
If you’re a trailer owner, at some point, you’ll need to replace your axle, and it’s essential to know the proper steps to take. Changing an axle on a trailer is a process that requires some experience and expertise, but if you’re up for the challenge, it can save you money on costly repairs. First, jack up the trailer and remove the wheels, disconnecting the brakes and suspension components along the way.
Then, remove the old axle, taking care not to damage any other parts. You’ll need to properly align and attach the new axle, ensuring that it’s in the correct position and securely fastened. Don’t forget to reattach the brakes and suspension components before you put the wheels back on.
When everything is in place, check for proper alignment and test the trailer to make sure everything is working as it should. With these steps in mind, you can confidently change the axle on your trailer and get back to hauling in no time.
– Check for proper alignment
When it comes to towing a trailer, safety should always come first. One of the key aspects of ensuring a safe tow is to test the trailer. And one important thing to check when testing the trailer is proper alignment.
This means making sure that the trailer is parallel to the tow vehicle and not tilting to one side or the other. Misaligned trailers can put stress on the tow vehicle and cause handling issues, which could lead to accidents. To check for proper alignment, start by parking the tow vehicle and trailer on a level surface.
Then, take a look at the trailer from the back and see if it’s straight or leaning to one side. You can also use a level to check the alignment. If the trailer is misaligned, you may need to adjust the weight distribution or reposition cargo to balance it out.
By taking the time to check for proper alignment, you can ensure a safer and more pleasant towing experience.
– Test brakes and lights
Testing the trailer before hitting the road is crucial for a safe and smooth journey. One of the most essential things to check is the brakes and lights. It’s crucial to ensure that the brakes are functioning properly, as they are responsible for stopping the trailer in emergencies.
Check the brake pads and make sure they haven’t worn out. Also, test the brake lights to see if they are working. If the lights are not functioning correctly, other drivers won’t be able to see the trailer clearly, which can cause accidents.
Therefore, it’s necessary to check the brake lights thoroughly. Make sure they turn on when the brake pedal is pressed. To test the turn signal lights, engage the hazards and check if all the lights are turning on.
By performing these basic checks, you can ensure that your trailer is roadworthy, and you’ll have a safe and stress-free journey.
Conclusion
Changing an axle on a trailer may seem like a daunting task, but with the right tools and a little bit of know-how, anyone can do it. Just remember, much like life, it’s important to make sure you’ve got a solid foundation before you hit the road, and sometimes that means swapping out an old, worn-out axle for a shiny new one. So, give your trailer the TLC it deserves and show it who’s boss by taking on this DIY project with confidence and ease.
“
FAQs
What tools do I need to change an axle on a trailer?
To change an axle on a trailer, you’ll need a jack, jack stands, a socket wrench, pliers, a pry bar, and a torque wrench.
Can I change an axle on a trailer myself, or should I take it to a professional?
If you have some mechanical knowledge and the right tools, you can change an axle on a trailer yourself. However, if you’re not confident in your abilities, it’s always best to leave it to a professional repair service.
What are the steps to changing an axle on a trailer?
The basic steps to change an axle on a trailer are: (1) jack up the trailer and remove the wheels, (2) disconnect the brake lines, (3) remove the old axle, (4) install the new axle, (5) connect the brake lines, (6) put the wheels back on, (7) lower the trailer and test the brakes.
How long does it take to change an axle on a trailer?
The time it takes to change an axle on a trailer can vary depending on your level of experience, the tools you have available, and any complications that may arise. However, you should plan for at least a few hours to complete the job.

