Smooth & Effortless Steering: The Ultimate Guide to Bleeding Power Steering with a Vacuum Pump
Have you ever experienced stubborn air pockets in your power steering system that cause your steering wheel to become stiff and unresponsive? It’s a common problem that can be frustrating to deal with. But fear not, because there’s a solution that makes bleeding power steering a breeze: using a vacuum pump. A vacuum pump is a handy tool that helps you eliminate air from your power steering system quickly and thoroughly.
It works by creating negative pressure in the system, which sucks out any trapped air and replaces it with fluid. This makes your power steering more efficient and responsive, resulting in a smoother driving experience. Using a vacuum pump to bleed your power steering is a simple and effective process that you can easily do yourself.
With the right tools and a little bit of know-how, you can get your steering system back to working like new in no time. So, why put up with a stiff and unresponsive steering wheel when you can resolve the issue quickly and easily with a vacuum pump? In this blog, we’ll walk you through the steps to bleed your power steering with a vacuum pump. We’ll cover everything from what tools you need to how to properly use the vacuum pump to ensure a successful bleed.
So, let’s dive in and get your power steering system working properly again!
What You’ll Need
When it comes to bleeding your power steering system, a vacuum pump can be an incredibly useful tool. But before you grab your pump, it’s important to make sure you have everything else you need for the job. First and foremost, you’ll need power steering fluid.
Be sure to check your vehicle’s manual for the type and amount recommended for your specific make and model. You’ll also need a vacuum pump with the appropriate fittings for your power steering system. A bleed hose and catch container are also necessary to catch the old fluid as it’s sucked out of the system.
Lastly, it’s a good idea to have some rags or paper towels on hand to wipe up any spills or drips. Once you have everything you need, you’ll be ready to start the power steering bleeding process using your vacuum pump.
Vacuum pump
If you’re planning on doing any kind of vacuum work, whether it’s for scientific research, engineering, or just general household maintenance, you’re going to need a vacuum pump. This handy tool is essential for creating and maintaining a vacuum environment, and there are several things you’ll need to keep in mind when selecting the right one for your needs. Firstly, you’ll need to determine the type of pump you need, whether it’s a diaphragm pump, a rotary vane pump, or a scroll pump.
Secondly, you’ll want to consider the ultimate vacuum pressure that you require, as different pumps have different ranges. Additionally, you’ll need to know the flow rate and pumping speed that you require, as well as the power source and footprint that you have available. Once you’ve taken all of these factors into account, you’ll be able to select the perfect vacuum pump for your needs and get to work on creating a powerful vacuum environment.
Power steering fluid
When it comes to maintaining your car’s steering system, power steering fluid is a vital component. But what exactly is power steering fluid? It’s a type of hydraulic fluid that works to assist the driver in turning the wheels of the car. Without it, steering would require a significant amount of effort and could even result in damage to the steering system.
To change the fluid, you’ll need a few things: a drain pan, a socket wrench, a funnel, and of course, the new power steering fluid itself. It’s always a good idea to consult your car’s manual or a professional mechanic before attempting to change the fluid yourself, as every car has its own unique requirements. Additionally, be sure to use the right type of power steering fluid for your car to ensure proper function and prevent damage.
By keeping up with regular power steering fluid changes, you can help extend the life of your car’s steering system and keep it running smoothly.
Wrench
When it comes to fixing things at home or in the garage, having the right tools is essential. One tool that you’ll definitely need is a wrench. A wrench is a handy tool that is used to tighten or loosen bolts, nuts, and other fasteners.
When purchasing a wrench, you’ll want to consider the size of the bolts and nuts you’ll be working with, as well as the type of wrench that would work best for the job. Some commonly used types of wrenches include the adjustable wrench, socket wrench, and torque wrench. The adjustable wrench is versatile and can be adjusted to fit a variety of sizes, while the socket wrench is great for tight spaces and hard-to-reach areas.
The torque wrench is ideal for precision work, as it can be calibrated to a specific level of torque. Whatever type of wrench you choose, make sure you have the right size and that it’s made from durable materials. A good wrench will last you for years and make your DIY projects a breeze.
So, go ahead and add a wrench to your toolbox today!
Step-by-Step Guide
If you’re experiencing difficulty turning your vehicle’s steering wheel, it may indicate that there’s air in your power steering system. To address this, you’ll need to bleed your power steering system. One way to do this is by using a vacuum pump.
First, locate the power steering pump on your vehicle. Then, connect the vacuum pump to the pump’s fluid reservoir. Turn the pump on, and let it run for a few minutes to draw air bubbles out of the power steering system.
Once you’ve done this, close the valve on the pump and detach it from the reservoir. Finally, start your engine and turn the steering wheel from lock to lock a few times to release any remaining air in your power steering system. That’s it! You’ve successfully bled your power steering with a vacuum pump, and your steering should now be working properly.
Step 1: Prepare the System
Preparing the system is the first step towards setting up your software successfully. To begin with, it’s important to ensure that your system meets all of the necessary requirements for the software’s installation. This includes checking that the system has the right operating system, enough RAM, and sufficient storage space.
You should also make sure that you have any necessary disks or licenses for the software before starting the installation process. Once you’ve confirmed that all the prerequisites are met, you can begin preparing the system by shutting down all unnecessary applications and running a malware scan to ensure there isn’t any harmful software on your device. It’s important to take these steps seriously, to ensure that your software can run smoothly and uninterruptedly.
So, if you want to have a great experience with your new software, ensure that the system is prepared properly before starting the installation process.
Step 2: Attach the Vacuum Pump
To proceed with the next step after you have assembled the required components for vacuum pumping, the next step is to attach the vacuum pump to your system. This process is easy and can be achieved in a few simple steps. Firstly, make sure you have adequate clearance around the vacuum pump and sufficient space to carry out the installation process.
Then, connect the vacuum pump to the pipe system using the flange connections provided on the pump. Ensure that all bolts and nuts are tightened properly to prevent any air leakages and secure the pump to ensure it remains safely in place when in use. Once the vacuum pump is firmly attached to the pipe system, you can power it on and begin to apply pressure to the system.
With the right setup and proper instructions, attaching a vacuum pump is a quick and effortless process that can help you remove air from your system efficiently.
Step 3: Turn on the Vacuum Pump
“vacuum pump” Now that you have set up your vacuum chamber, it’s time to turn on the vacuum pump. This is a crucial step since it creates the necessary vacuum pressure inside the chamber. First, make sure that the valves are closed and the gauges are functioning correctly.
Then, plug in the vacuum pump and turn it on. Be sure to monitor the pressure gauges closely, and adjust the pump as necessary to maintain a consistent vacuum level. Depending on the type of vacuum pump you are using, you may need to periodically change the oil or perform other maintenance tasks.
If you notice any unusual sounds or vibrations, turn off the vacuum pump immediately and investigate the problem. With the vacuum pump running smoothly, you are now ready to proceed with your experiments or manufacturing processes in the vacuum chamber.
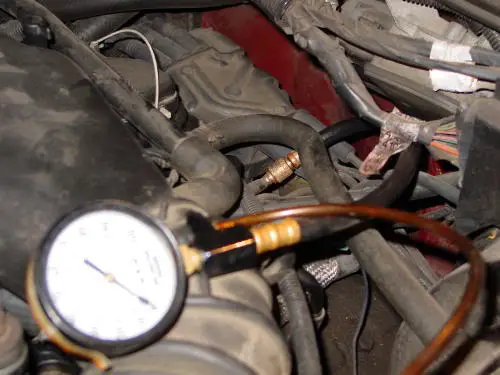
Step 4: Monitor the Gauge
When it comes to checking your tire pressure, step four is all about monitoring the gauge. This is the moment of truth – you’ll find out if your tires need more air or if they’re good to go. To start, make sure the gauge is firmly attached to the valve stem.
You should hear a slight hiss of air as you connect it. Take a quick glance at the gauge to make sure the measurement is at zero. Next, apply pressure to the tire gauge until the hissing sound stops.
This will give you an accurate reading of your tire pressure. Of course, once you have your reading, you need to compare it to the recommended pressure for your vehicle. This information can be found in your owner’s manual or on the driver’s side door jamb.
The recommended tire pressure is usually listed in PSI, or pounds per square inch. If your reading is below the recommended level, it’s time to add air. If it’s above the recommended level, you may need to let some air out.
Keeping your tires at the right pressure is crucial for safe driving, so make sure to monitor your gauge regularly.
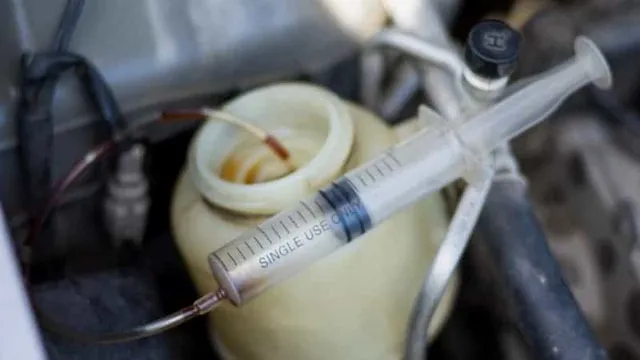
Step 5: Refill with Power Steering Fluid
Now that all the air has been bled out of the power steering system, it is time to refill it with power steering fluid. Before doing so, be sure to check your vehicle’s manual to confirm what type of power steering fluid is recommended for your specific model. This will prevent any potential damage to your system.
Once you have the correct fluid, locate the power steering fluid reservoir and remove the cap. Slowly pour the fluid into the reservoir, making sure not to overfill it. It is important to check the fluid level frequently until it reaches the appropriate level.
A common mistake is not adding enough fluid and causing the system to run dry, which can lead to costly repairs. Remember, proper fluid levels are crucial for optimal steering performance. So, take the time to fill the reservoir with the right amount of fluid, ensuring your car drives smoothly and safely.
Step 6: Check for Leaks
Now that you’ve successfully installed your new plumbing system, it’s essential to check for any leaks. A leak is a common issue that can lead to water wastage, property damage, and increased utility bills. To check for leaks, you can turn on all the faucets, showers, and flush all the toilets in your home and observe the water meter.
If the meter is still running after all the water sources are turned off, then there might be a leak. You can try tightening the plumbing connections or reaching out to a professional plumber for assistance. Checking for leaks and addressing them promptly ensures that your newly installed plumbing system continues to function efficiently and without any hindrances.
Remember to do regular maintenance checks to avoid surprises and future expenses.
Tips and Tricks
If you need to bleed the power steering in your car, using a vacuum pump is a convenient and effective method. First, ensure that your power steering fluid is fresh and at the correct level. Then, connect the vacuum pump to the power steering reservoir and use it to draw out the old fluid.
Once the old fluid has been removed, refill the reservoir with fresh fluid and start the engine. Turn the steering wheel fully to the left and right several times, checking the fluid level periodically and topping it up as necessary. This will help to remove any remaining air bubbles in the system and ensure smooth operation.
Remember to dispose of the old fluid responsibly and recycle the container if possible. With these simple steps, you can enjoy a properly functioning power steering system in your car.
Use the Right Amount of Fluid
When it comes to maintaining your car’s longevity, one of the simplest tasks you can do is ensuring the right amount of fluid is used. From oil changes to brake fluid, using the correct amount is essential to avoid major damage to your vehicle. One tip to ensure the correct amount is to refer to your car’s manual for guidelines.
Adding too much fluid can cause overflow, spillage, and even damage to your car’s mechanical parts. On the other hand, low levels of fluid can cause friction, which can lead to wear and tear on car components. In addition, using the right type of fluid is equally crucial.
Always double-check the type and viscosity that your car’s manufacturer recommends. Using the incorrect fluid type can lead to significant problems, such as reduced engine performance and even engine failure. So, remember to utilize the appropriate amount and type of fluid, and your car will thank you for it.
Check the Manufacturer’s Recommendations
Before starting your home renovation project, take the time to check the manufacturer’s recommendations. Each product has specific instructions for use and installation that can affect its durability and longevity. Following the manufacturer’s guidelines will ensure that your project is completed correctly and safely.
It can also prevent the need for costly repairs or replacements down the road. Don’t assume that you know how to use every product just because you’ve used similar ones before. Taking a few minutes to read the instructions can save you time and trouble in the long run.
By following the manufacturer’s recommendations, you can guarantee that your renovation project will look great and function properly for years to come.
Conclusion
In the end, bleeding your power steering with a vacuum pump is the ultimate remedy for steering woes. Not only is it quick and efficient, but it also ensures that your vehicle is back on track in no time. So don’t let a lack of power steer ruin your ride.
Grab a vacuum pump and get your system up and running smoothly again. It’s a pump-tastic solution for a wheel-y good time!”
FAQs
What is power steering and why does it need bleeding?
Power steering is a system that helps in easier maneuvering of the vehicle by assisting the driver in turning the steering wheel. Bleeding is necessary to remove any trapped air from the power steering system, which can cause reduced performance or total failure of the system.
Can power steering be bled without a vacuum pump?
Yes, power steering can be bled without a vacuum pump. One way is to turn the steering wheel from lock to lock while adding more fluid until there are no more air bubbles in the system. Another way is to use a hand vacuum pump to draw out the air from the power steering fluid reservoir.
What are the steps to bleed power steering with a vacuum pump?
First, fill the power steering fluid reservoir to the recommended level. Then, connect the vacuum pump to the reservoir and draw out the air. Next, start the engine and turn the steering wheel from lock to lock a few times. Finally, repeat the vacuum process until no more air bubbles are seen.
How often should power steering be bled?
It is recommended to bleed the power steering system once a year or when changing the power steering fluid. However, if there are symptoms of reduced steering performance such as difficulty turning the wheel or whining noise, the system should be bled immediately to prevent further damage.