The Ultimate Guide to Bleeding Air Out of Your 6.7 Fuel System: Tips and Techniques
If you’re a diesel truck owner, you know the importance of maintaining your vehicle’s fuel system. As time goes on, air bubbles can get trapped in the fuel line, causing performance issues and potentially even damaging your engine. Bleeding air out of your
7 fuel system is an essential maintenance task that will keep your truck running smoothly and reliably. But where do you even start? Don’t worry, we’ve got you covered. In this blog post, we’ll break down the process of bleeding air out of your
7 fuel system step-by-step, so you can tackle this task with confidence. We’ll cover everything from identifying the symptoms of air in your fuel system to the tools you’ll need to get the job done right. So, whether you’re a seasoned diesel mechanic or a first-time truck owner, this blog post is for you.
Let’s get down to business and get rid of that pesky air in your fuel line!
Preparation
If you’re wondering how to bleed air out of the 7 fuel system, preparation is key. Before you start the bleeding process, make sure the engine is off and the fuel tank is full.
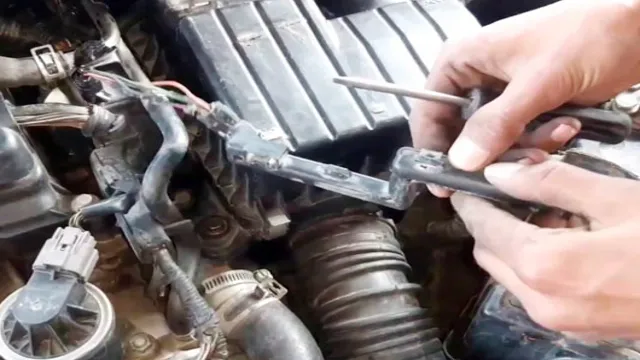
Locate the fuel rail and the high-pressure relief valve, which is typically located near the fuel filter housing. To begin the process, slowly turn the key to the “on” position without starting the engine. You will hear the fuel pump start to run, indicating that fuel is being pulled from the tank and into the system.
Next, locate the valve on the fuel rail and open it slightly; this will release any air that may have accumulated in the system. Be sure to catch any fuel that may come out with a rag or container. Once the air has been released, close the valve and repeat the process, turning the key a few more times until the fuel pump has run for several seconds.
Finally, start the engine and allow it to warm up before driving. By following these steps and taking the time to properly prepare for the bleeding process, you can ensure that your 7 fuel system is running smoothly and efficiently.
Park vehicle on level ground
When it comes to preparing your vehicle for maintenance or repair work, there’s one crucial step that often gets overlooked – parking the car on level ground. This might seem like a small detail, but it can actually have a big impact on the success of your project. Parking on an uneven surface can throw off your measurements, cause parts to shift or move unexpectedly, and even make it difficult to access certain components.
So, before you start your next automotive project, take the time to find a level, stable surface to park on. This may mean moving the car to a different location, but it’s worth the extra effort to ensure that you’re able to work safely and efficiently. By taking this simple step, you’ll be setting yourself up for success and making your project run more smoothly.
Locate fuel filter
When it comes to locating the fuel filter in your vehicle, it’s important to be prepared with the right tools and knowledge. Before you begin, make sure you have a new filter on hand, as well as any necessary replacement parts. It’s also a good idea to consult your vehicle’s owner manual or online resources for specific instructions on how to locate the fuel filter.
Keep in mind that the process can vary depending on the make and model of your vehicle. Once you feel ready to tackle the task, start by locating the fuel lines – these are typically located on the bottom of the car or near the fuel tank. From there, you should be able to trace the lines to the filter.
Remember to wear protective gloves and eyewear during the process to ensure your safety. With a bit of patience and the right tools, you’ll be able to successfully locate and replace your fuel filter, keeping your vehicle running smoothly for miles to come.
Prepare tools
Preparation is a crucial element for any successful project, and it’s no different when it comes to preparing tools for the task at hand. Whether it’s a DIY project around the house, a crafting endeavor, or even a professional job, having the right tools available can make all the difference in the world. First, take inventory of what you already have and make a list of what you need to acquire.
This will help you budget your time and money effectively. It’s also important to make sure your tools are clean, sharp, and in good repair. Not only will this help you work more efficiently, but it will also extend the life of your tools.
Finally, ensure you have a safe and organized workspace before beginning any project. By doing these things, you’ll be well-prepared for any task that comes your way.
Bleeding Process
When it comes to bleeding air out of a 7 fuel system, the process can seem daunting, but with the right steps, it’s entirely possible to do it yourself. Firstly, locate the fuel filter housing on your engine and open the vent valve.
Then, turn the key to the on position, and wait for about 30 seconds before closing the valve. After shutting the valve, start the engine and let it idle for a few minutes to ensure the fuel system has been properly bled. Checking for any leaks or abnormal behavior can also help you confirm the process has been executed correctly.
Bleeding the air out of a 7 fuel system is a vital part of ensuring your engine runs at its best and prevents damage to vital components. So with a little bit of know-how, you can do it yourself and save yourself money and time in the process.
Turn on the engine
When it comes to bleeding your engine, it’s important to know that there are a few different methods depending on your specific make and model. One common method is to turn on the engine and allow it to run for a few minutes before bleeding the lines. This helps to build up pressure in the system, making it easier to identify and remove any pockets of air.
To get started, locate the bleed valve on your engine and loosen it with a wrench. Then, instruct a helper to slowly pump the throttle while you watch for air bubbles to escape from the valve. It may take several attempts to fully bleed the engine, so be patient and persistent.
Remember, a properly bled engine is essential for optimal performance and safety on the water. So take your time and follow the manufacturer’s instructions carefully to ensure the best results.
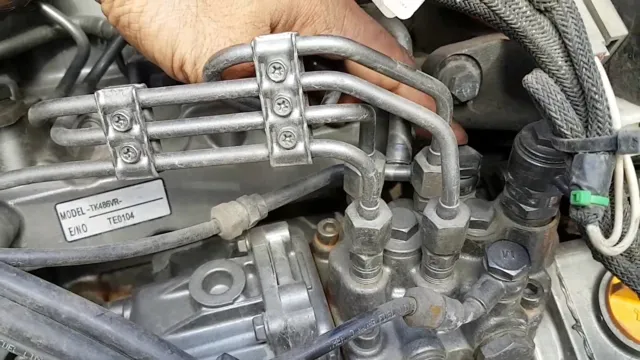
Find the fuel bleed port
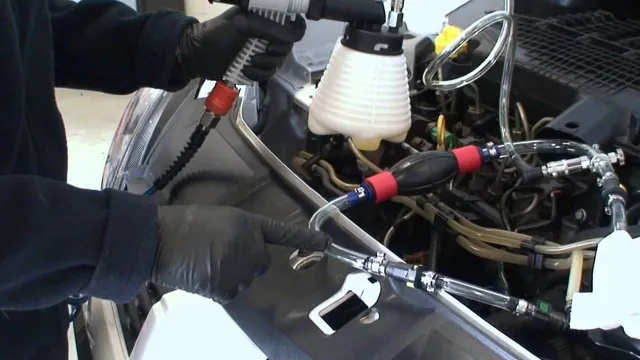
When it comes to bleeding a fuel system, the first step is to locate the fuel bleed port. This part can be a bit tricky to find, but it’s usually located near the fuel filter or injection pump. Once you’ve found it, the next step is to prepare the system for bleeding.
This involves opening the vent valve on top of the fuel filter and loosening the fuel line at the injector end. Then, use the hand primer pump to pump the fuel until it’s free from any air bubbles. This process may take some time, but it’s crucial to ensure that the fuel system is working efficiently.
By taking the time to bleed the system properly, you can avoid potential engine damage and ensure that your vehicle runs smoothly. Remember, always consult your vehicle’s manual for specific instructions on how to bleed the fuel system.
Loosen the port and let air escape
Bleeding Process One crucial step in bleeding a hydraulic system is to loosen the port and allow the trapped air to escape. This process involves opening the valve or screw that connects to the brake or clutch assembly and gently loosening it until a hissing sound is heard. This sound indicates that the air is escaping, making room for the brake fluid to fill the entire system.
It’s essential to have someone assisting you during this process so that they can monitor the fluid level while you bleed the system. If the fluid level drops too low, more air may enter the system, worsening the problem. Ensuring that the ports are correctly tightened, and there are no leaks is crucial to avoid damage to the components.
Overall, the bleeding process is necessary for maintaining the proper functioning of the hydraulic system, and it’s essential to pay attention to each step to avoid any mistakes that could put you and your vehicle at risk.
Tighten the port
When it comes to bleeding your brakes, tightening the port is a crucial step in the process. The port is the opening where air and fluid pass through, and if it’s loose, it can allow air to enter the braking system, leading to a spongy brake pedal. To tighten the port, you’ll need a wrench or a pair of pliers.
Make sure the brake lines are properly connected to the caliper or wheel cylinder and that there are no visible leaks. Then, use your wrench or pliers to tighten the port until it’s snug. Be careful not to over-tighten as this could damage the fitting and cause leaks.
Double-check to ensure everything is sealed, and you’ll be ready to move onto the next step in bleeding your brakes. Remember, taking the time to properly tighten the port can save you a lot of trouble down the road, so don’t rush this critical step. By paying close attention to the port and ensuring it’s properly tightened, you can ensure your brakes perform their best when you need them most.
Repeat the process
Now that you have successfully stopped the bleeding, it’s important to repeat the process to ensure the wound is properly cared for. Before starting again, make sure to remove any remaining blood and clean the wound with a mild soap and warm water. Once the area is clean, apply pressure to the wound using a clean cloth or bandage for several minutes.
If the bleeding does not stop after ten minutes, seek medical attention immediately. If the bleeding has stopped, apply an antibiotic ointment to the wound and cover it with a sterile bandage. It’s important to change the bandage daily and monitor the wound for signs of infection, such as redness, swelling, or pus.
By repeating this process, you can ensure that the wound heals properly and avoid further complications. Remember, if at any point you are unsure or uncomfortable with the process, seek medical attention.
Final Steps
Once you have completed the primary steps of bleeding air out of a 7 fuel system, there are a few final steps to follow that will ensure the process is complete. First, make sure that you have tightened all the fuel line connections securely.
If there are any leaks, it could cause the engine to run poorly or not start at all. Next, turn the engine over with the starter for about 30 seconds, then repeat the process a few more times until the engine starts. This will help to clear any remaining air out of the fuel system.
Finally, allow the engine to idle for a few minutes, then test drive the vehicle to ensure that everything is functioning properly. It’s essential to take these final steps to make sure that the bleeding process is effective, and your 7 fuel system is running smoothly.
Check for system leaks
As you near the end of your system maintenance checklist, it’s essential to check for system leaks. These can lead to serious issues, including data breaches, loss of productivity, and even hardware damage. To begin, look for signs of fluid or moisture around your system components.
This could indicate a leak in your cooling system, which can cause your computer to overheat and shut down. Next, perform a visual inspection of your system’s pipes, connectors, and other hardware. Look for any cracks, corrosion, or other signs of damage that could cause leaks.
Finally, consider testing your system with a leak detector to ensure that there are no hidden leaks that could cause problems down the line. By taking these final steps, you can rest assured that your system is in top shape and ready to tackle any task you throw at it.
Dispose of waste fuel properly
When it comes to disposing of waste fuel properly, there are a few final steps that you can take to ensure that you are doing it safely and effectively. The first step is to make sure that you are using the proper containers for your waste fuel. You should use a metal container that is specifically designed for storing and transporting hazardous materials.
Once you have the proper container, you need to label it clearly with the type of fuel and any other pertinent information. This will help ensure that the container is handled and disposed of properly. Next, you need to find a reputable company that can properly dispose of your waste fuel.
Check with your local recycling center or waste management company to see if they offer this service. You can also check with your state’s environmental agency to find a licensed hazardous waste disposal company near you. Be sure to ask about their disposal methods and make sure that they are in compliance with all federal, state, and local regulations.
Finally, you need to transport your waste fuel to the disposal facility. Make sure that you do this in a safe and secure manner, and be sure to follow all applicable regulations for transporting hazardous materials. This may include using a specially equipped vehicle and having the proper permits and documentation.
In conclusion, disposing of waste fuel properly requires careful attention to detail and a commitment to safety. By using the proper containers, finding a reputable disposal company, and transporting your waste fuel safely, you can help protect the environment and ensure that your waste fuel is disposed of properly. Remember, taking the time to dispose of your waste fuel properly is not only the law; it’s the right thing to do.
Ensure smooth engine operation
Now that you have carefully inspected and tuned up your engine, it’s time to focus on ensuring its smooth operation. One essential step is to regularly change your oil and oil filter, ideally every 5,000 to 7,000 miles. Dirty oil can clog the engine and cause it to run poorly, so don’t neglect this easy task.
Additionally, keep an eye on your engine temperature and ensure it stays within the appropriate range. Overheating can cause significant damage, so take action if you notice any signs of trouble. Finally, pay attention to any unusual sounds or vibrations coming from your engine and address them promptly.
By taking these final steps, you can keep your engine running smoothly and efficiently for years to come.
Conclusion
In conclusion, bleeding air out of a 7 fuel system is like playing a game of Operation – you need a steady hand, a sharp eye, and nerves of steel to get the job done. But with a bit of patience and some handy tools, you’ll be able to remove any pesky air bubbles and get your engine roaring back to life.
Remember, practice makes perfect – so don’t be afraid to dive in and give it a go!”
FAQs
What causes air to get trapped in a 6.7 fuel system?
Air can get trapped in a 6.7 fuel system due to a number of reasons such as a clogged fuel filter, damaged fuel lines, or a cracked fuel tank.
How can you detect air in the 6.7 fuel system?
The symptoms of air in the 6.7 fuel system include engine hesitation, rough idling, reduced power, and even stalling.
What is the best way to remove air from a 6.7 fuel system?
The best way to remove air from a 6.7 fuel system is to locate the fuel bleed valve and open it while pumping the fuel pump until the air is expelled and only fuel comes out.
If the 6.7 fuel system continues to have air in it, what could be the problem?
If the 6.7 fuel system continues to have air in it, it could be an indication of a more serious problem such as a damaged fuel injector, fuel pump, or pressure relief valve. It is best to have a professional mechanic diagnose and fix the issue.