Shift into Gear: A Step-by-Step Guide on How to Adjust Your Shift Linkage Safely and Easily
Are you having difficulty shifting gears when you drive? Is your shift linkage not working as it should? If so, then adjusting your shift linkage may be the solution to your problem. Shifting issues can make driving a frustrating and stressful experience, but don’t worry because this step-by-step guide is here to help. Adjusting your shift linkage is not as complicated as it may seem, and can be easily done with a few basic tools.
Think of it like tuning up an instrument – you want to ensure every gear change is smooth and in perfect harmony with your car. In this article, we will explore the fundamentals of how to adjust your shift linkage and share expert tips on how to get it right.
Prepare Your Vehicle
Adjusting the shift linkage in your vehicle is an essential task that can ensure smooth and easy gear shifting. To do so, you first need to prepare your vehicle by putting it on a flat surface, engaging the emergency brakes, and keeping it turned off. Then, locate the shift linkage under the vehicle and loosen the bolts holding it.
Once the linkage is loose, adjust it to the appropriate length using a wrench or pliers, making sure that it is secure and tight. Finally, test your gear shifting to ensure that it is working correctly. Adjusting the shift linkage may seem daunting, but it is a straightforward process that can prevent serious problems down the line.
By taking the time to complete this task, you can keep your vehicle functioning smoothly and safely.
Park on a Level Surface
When it comes to preparing your vehicle for parking, one key consideration is finding a level surface. This can be especially important if you plan to leave your car in gear, as parking on an incline can put extra pressure on your transmission. It’s also important to remember that level ground is necessary in order to get an accurate reading on your vehicle’s oil and fluids.
So before you park, take a few extra seconds to scout out a flat spot. And if you can’t find one, consider chocking your wheels to prevent them from rolling, or using a wedge to level out the ground. Ultimately, taking the time to make sure your vehicle is positioned on a level surface will help protect your car and ensure that it’s ready to go when you’re ready to hit the road again.
Use Safety Equipment
When it comes to preparing your vehicle for a safe journey, the importance of safety equipment cannot be overstated. Before hitting the road, it’s vital to make sure that your vehicle is equipped with all the necessary safety equipment, such as seat belts, airbags, and child safety seats. Seat belts are one of the most important safety features that can save your life in the event of an accident, so it’s essential to make sure that they work properly and are fastened securely before starting your journey.
Airbags also play a vital role in protecting you in the event of a collision, so it’s important to have them checked regularly to ensure that they are in good working order. Additionally, if you’re travelling with children, it’s essential to use child safety seats that are appropriate for their age, height, and weight. By taking these safety precautions, you can significantly reduce the risk of injury or death in the event of an accident.
Remember, safety should always come first when it comes to driving, so never compromise on safety equipment.
Identify Your Shift Linkage Type
Adjusting the shift linkage of your car is a fairly easy process that can be done by anyone. However, the first step in this process is to identify the type of shift linkage your car has. There are several types of shift linkages, including the cable-style and the rod-style.
If your car has a cable-style linkage, the cable runs directly from the shifter to the transmission. On the other hand, if your car has a rod-style linkage, rods connect the shifter to the transmission. Identifying your shift linkage type is crucial when adjusting the shift linkage because it will determine the method to be used.
If you are unsure of the type of shift linkage your car has, you can always consult your owner’s manual or seek the help of an auto mechanic. Once you know the type of shift linkage your car has, you can proceed to adjust it and ensure smooth gear shifts every time you drive. So, if you want to optimize the performance of your car, take a moment to identify your shift linkage type before proceeding with adjustments.
Column Shift or Floor Shift?
If you’re a car enthusiast, you know that one of the most exciting things about working on your vehicle is customizing it to your liking. If you’re considering switching up your shift linkage style, you may be wondering whether a column shift or floor shift would best suit your needs. Identifying your shift linkage type is simple, and will help you determine which style to go with.
Column shifters are located on the steering column and offer a more traditional feel to your vehicle. Floor shifters, on the other hand, are located on the floor and offer a sportier, race car-like feel. Ultimately, the decision comes down to personal preference and what type of driving you’ll be doing.
If you prioritize comfort and ease of use, a column shifter may be a better choice. However, if you’re looking for a more aggressive and thrilling driving experience, a floor shifter would be the way to go.
Manual or Automatic Transmission?
When it comes to vehicles, the debate between manual and automatic transmissions is ongoing. One of the most significant differences between the two is the type of shift linkage used to change gears. Manual transmissions require a mechanical linkage that connects the shifter in the cabin to the transmission’s gears.
This linkage can come in two forms: a cable or a rod. Cable shifters utilize steel cables that attach to the shifter and connect directly to the transmission. This type of linkage tends to be more flexible and requires less maintenance.
In contrast, rod shifters use metal rods to connect the shifter to the transmission. Rod shifters are less common and tend to offer a more direct and responsive feel. On the other hand, automatic transmissions utilize a hydraulic or electronic shift linkage.
Hydraulic shifters use pressurized fluid to shift gears, while electronic shifters use sensors and solenoids to initiate gear changes. Both types of automatic shifters tend to be more reliable and require less user input, making them a popular choice for those who prioritize ease of use. Whether you prefer manual or automatic, understanding the workings of your car’s shift linkage is crucial to maintain optimal performance and ensure a smooth ride.
Inspect the Linkage
Shift Linkage Type Before you dive into inspecting your shift linkage, it’s important to identify the type of linkage your vehicle has. The most common types of shift linkages are cable-based, rod-based, and hydraulic-based. Cable-based linkages use a cable to connect the shifter to the transmission.
Rod-based linkages use a series of rods to accomplish the same task, while hydraulic-based linkages use fluid to transfer the force from the shifter to the transmission. Identifying your shift linkage type is crucial in determining the specific maintenance and repair steps required. Keep in mind that some vehicles may have a combination of these linkage types, so it’s important to consult your vehicle’s owner’s manual or a professional mechanic for assistance if unsure.
With proper identification and maintenance, your shift linkage can provide smooth and reliable shifting for years to come.
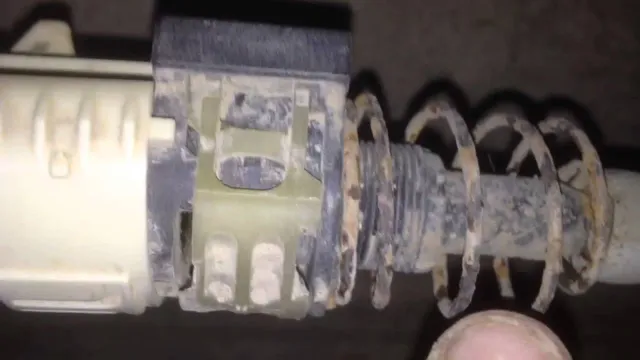
Adjust the Shift Rod
Are you having trouble shifting gears on your vehicle? One possible cause could be an improperly adjusted shift linkage. Fortunately, adjusting the shift rod is a relatively easy fix that can be done at home with a few basic tools. First, locate the shift rod, which connects the gear shifter to the transmission.
Then, loosen the lock nuts on each end of the shift rod and turn the rod clockwise or counterclockwise until the shifter moves smoothly between gears. Don’t forget to tighten the lock nuts back up once you’ve made the adjustment to prevent the rod from slipping out of place. With a little bit of patience and some trial and error, you can get your shifting back on track in no time with this simple adjustment.
Loosen the Locking Nut
Loosening the locking nut when adjusting the shift rod in your vehicle is an important step to ensure a smooth and reliable gear change. The locking nut can be found on the shift rod, close to the transmission, and is usually secured tightly to prevent the shift rod from moving during operation. To loosen it, you’ll need a wrench of the corresponding size, which you can use to turn the nut counterclockwise.
Use care not to over-tighten the nut, as it can damage the shift rod. Adjusting the position of the shift rod can improve gear changes, especially if it’s been knocked out of alignment or if you’ve recently installed new transmission components. A poorly aligned shift rod can cause jerking, grinding, or missed shifts, which can be a real headache on the road.
With the right tools and a little know-how, loosening the locking nut and adjusting the shift rod can be an easy DIY job that can save you time and money in the long run.
Rotate the Shift Rod
If you’re experiencing difficulty shifting gears on your motorcycle, it may be time to adjust the shift rod. This process is relatively straightforward and can be done with just a few tools. The first step is to locate the shift rod, which connects the gear shifter to the transmission.
Once you’ve located it, use a wrench to loosen the locknut on the shift rod. With the locknut loosened, you can now rotate the shift rod to adjust its length. Ideally, you want the shift rod to be as short as possible while still allowing for smooth gear changes.
When you’ve found the right length, tighten the locknut back up and test your gear shifter to make sure it’s working as it should. With this simple adjustment, you can improve your riding experience and avoid any fumbling with shifting gears.
Tighten the Locking Nut
Tightening the locking nut is an important step in adjusting the shift rod of your vehicle. The locking nut is the adjustable piece that keeps the shift rod in place once you have made adjustments to it. To tighten it, you’ll need to use a wrench and turn it clockwise until it is snug.
It’s important not to over-tighten it or you risk damaging the threads. Once you’ve tightened the locking nut, make sure to test your shifter to ensure it is properly aligned and shifting smoothly. If it isn’t, you may need to make additional adjustments to the shift rod, but tightening the locking nut should be your first step.
By taking the time to adjust your shift rod and tighten the locking nut, you’ll be able to enjoy smoother, more efficient shifts as you drive.
Test the Shifting
Adjusting the shift linkage can be a bit tricky, but properly aligning the linkage can make your car shift like a dream. One way to test the shifting after making adjustments is by starting your car and putting it in gear. Move through each gear, paying close attention to how smoothly the car transitions.
Do you feel any hesitation, jerking, or grinding? If so, you may need to fine-tune the shift linkage further. Alternatively, if the shifting feels smooth and seamless, then congratulations – you have successfully adjusted your shift linkage! Remember to take your car for a test drive to ensure the adjustments are working as intended. By testing the shifting after adjusting the shift linkage, you can ensure that your car shifts properly and efficiently on the road.
Move to Different Gears
When it comes to cycling, moving to different gears is essential to optimizing your ride. But, how do you know when it’s time to shift? First, pay attention to the slope of the road or the terrain – if it’s flat or downhill, you can remain in a higher gear. However, when you encounter an uphill climb or stronger headwinds, you’ll need to shift to maintain your speed and prevent burning out quickly.
It’s important to note that finding the right gear isn’t about speed, but rather about cadence. You’ll want to keep a consistent pace that isn’t too fast or too slow to avoid placing strain on your knees and legs. Practice shifting on a flat surface, then take it on a test drive with different inclines to see how your bike handles.
Don’t be afraid to experiment until you find your perfect gear ratio!
Check for Smooth Shifting
Once you’ve made sure your bike is properly adjusted and your brakes are working well, it’s time to move on to testing the shifting. Check for smooth shifting and ensure you can easily shift between gears without any hesitation or difficulty. Start by pedaling and shifting through all gears slowly, making sure they change smoothly without any grinding noise.
Then, shift while riding at a faster pace to ensure the gears are working properly while you’re in motion. It’s important to make sure your bike is shifting correctly, as it can affect your speed and efficiency on the road. Don’t be afraid to make small adjustments, such as tightening the cables or lubricating the chain, to improve your shifting experience.
Remember, a well-maintained bike makes for a much more enjoyable ride!
Final Tips and Warnings
To adjust the shift linkage, there are a few final tips to keep in mind. First, always refer to the manufacturer’s instructions and follow them carefully. If you are unsure about any steps, consult a mechanic or the manufacturer’s customer service team.
Secondly, make sure the vehicle is on a level surface and the parking brake is engaged before attempting any adjustments. This will ensure accuracy and prevent any accidents. Additionally, if you are experiencing issues with the shift linkage, it may be a sign of a larger problem with the transmission or clutch.
It’s important to address these issues promptly to prevent further damage. With these tips in mind, adjusting the shift linkage should be a relatively straightforward process.
Check Your Owner’s Manual
When it comes to maintaining and servicing your vehicle, always check your owner’s manual. Your owner’s manual contains crucial information about your car, including how to operate it safely and how to properly care for it. It is recommended that you read through your owner’s manual thoroughly to familiarize yourself with your car’s unique features and recommended maintenance schedule.
Your owner’s manual will also provide insights into how to troubleshoot common problems that you may encounter with your car. By consulting your owner’s manual, you can ensure that your vehicle is running smoothly and efficiently and avoid costly repairs down the road. Always keep your owner’s manual in a safe and easily accessible place in your car, so you can quickly and easily reference it whenever you need to.
Don’t Force Anything
When it comes to achieving success in life, it’s important to remember that forcing things is never the answer. Whether it’s in our personal or professional lives, trying to force things to happen can often produce undesirable results. Instead, it’s important to approach things with a sense of openness and flexibility.
This means being willing to pivot when things don’t go as planned and being open to new opportunities that come our way. It also means taking a step back and re-evaluating things when we feel like we’re hitting a wall. Remember, success is not just about reaching a specific endpoint, it’s also about enjoying the journey along the way.
So, take a deep breath, trust yourself and the journey, and know that everything will work out in the end if we allow it to.
If Unsure, Seek Professional Help
When it comes to legal matters, it’s always better to be safe than sorry. If you are unsure about anything, seek professional help from a lawyer or legal expert. They have the knowledge and experience to guide you through the complicated legal system and ensure you are making the right decisions.
Don’t hesitate to ask questions and get a second opinion if necessary. It’s always better to spend money on professional help upfront than to risk making costly mistakes later on. Remember, legal issues can be very complex and the consequences of a wrong decision can be severe.
By seeking professional help, you can ensure that you are doing everything correctly and that your legal matter will be resolved as smoothly and efficiently as possible. So, when in doubt, don’t hesitate to reach out to a trusted legal expert for assistance.
Conclusion
Adjusting the shift linkage may seem daunting at first, but fear not! With a little patience, a few simple tools, and a dash of perseverance, you’ll be shifting with ease in no time. Remember, just like in life, small adjustments can lead to big improvements. So don’t be afraid to tinker with your shift linkage and tailor it to your preferences.
After all, the beauty of driving is in the journey, and with a finely tuned shifter, that journey will be smoother and more enjoyable than ever before!”
FAQs
What are the signs of a faulty shift linkage?
Signs of a faulty shift linkage include difficulty shifting gears, gear slippage, grinding noises, and the shifter feeling loose or jiggly.
Can a faulty shift linkage cause transmission damage?
Yes, a faulty shift linkage can cause transmission damage as it can cause incorrect gear engagement or slippage, which can put excessive strain on the transmission.
How often should the shift linkage be inspected?
The shift linkage should be inspected at least once a year or more frequently if you notice any signs of an issue.
Is it possible to adjust the shift linkage myself?
It is possible to adjust the shift linkage yourself, but it requires specialized knowledge and tools. It’s recommended to have a professional mechanic do the adjustment to ensure it’s done correctly.