Mastering Your Ride: A Complete Guide on How to Adjust Automatic Transmission Shift Cable
Are you experiencing trouble when shifting gears on your automatic transmission vehicle? If yes, then there is a high chance that your shift cable is not adjusted properly. A malfunctioning shift cable can cause a lot of drivability issues and can even prevent your vehicle from shifting into the correct gear. Luckily, adjusting the shift cable is a straightforward process and can be done by anyone who knows the right steps to follow.
In this blog post, we’ll guide you through the steps you need to take to adjust an automatic transmission shift cable, so you can get back on the road, hassle-free.
What Does the Shift Cable do?
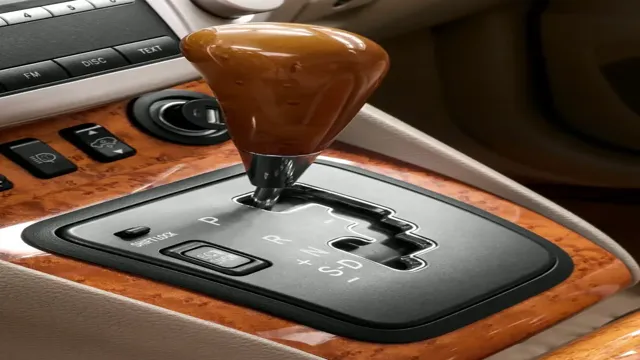
The shift cable, as the name implies, is responsible for shifting gears in an automatic transmission. It acts as a connection between the shift lever and the transmission, allowing the driver to change gears smoothly without any jerky movements. However, over time, the cable may become stretched or out of adjustment, resulting in problems with shifting.
To adjust the automatic transmission shift cable, start by locating the adjustment nut on the cable. Loosen the nut and adjust the cable until it is lined up with the desired gear position on the shift lever. Tighten the nut back up and test the shifting to ensure it is smooth and accurate.
Regularly adjusting the shift cable can help prevent problems down the line, ensuring your car runs smoothly and reliably.
Explanation of the Purpose of the Shift Cable
The shift cable is a vital component in the operation of your vehicle’s transmission system. It is responsible for transmitting the driver’s shifting commands from the shifter to the transmission. In other words, the shift cable is what allows you to shift gears in your car.
This cable consists of a metal wire that is encased in a protective sheath. When the driver selects a gear from the shifter, the cable pulls or releases the gear selector on the transmission. Without the shift cable, your car would not be able to change gears, which would make it impossible to operate the vehicle.
It is essential to ensure that your shift cable is functioning correctly to avoid any transmission-related issues. Regular inspections and maintenance can help prolong the life of your shift cable and keep your vehicle running smoothly. By taking care of this essential component, you can enjoy a much more seamless driving experience, whether you’re going on short daily commutes or long road trips.
Pre-Adjustment Preparations
Adjusting the automatic transmission shift cable can be a daunting task, but with a few simple preparations, the process can be made smoother and much easier. Before attempting to adjust the cable, it is important to ensure that the vehicle is on a level surface. This is essential as the angles and gradients of the surface can influence the cable’s position and throw off the adjustment.
Additionally, the transmission fluid level should be checked and topped up if required. A low fluid level can cause irregular shifting and throw off the adjustment of the cable. Once these initial preparations are completed, it is best to carry out a visual inspection of the cable and its components.
Any signs of wear and tear such as frayed cables or broken sheaths should be replaced before attempting to adjust the cable’s position. Taking these simple preparatory steps can save time and ensure a more accurate adjustment of the automatic transmission shift cable.
What Tools are Needed
When it comes to preparing for an adjustment, having the right tools is essential. A chiropractor will likely need a combination of different tools to ensure that they can perform the necessary adjustments. Of course, the specific tools needed will depend on the type of adjustment that is being performed.
However, some basic tools that are often used during adjustments include a chiropractic table, a cervical pillow, and an Activator tool. The chiropractic table is an essential tool that allows the chiropractor to carefully manipulate the patient’s spine while providing adequate support. A cervical pillow can also be used to ensure that the patient’s neck is in the correct position during the adjustment.
Finally, the Activator tool is a handheld device that can deliver a quick, precise adjustment to a specific area of the spine. As a chiropractor, having the right tools can make all the difference in providing high-quality care to patients.
Where to Locate the Shift Cable
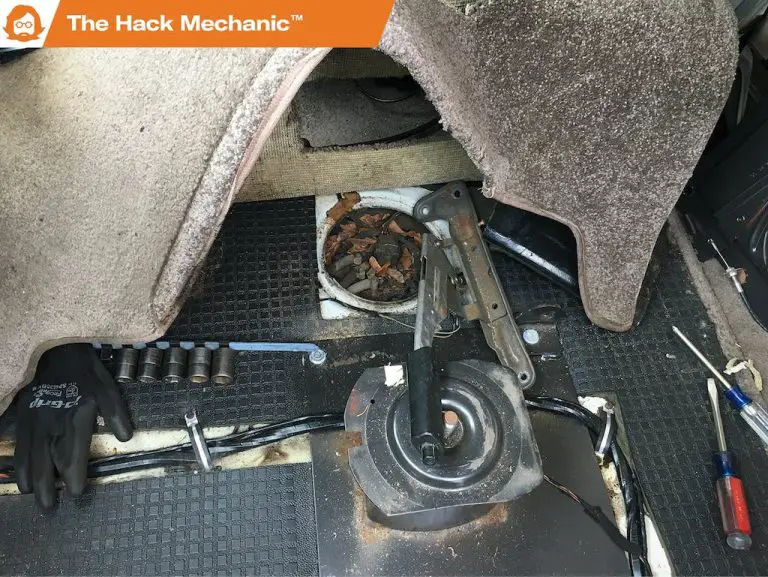
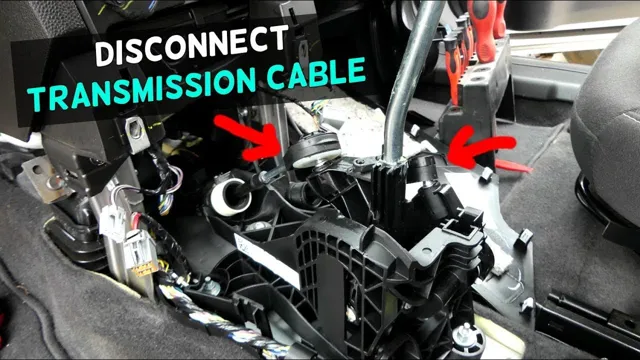
When it comes to adjusting your shift cable, the first step is to locate it. Typically, the shift cable connects the gear shift lever to the transmission. Depending on the make and model of your vehicle, the cable may be located on the top or side of the transmission or even underneath the vehicle.
It’s important to consult your vehicle’s manual to ensure that you locate the cable correctly. Once you’ve found the cable, you can begin preparing for the adjustment. This may involve clearing any obstructions around the cable or making sure the transmission is in a neutral position.
By taking the time to properly locate and prepare for the adjustment, you can ensure a smoother and more effective outcome.
Adjusting the Shift Cable
Learning how to adjust your automatic transmission shift cable can save you a lot of trouble down the line. If your transmission isn’t shifting properly, the shift cable may be the culprit. Begin by putting your vehicle in park and engaging the emergency brake to ensure that it won’t move.
Locate the shift cable under the hood, where it attaches to the transmission lever. You’ll need to remove the clip that holds the shift cable to the lever, adjust the cable until the shift lever is in the correct position, and then reattach the clip. A properly adjusted shift cable should allow your vehicle to shift smoothly and accurately without any hesitation or jerking.
Remember to always follow the manufacturer’s instructions and to consult an expert if necessary.
Step 1: Loosening the Locking Mechanism
If you’re having trouble with your bike’s shifting mechanism, one possible culprit could be a misadjusted shift cable. The first step in fixing this problem is loosening the locking mechanism that holds the cable in place. Look for the barrel adjuster, which is typically located near the shifter control on the handlebars.
Turn the adjuster counterclockwise to loosen the cable tension. You should be able to feel the cable slacken as you turn the adjuster. Once the cable is loosened, you can move on to making adjustments to the cable tension itself.
By taking the time to properly adjust your shift cable, you can ensure a smoother, more reliable ride on your bike.
Step 2: Moving the Shift Lever to the Neutral Position
Adjusting the shift cable is the next step in moving the shift lever to the neutral position. The shift cable connects the shift lever to the transmission, allowing the driver to select the desired gear. Over time, the shift cable can become loose or stretched, causing difficulty in shifting gears.
To adjust the shift cable, start by locating the shift cable under the hood. It will run from the shift lever to the transmission. Loosen the lock nut holding the cable in place and adjust the threaded stud until the shift lever is in the neutral position.
Tighten the lock nut to hold everything in place. It’s important to check the shift lever and make sure it moves smoothly through all gears after adjusting the shift cable. With this simple adjustment, shifting gears will be a breeze and you’ll be back on the road in no time.
Step 3: Adjusting the Cable
Adjusting the shift cable is an essential part of the bike maintenance process. After shifting the gears, it’s crucial to check if the shift cable is correctly adjusted or not. You can do this by riding the bike and shifting gears to see if the changes feel smooth and seamless.
If changes are clunky or don’t shift at all, it’s time to adjust the shift cable. Before adjusting, make sure that the bike is on a stable surface and won’t roll away. First, locate the barrel adjuster where the shift cable enters the derailleur.
By turning the barrel adjuster clockwise or counterclockwise, you can tighten or loosen the cable, respectively. The goal is to make sure that the cable isn’t too loose or too tight, which can cause gears to slip or not shift at all. Keep turning the barrel adjuster and testing the shifts until it feels perfect.
Step 4: Tightening the Locking Mechanism
To properly tighten the locking mechanism of your bike, you’ll need to adjust the shift cable. The shift cable is what allows you to move your bike’s gears smoothly. To adjust it, start by shifting to the smallest gear on the back wheel and then loosen the pinch bolt on the derailleur.
Next, pull on the cable until it’s tight and re-tighten the pinch bolt. Check to make sure the gears shift smoothly and, if needed, make further adjustments. If everything looks good, move the shifter to the largest gear on the back wheel and check again.
Repeat the process until all the gears shift smoothly and the cable is tight enough to keep the locking mechanism in place. Remember, a well-adjusted shift cable is essential to a smooth ride and efficient cycling!
Testing After Adjustment
Now that you’ve adjusted your automatic transmission shift cable, it’s important to test it out to make sure everything is running smoothly. Start by putting your car in neutral and releasing the handbrake. Then, turn on your engine and let it idle for a few minutes.
After that, shift through all the gears one by one, starting with park, reverse, neutral, drive, and then back to park. Make sure that your car smoothly transitions into each gear without any jerks or delays. If you feel any resistance or hear any strange noises, there may still be something wrong with your shift cable adjustment.
It’s always better to double-check everything to avoid any issues while driving. Finally, take your car for a short test drive and see how it performs. If you’re satisfied with the results, you’re good to go.
Congratulations on a job well done!
What to Check After Adjusting the Shift Cable
After adjusting the shift cable of your vehicle, it’s important to test its functionality before hitting the road. Begin the testing by starting your car and moving the gearshift through all the gears. Ensure that the transmission smoothly engages each gear and there are no unusual sounds or vibrations.
Next, take your car for a brief test drive and check for any slipping in the transmission, delay in shifting, and rough gear shifting. If you notice any of these issues, adjust the shift cable again or seek professional assistance. You don’t want to experience transmission problems while driving, so it’s crucial to test the shift cable after making adjustments.
Keep your vehicle running smoothly and ensure a safe driving experience.
Conclusion and Final Thoughts
After following these steps to adjust your automatic transmission shift cable, you’ll have a smoother ride than a freshly paved road. You’ll glide through the gears like a figure skater on ice, effortlessly shifting from park to drive and beyond. Your car will thank you, and you’ll feel like a transmission-tuning pro.
So go forth and conquer the road with confidence, knowing that you have the power to fine-tune your transmission like a champ!”
FAQs
What are the symptoms of a misadjusted automatic transmission shift cable?
Some of the symptoms of a misadjusted automatic transmission shift cable include difficulty shifting gears, slippage between gears, and the transmission staying in the wrong gear.
How do I adjust the automatic transmission shift cable on my vehicle?
To adjust the automatic transmission shift cable, locate the cable under the hood, loosen the locking tab, reposition the cable, and then tighten the locking tab. Consult your owner’s manual or a mechanic for specific instructions for your vehicle.
Can a misadjusted automatic transmission shift cable cause damage to my transmission?
Yes, a misadjusted automatic transmission shift cable can cause excessive wear and damage to your transmission by putting stress on the gears, causing them to grind and wear out prematurely.
How often should I have my automatic transmission shift cable adjusted?
It is recommended to have your automatic transmission shift cable inspected and adjusted every 50,000 miles or as instructed by your vehicle’s manufacturer. However, if you notice any symptoms of a misadjusted cable, it is important to have it checked as soon as possible to prevent damage to your transmission.

