How to Fix Oil Filter Housing Leak
Oil filter housing leaks are a common issue that many car owners face. If left untreated, an oil filter housing leak can lead to a messy, costly problem. The good news is that fixing an oil filter housing leak is a relatively straightforward process that can be done at home with the right tools and a little know-how. In this article, we will discuss the causes of oil filter housing leaks, how to diagnose the issue, and the step-by-step process for fixing the leak.
Causes of Oil Filter Housing Leaks
Oil filter housing leaks can be caused by a variety of factors, including:
- Worn-out gasket: Over time, the gasket that seals the oil filter housing to the engine can degrade and develop leaks.
- Loose housing bolts: If the bolts holding the oil filter housing in place become loose, it can cause the housing to leak.
- Cracked housing: The oil filter housing itself can develop cracks due to age or excessive tightening of the housing bolts.
- Incorrectly sized or installed oil filter: Using the wrong size or incorrectly installing the oil filter can cause the housing to leak.
Diagnosing an Oil Filter Housing Leak
Before you begin the repair process, it’s important to confirm that the oil filter housing is indeed the source of the leak. Here’s how to diagnose an oil filter housing leak:
- Inspect the oil filter housing for visible signs of oil leaks, such as wetness or drips.
- Use a flashlight to thoroughly check the area around the oil filter housing for any signs of oil leakage.
- Start the engine and let it run for a few minutes while checking for oil leaks around the oil filter housing.
- If you’re still unsure about the source of the leak, consider using a dye to pinpoint the exact location of the leak.

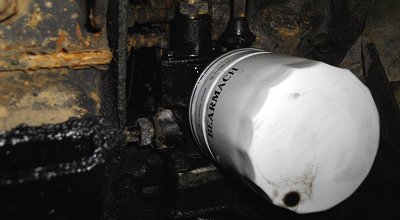
Credit: www.northamericanmotoring.com
Fixing an Oil Filter Housing Leak
Once you’ve confirmed that the oil filter housing is indeed leaking, it’s time to fix the issue. Here’s a step-by-step guide to fixing an oil filter housing leak:
Step 1: Gather The Necessary Tools And Materials
Before you begin the repair, make sure you have the following tools and materials on hand:
| Tools | Materials |
|---|---|
| Socket wrench set | New oil filter housing gasket |
| Torque wrench | Engine oil |
| Oil filter wrench | Clean rags |
| Oil drain pan |
Step 2: Drain The Engine Oil
Start by draining the engine oil from the vehicle. Place an oil drain pan beneath the oil pan and remove the drain plug to let the oil flow out. Once the oil has drained completely, replace the drain plug.
Step 3: Remove The Old Oil Filter Housing Gasket
Using the socket wrench set, carefully loosen and remove the bolts securing the oil filter housing to the engine. Once the housing is removed, carefully take out the old gasket and discard it.
Step 4: Install The New Gasket And Reattach The Housing
Place the new oil filter housing gasket in the correct position on the engine, ensuring it is properly aligned. Carefully reattach the oil filter housing and use the torque wrench to tighten the bolts to the manufacturer’s specifications.
Step 5: Refill The Engine With Oil
After securing the oil filter housing, refill the engine with the appropriate amount of engine oil, as indicated by the manufacturer’s specifications. Be sure to check the oil level using the dipstick to ensure it is at the correct level.
Step 6: Check For Leaks
Start the engine and let it run for a few minutes, then check for any signs of oil leaks around the oil filter housing. If there are no leaks, you have successfully fixed the oil filter housing leak.
What could be causing a burning smell in my car when parked in the garage?
The presence of a burning smell in your car when parked in the garage can be an indication of several underlying issues. One possible cause could be an overheating engine, leading to the burning of coolant or oil within the engine compartment.
Another potential culprit might be a malfunctioning electrical component, such as faulty wiring or a malfunctioning fuse, which could generate heat and produce a burning smell.
Additionally, a fluid leak, such as oil or transmission fluid, dripping onto a hot surface within the engine compartment could also be responsible for the smell. It is crucial to address this issue promptly as it could be a sign of a more significant problem that could impact the safety and performance of your vehicle.
I recommend consulting with a qualified automotive technician who can perform a thorough inspection and diagnostics to accurately identify and resolve the cause of the burning smell.
FAQ:
What Are The Common Signs Of An Oil Filter Housing Leak?
Leaking oil, oil puddles around the engine, burning oil smell, low oil levels.
How Can I Diagnose An Oil Filter Housing Leak?
Inspect the housing for visible leaks, check oil level frequently, monitor for burning oil odor.
Can I Fix An Oil Filter Housing Leak On My Own?
It’s possible with the right tools and knowledge, but professional help is recommended.
What Are The Potential Consequences Of Ignoring An Oil Filter Housing Leak?
Risk of engine damage, decreased performance, increased repair costs, environmental impact.
Is it possible for an oil filter housing to only leak coolant and not oil?
Indeed, it is possible for an oil filter housing to primarily leak coolant and not oil. While it is not a common occurrence, there is a theoretical possibility for coolant leakage in the oil filter housing. Normally, oil filters are designed to prevent any leakage, but in certain cases, coolant can seep through the unit. This is primarily due to the fact that the oil filter housing incorporates internal passages with gaskets specifically designed for handling coolant. These gaskets, which are intended to seal coolant, sometimes become compromised, resulting in coolant leaks within the oil filter housing unit.
Why is coolant still leaking into the oil after replacing the head gasket in a 2005 Mini Cooper S Hatchback?
After having the head gasket and valve job replaced on my 2005 Mini Cooper S Hatchback (R53), I am still experiencing the unfortunate issue of coolant leaking into the oil. Despite the recent repairs, the problem persists and I am unsure why this is happening. I would greatly appreciate any insight or guidance on this matter.
What could be causing a bad oil leak on the passenger side of my 2006 BMW 330i?
There could be several reasons causing a bad oil leak on the passenger side of your 2006 BMW 330i. One possibility is that the valve cover gasket may be worn or damaged. The valve cover gasket is responsible for sealing the valve cover to the engine, preventing oil from leaking out. If this gasket is worn out, it can lead to oil leaks.
Another potential cause could be a problem with the oil filter housing gasket. This gasket seals the oil filter housing to the engine block and can also become worn over time. If it fails, it can result in oil leaking onto the passenger side of the engine.
Additionally, the oil pan gasket may be a potential source of the leak. The oil pan is located underneath the engine and holds the engine oil. If the gasket between the oil pan and the engine block deteriorates or becomes damaged, oil can escape and cause a leak.
Other possible causes could include a leak from the oil cooler or a loose or damaged oil drain plug. It’s essential to inspect these components to determine the root cause of the oil leak.
To accurately diagnose the issue, it is recommended to have a professional inspection performed by a certified BMW technician. They will be able to identify the specific source of the oil leak and provide the necessary repair or replacement.
Conclusion
Dealing with an oil filter housing leak may seem daunting, but with the right tools and knowledge, you can tackle the issue with confidence. By following the steps outlined in this article, you can effectively diagnose and fix an oil filter housing leak, saving yourself time and money in the process.

