Stop Coolant Hose Leaks in their Tracks: Essential Tips and Tricks
If you own a car, one of the essential things you need to keep an eye on is your coolant hose. It plays a vital part in the engine and helps regulate the temperature. However, like any other parts of the car, coolant hoses are prone to damage and leaks.
This issue can lead to engine overheating and other significant problems. Are you dealing with a coolant hose leak? Don’t panic! Our comprehensive guide will help you understand what causes the leak, how to diagnose the problem, and what steps to take to fix it. We’ll take you through the entire process, from identifying the source of the leak to replacing the hose or clamping it back together.
First, we’ll help you understand the symptoms of a coolant hose leak so you can quickly detect the problem and prevent further damage. Secondly, we’ll show you how to diagnose the leak by inspecting the hoses and the coolant system. Thirdly, we’ll take you through the steps of fixing the leak, whether it’s by replacing the hose or clamping it back together.
In this guide, we’ll also provide you with tips on how to prevent any future coolant hose leaks. With our easy-to-follow instructions, you’ll be able to keep your car running smoothly and avoid costly repairs. So, if you’re dealing with a coolant hose leak, keep reading our guide to become an expert on fixing it!
Identifying the Problem
If you’re experiencing a coolant hose leak, it’s important to identify the problem before attempting to fix it. One of the most common signs of a coolant hose leak is a decrease in engine performance or overheating. You may also notice a strange smell, steam, or visible coolant dripping under your vehicle.
To identify the exact location of the leak, you’ll need to inspect all of the coolant hoses, clamps, and connections. Check for cracks, holes, or loose fittings. If you’re unable to locate the leak, it’s recommended to take your vehicle to a trusted mechanic.
Once the location of the leak is found, be sure to have the appropriate replacement parts before attempting to fix it. A coolant hose leak can cause serious damage to your engine if not repaired promptly.
Checking for Leaks
When it comes to checking for leaks, identifying the problem is the first step. Often, leaks go undetected until they become a major issue, so it’s important to be on the lookout for any signs of a problem. One common sign of a leak is water stains or damage on walls or ceilings.
You may also notice a musty or damp smell in certain areas of your home. To locate the source of the leak, start by checking all visible pipes and connections. However, not all leaks are easily visible, and you may need to employ the help of a professional plumber to identify any hidden sources of water damage.
By catching leaks early and addressing them promptly, you can save yourself from costly repairs down the line.
Pinpointing the Hose
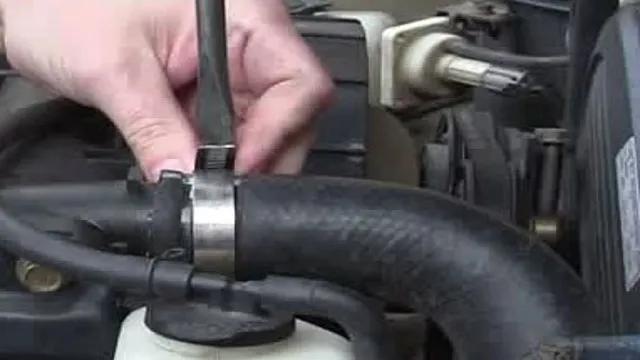
When it comes to a malfunctioning hose, the first step to fixing the problem is identifying exactly where the issue lies. One common problem with hoses is leakage. This can occur anywhere along the length of the hose, but it is important to start by checking the ends of the hose first.
These are the areas that are most likely to experience wear and tear, especially if the hose is frequently being connected and disconnected. Another potential issue to look out for is cracks in the hose itself. These cracks can occur due to age or being exposed to harsh environmental conditions.
To identify the exact location of the problem, it may be necessary to run water through the hose and visually inspect it for any signs of leakage or damage. Once the problem has been pinpointed, the appropriate steps can be taken to repair or replace the affected segment of the hose.
Gathering Tools and Supplies
If you’ve found yourself with a coolant hose leak, you’ll want to make sure you gather the right tools and supplies before attempting any repairs. First, you’ll need replacement coolant hoses, which can easily be found at your local auto parts store or online. You’ll also need a hose clamp kit, as well as a coolant drain pan and a funnel.
It’s a good idea to have some cleaning supplies on hand as well, such as a degreaser and a rag, to clean the area around the leak before you start working. Additionally, you may need some basic hand tools like pliers, sockets, and a wrench depending on the location of the leak. By having everything you need on hand before you start, you’ll save yourself time and hassle in the long run.
With the right tools and supplies, fixing a coolant hose leak can be a straightforward DIY project that will keep your car running smoothly for years to come.
Tools Needed
When it comes to any DIY project, having the right tools and supplies is crucial. So, before you start on any task, you need to gather all the necessary tools and supplies to get the job done efficiently. The same goes for any home renovation project.
For instance, if you’re planning on tearing down an old wall and rebuilding it, you’ll need a hammer, a drill, a saw, measuring tape, and a leveler. Additionally, safety gear like gloves, goggles, and a hard hat are a must. You don’t want to compromise your safety for anything.
Having all the right tools and supplies on hand saves you time and money in the long run as you won’t have to go to the store in between the process. So, make a list of all the necessary items before starting on any project to make things easier for yourself.
Supplies Needed
When it comes to starting a new project, having all the necessary tools and supplies is crucial. Whether you’re working on a DIY craft or a home improvement task, you’ll need to gather a few essentials beforehand. One of the most important things to consider is the type of project you’re working on and the specific supplies it requires.
For instance, if you’re working on a sewing project, you’ll need a sewing machine, fabric, thread, scissors, and pins. On the other hand, if you’re painting a room, you’ll need paint, brushes, rollers, and painter’s tape. It’s also important to consider the quality of your supplies.
Choosing high-quality tools and materials can make a significant difference in the outcome of your project. Investing in durable tools that will last for years to come can save you time and money in the long run. So, before you dive into your next project, take some time to gather all the necessary supplies and ensure that they’re of the highest quality possible.
Replacing the Hose
Coolant leaks can be a real headache and can have serious consequences on your vehicle’s performance. One common cause of coolant leaks is a damaged or worn-out hose. If you suspect that your coolant hose is the culprit, replacing it is a simple and straightforward fix.
Begin by locating the damaged hose and checking its condition. If it’s cracked or worn out, remove it using a pair of pliers or a wrench. Be careful not to damage any surrounding components.
Once the old hose is removed, replace it with a new one and use clamps to secure it in place. Refill the cooling system with fresh coolant and check for any leaks. With a new hose, your vehicle will be running smoothly again in no time, and you won’t have to worry about coolant leaks causing any damage.
Remember to regularly check your hoses for any signs of wear and tear to prevent future leaks.
Draining the Coolant System
Replacing the Hose Draining the coolant system is a crucial step when replacing a hose in your car’s engine. To start, make sure your engine is cool to the touch to avoid any burns. Begin by locating the low-pressure hose and the drain plug.
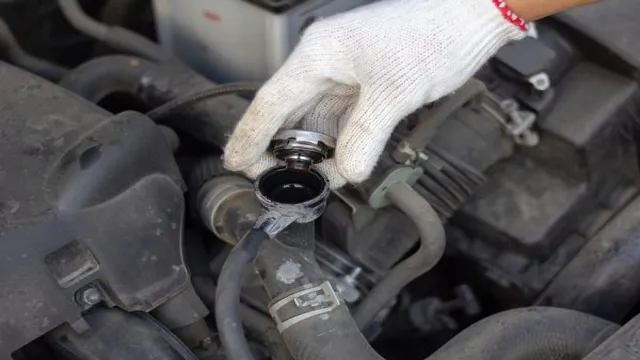
Next, position a container under the drain plug to catch the coolant. Don’t forget to loosen the radiator cap to allow air to flow. Once the coolant has been drained, you can safely remove the old hose.
Take note of its placement and carefully remove any clamps holding it in place. It’s important to inspect the hose for any signs of wear or cracks, as it may indicate an underlying issue with the coolant system. When fitting the new hose, ensure it’s the correct size, and use clamps to secure it in place.
Refill the coolant tank with the recommended amount and start the engine to check for leaks. With the hose replacement complete, you can enjoy a smoothly-running engine and peace of mind knowing your coolant system is functioning correctly.
Removing the Hose
Replacing a hose can be a simple task, depending on the type of hose that needs to be replaced. Before you begin, ensure you have the right tools, such as pliers, a wrench, and a new hose of the same size. First, turn off the water supply to the hose and drain any remaining water.
Next, locate the hose that needs to be replaced and disconnect it from the water source by loosening the nut with pliers or a wrench. If the hose is secured with a clamp, use pliers to loosen and remove it. Once the hose is disconnected, remove any debris or dirt from the connection site and inspect for any damage to the fixture.
Finally, attach the new hose by tightening the nut or clamp and turn on the water supply to test for leaks. With a little patience and the right tools, replacing a hose can be done quickly and easily.
Installing the New Hose
When it comes to replacing a hose on your vehicle, it’s important to install the new one correctly to prevent any leaks or damage. The first step is to ensure that the new hose matches the old one in terms of size and shape. Once you have determined that the new hose is a good fit, you will need to remove any clamps or fittings that are currently holding the old hose in place.
Carefully detach the old hose from the engine and any other components, taking care not to damage any surrounding parts. Then, slide the new hose into place and attach any clamps or fittings necessary to secure it. Make sure that the hose is tightly secured and free from any kinks or twists that could cause problems down the line.
A professional mechanic can always assist if you’re unsure how to proceed, but with some patience and attention to detail, replacing a hose on your own shouldn’t be too difficult.
Refilling the Coolant System
When it comes to replacing a coolant hose, it’s essential to have a basic understanding of the process. First, identify the problem by checking for leaks or cracks in the hose. Once you determine the need for replacement, gather all the necessary tools, including pliers, wrenches, and a new hose, before beginning.
Begin by loosening the clamps that secure the worn-out hose in place, then remove it from the engine. Take time to clean the area around the connection point and inspect the other hoses for any signs of wear. After inserting the new hose, be sure to tighten the clamps securely and fill the coolant system with the appropriate coolant mix.
It’s vital to follow any specific procedures for your vehicle to avoid any damage or issues that could arise from a poorly functioning coolant system. A properly functioning coolant system is crucial to the car’s engine, regulating its temperature and preventing overheating, so replacing a worn-out coolant hose could save you from bigger problems down the line.
Tips for Maintenance and Prevention
If you’re experiencing a coolant hose leak, it’s important to address the issue as soon as possible to prevent any further damage to your engine. Here are some tips on how to fix a coolant hose leak. First, locate the leak and determine the size and severity of the damage.
Next, turn off the engine and release any pressure in the cooling system. Remove the damaged section of the hose and clean the area where the new hose will be installed. Then, install the new hose and secure it properly with clamps.
Finally, refill the cooling system with the appropriate amount of coolant and test for leaks. It’s important to regularly maintain your cooling system to prevent leaks from occurring in the first place. This includes checking the hoses and clamps for any wear and tear, as well as flushing the system and replacing the coolant according to the manufacturer’s recommendation.
By following these tips for maintenance and prevention, you can keep your engine running smoothly and avoid any costly repairs. So, don’t overlook the importance of your cooling system and take care of any coolant hose leaks right away.
Conclusion
In summary, fixing a coolant hose leak is a modern-day form of surgery. It requires precision, patience and the right tools in order to avoid complications. However, with the proper care and attention, you can effectively put a ‘band-aid’ on your coolant hose and get your vehicle back on the road.
Remember to stay vigilant and keep an eye out for any potential warning signs. After all, a small leak can quickly turn into a big problem if left unattended. So, roll up your sleeves and fix that coolant hose leak like the modern-day master mechanic that you are!”
FAQs
What are the common signs of a coolant hose leak?
Some common signs of a coolant hose leak include low coolant levels, a sweet smell coming from the engine, overheating, and visible coolant leaks under the car.
How can I locate the source of a coolant hose leak?
To locate the source of a coolant hose leak, start by visually inspecting all the hoses and connections in the cooling system. You can also use a pressure tester to pressurize the system and look for leaks. If the leak is small, you may need to add UV dye to the coolant and use a black light to locate the source.
Can I fix a coolant hose leak myself?
Yes, you can fix a coolant hose leak yourself if you have some basic mechanical knowledge and tools. You will need to drain the coolant, remove the damaged hose, and replace it with a new one. It’s important to use the correct type of hose for your vehicle and to ensure that all connections are properly tightened.
What should I do if I can’t fix the coolant hose leak myself?
If you are unable to fix the coolant hose leak yourself, you should take your vehicle to a trusted mechanic or dealership. They will be able to properly diagnose and fix the issue, and ensure that the cooling system is functioning correctly to prevent future leaks.

