Unlocking the Solution: Your Ultimate Guide on How to Fix a Broken Glove Box Latch
Is your car’s glove box latch broken and frustrating you every time you try to open or close it? It’s a common enough problem, but one that still needs a solution. After all, how can you feel secure leaving your belongings inside the glove box if it can’t even lock properly? Fret not, as fixing a broken glove box latch can be a straightforward and relatively easy task for most car owners. By following a few key steps, you can easily remedy this inconvenience and restore the functionality of your glove box.
In this blog post, we will explore the causes of a broken glove box latch, the tools required for fixing it, and the step-by-step process you need to follow to get your glove box back in working condition. So, if you’re struggling with a stubborn and broken glove box latch, read on to learn how to fix it like a pro!
Identify the Issue
If you’re struggling with a broken glove box latch, you’re not alone. This frustrating problem can make it difficult to access important items in your glove box. The good news is that fixing a broken latch is usually a simple process.
First, identify the issue. Is the latch stuck, loose, or broken? Once you know what’s wrong, you can then take the necessary steps to fix it. If the latch is stuck, try lubricating it with a silicone spray or WD-40.
For a loose latch, tighten any screws or bolts that may have come loose. If the latch is broken, you may need to purchase a replacement latch and install it yourself or take it to a mechanic to have it repaired. Overall, fixing a broken glove box latch may require a little bit of effort, but it’s definitely worth it to have a functioning glove box.
Check for loose screws or damaged latch mechanism
When it comes to the security of your gate, the last thing you want is a faulty latch mechanism or loose screws. Not only can this make your gate vulnerable to intruders or unwanted guests, but it can also lead to wear and tear over time. To identify whether there is an issue with your latch mechanism or screws, start by visually inspecting your gate.
Look for any screws that appear loose or bent and tighten or replace them as necessary to ensure a secure fit. Additionally, check the latch mechanism to make sure it is functioning properly and not damaged in any way. If you notice any issues, it’s best to address them immediately before they worsen and potentially compromise the safety of your gate.
Remember, taking the time to ensure that your gate is in good working order is key to keeping your property secure.
Remove the Old Latch
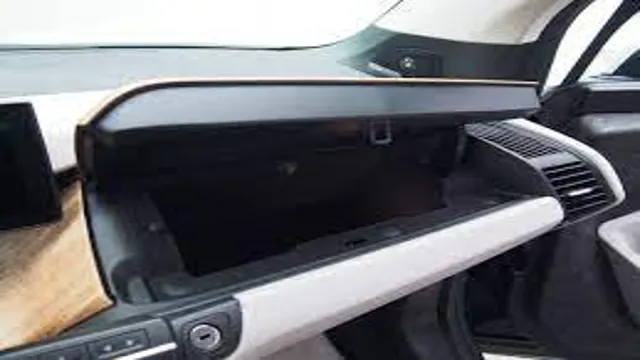
Now, let’s get started on fixing that broken glove box latch. First, you’ll need to remove the old latch. Begin by opening the glove box and emptying its contents.
Next, locate the latch on the inside of the glove box door. There should be two screws holding it in place. Use a Phillips head screwdriver to remove the screws and carefully pull the old latch out of the door.
Be sure to keep the screws in a safe place, as they’ll be needed to install the new latch. Once the old latch is removed, inspect it for any damage or wear and tear. If it’s beyond repair, you’ll need to purchase a new one before moving onto the next step.
With the old latch out of the way, you’re one step closer to getting your glove box fully functional again!
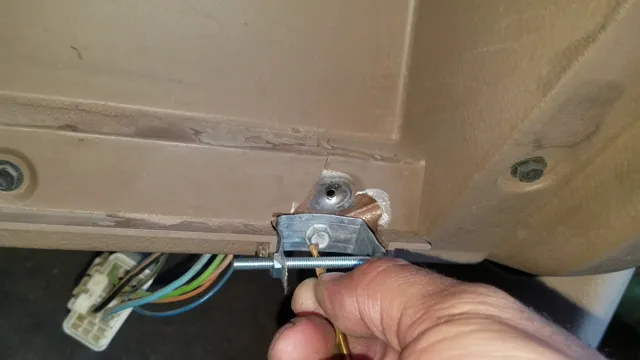
Access the latch from the back or underside of the glove box
If you need to replace the latch on your glove box, don’t worry! Accessing it is easier than you might think. To remove the old latch, you’ll need to locate it from the back or underside of the glove box. Depending on your vehicle model, you may need to remove a few screws or plastic covers to get to it.
Once you’ve located the latch, simply detach it from the glove box by removing any screws or clips that are holding it in place. Be sure to keep track of these screws or clips so you can reuse them with the new latch. Remember, the goal is to remove the old latch without damaging anything around it.
By taking your time and following the instructions carefully, you can easily install the new latch and get your glove box back in working order.
Unscrew any screws holding the latch in place
When it comes to replacing the old latch on your door, the first step is to remove the outdated one. You will need to unscrew any screws holding it in place with a screwdriver. Be sure to keep the screws in a safe place so that you don’t lose them.
Once you’ve removed the screws, you can simply lift the old latch out of the door. If the latch is particularly stuck, you may need to use a little bit of force to wiggle it free. Remember to be gentle so you don’t damage the door.
With the old latch out of the way, you can now move on to installing the new one. Choosing the right latch can make a significant difference in the safety and security of your home. By replacing your old, worn-out latch with a new and updated one, you can rest easy knowing that your door is secure and your family is protected.
Replace the Latch
If you’re wondering how to fix a broken glove box latch, it’s actually a relatively easy process. The first step is to remove the old latch. You can typically do this by unscrewing it from the inside of the glove box door.
Once you have the old latch removed, it’s time to install the new one. Place the new latch in the spot where the old one was, and then attach it with screws. Make sure you tighten the screws securely to ensure the new latch doesn’t come loose.
Once the new latch is installed, give it a test to make sure it’s working properly. If it opens and closes smoothly, you’re all set! With this simple process, you can save yourself from having to replace the entire glove box.
Purchase a new latch that matches the make and model of your vehicle
If you’re having trouble closing or opening your vehicle’s door, it may be time to replace the latch. Purchase a new latch that matches the make and model of your car to ensure it fits properly. Installing a latch isn’t the most complicated task, but it does require some patience and focus.
Begin by removing the inside door panel to access the latch. Once the panel is off, locate the latch and unscrew any screws or bolts holding it in place. Carefully disconnect any wires or rods connecting the latch to the door, making sure to remember their placement for when you install the new latch.
Then, insert the new latch, reconnect any wires or rods, and securely attach it to the door with screws or bolts. Finish by replacing the door panel. With your new latch in place, your car door should open and close smoothly.
Don’t hesitate to replace your vehicle’s latch for a more comfortable and safe ride.
Attach the new latch with screws or bolts
When it comes to securing your doors, having functional latches is vital. Over time, latches can loosen, break, or rust, which can compromise the security of your home. If you need to replace your latch, it’s crucial to do it correctly to ensure that your door stays secure.
Follow these simple steps to attach your new latch with screws or bolts: First, remove the old latch by unscrewing the screws or bolts holding it in place. Next, take your new latch and line it up with the holes left by the old latch. Make sure the latch sits flush against the door, and there’s no gap between the door and latch.
After you’ve lined up the latch, insert the screws or bolts through the holes and tighten using a screwdriver or wrench. Ensure that you tighten the screws or bolts enough, but not too tight as this can damage the new latch or door. Finally, check that the door still opens and closes smoothly, and the latch engages correctly.
Changing your latch might not seem like a big deal, but it’s essential to take your time and do it right. By following these simple steps, you can replace your latch in no time, ensuring the safety and security of your home. Remember to choose the right latch for your door and ensure it’s the correct size and type.
When done right, replacing your latch is an easy and straightforward task that will give you peace of mind. So go ahead and replace that old, worn-out latch and rest easy knowing your home is secure.
Test the Latch
If you’re struggling with a broken glove box latch, you may think the only solution is to replace the entire latch mechanism. However, before you shell out the money for a new latch, it’s worth testing the current one to see if you can fix the problem yourself. First, open the glove box and locate the latch mechanism.
Inspect the latch for any visible damage or wear, then try closing and opening the glove box a few times to see if the latch engages properly. If it doesn’t, try adjusting it by tightening any screws or bolts. If you still can’t get it to work, you may need to resort to replacing the mechanism altogether.
Remember, always be gentle when testing and adjusting the latch to avoid causing any further damage. With a bit of patience and troubleshooting, you may be able to fix the issue and save yourself some money in the process.
Close and open the glove box to ensure the new latch is secured
After replacing the glove box latch, it’s crucial to test it out to make sure that it is securely in place. Start by gently lifting and dropping the glove box door to make sure that it snaps shut tightly. Then, try pulling on the door to see if it opens easily and without any resistance.
If the door doesn’t open smoothly or if it feels loose, it may be necessary to adjust the latch or tighten the screws. Make sure that the latch is also lining up properly with the striker plate on the dashboard. If all seems well, open and close the glove box several times to test the latch’s durability and reliability.
With these simple steps, you can be confident that your glove box latch will function properly and keep your belongings safe and secure.
Conclusion
When it comes to fixing a broken glove box latch, the key is to remain calm and methodical. You can either try the DIY approach by searching for online tutorials or simply bring the car to a professional mechanic. Remember, it’s always better to address the issue sooner rather than later, so don’t let that flimsy latch keep you from accessing your favorite snacks or important car documents! With a bit of patience and know-how, you’ll be popping that glove box open in no time.
“
FAQs
What causes a glove box latch to break?
There are several reasons why a glove box latch can break, including wear and tear, accidental damage, or a faulty latch mechanism.
Can a broken glove box latch be repaired?
Yes, in most cases a broken glove box latch can be repaired. However, the extent of the repair may depend on the severity of the damage.
How do I remove a broken glove box latch?
To remove a broken glove box latch, you will need to use a set of pliers or a screwdriver to loosen the screws holding the latch in place. Once the screws are removed, the latch can be pulled out.
How much does it cost to replace a broken glove box latch?
The cost of replacing a broken glove box latch will depend on the make and model of your vehicle, as well as the severity of the damage. On average, you can expect to pay between $50 and $150 for a replacement latch.