Tracking Engine Hours Made Easy: A Complete Guide on How to Connect Hour Meter to Your Diesel Engine
Have you ever wondered how long your diesel engine has been running? Whether you’ve got a generator, tractor, or boat, an hour meter is an essential instrument that tells you how long your diesel engine has been running and when it’s due for maintenance. But how do you connect an hour meter to a diesel engine? Fear not, we’ve got you covered! In this blog post, we’ll break down the step-by-step process of connecting an hour meter to your diesel engine. We’ll cover the tools and materials you’ll need, how to locate your diesel engine’s ignition wire, how to wire and mount the meter, and finally, how to test it.
Connecting an hour meter may seem like a daunting task, but it’s actually a straightforward process that can be done with just a few tools. By the end of this post, you’ll have all the information you need to install your very own hour meter and keep track of your diesel engine’s running time. So, let’s dive in!
Equipment Required
Connecting an hour meter to a diesel engine is a simple process that can be completed with just a few basic tools. Firstly, you will need to purchase an hour meter which can be found at most hardware and automotive stores. Once you have your hour meter, you will need to locate a suitable location to attach it to your engine.
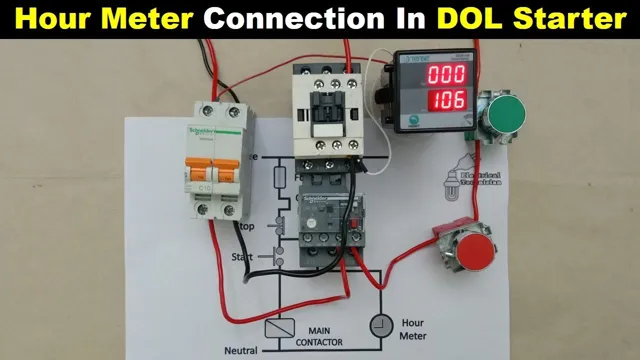
It’s best to attach the hour meter in an easily accessible location, where you can easily monitor it. Next, you will need to connect the hour meter to the engine’s wiring harness. This is a straightforward process that can be accomplished by following the wiring diagram provided with your hour meter.
You’ll need a wire stripper, crimper, and pliers to connect the wires. Make sure to double-check all of your connections to ensure they are secure and stable. Finally, you’ll need to connect the hour meter to the power source.
In most cases, this will involve connecting the hour meter to the battery. Once you have completed these steps, you should have a functioning hour meter, which will help you keep track of your diesel engine’s usage and maintenance schedule.
Hour Meter and Wiring Harness
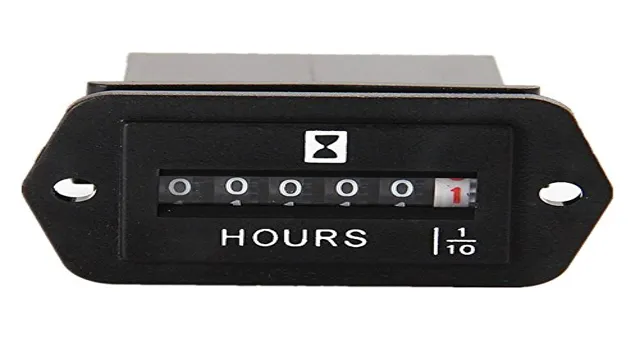
One important aspect of maintaining any piece of machinery is keeping track of the usage hours. This is where an hour meter can come in handy. An hour meter is a simple device that tracks how many hours a machine has been in use.
This information can be helpful in predicting maintenance and repair needs. Additionally, a wiring harness is important for ensuring that the hour meter is connected properly to the machine. A wiring harness is a bundle of wires that are designed to fit and connect to a specific machine.
It can help prevent damage to the machine and ensure that the hour meter is functioning properly. If you’re not sure how to install an hour meter or wiring harness, it’s a good idea to consult the manufacturer’s instructions or seek the help of a professional mechanic. Taking care of these small details can go a long way in ensuring the longevity and efficiency of your machine.
Screwdriver and Wrench
If you plan to do some basic repairs or DIY projects around your house, then a screwdriver and wrench are two essential tools you’ll need in your toolbox. A screwdriver comes in various sizes and types that you can use to tighten or loosen screws, while a wrench is perfect for tightening or loosening bolts and nuts. Ensure that you have both a Phillips head and flathead screwdriver, as they’ll be useful for both types of screws you’ll come across.
A set of wrenches is also vital, as it will come in a range of sizes that you can use for different-sized bolts and nuts. While there are power tools that you can use, a screwdriver and wrench are the basic essentials that allow you the necessary leverage by hand to handle most repairs, both small and large. Consider investing in good-quality screwdrivers and wrenches since they’ll last longer and save you the time and hassle of frequent replacements.
Overall, having a screwdriver and wrench on hand will allow you to complete a multitude of tasks, and they’re a must-have for any DIY enthusiast or homeowner.
Steps to Connect Hour Meter
If you are looking to install an hour meter on your diesel engine, there are a few important steps you should follow. The first thing you need to do is locate the spark plug wire. Once you have located it, you will need to remove it and connect it to the hour meter’s sensor wire.
Next, you will need to connect the hour meter’s ground wire to the engine’s frame. This will ensure that the hour meter has a good ground connection. Once you have made these connections, you will be ready to power up the hour meter.
Finally, you will need to test the hour meter to make sure it is working properly. To do this, simply run your engine for a few minutes and check the reading on the hour meter. If everything is working properly, the hour meter should be tracking your engine’s running time accurately.
By following these simple steps, you can easily connect an hour meter to your diesel engine and keep track of its running hours.
Step One: Locate Ignition Wire
To connect an hour meter to your vehicle, the first step is to locate the ignition wire. This wire is responsible for providing power to your vehicle’s ignition system and is essential for the hour meter to operate correctly. You can find this wire by referring to your vehicle’s owner’s manual or by using a wire tester.
Once you have located the ignition wire, you need to connect the hour meter to it. You can do this by using a crimp connector or by soldering the wires together. Make sure to follow the instructions provided with your hour meter and double-check all connections to ensure they are secure.
With the ignition wire connected, your hour meter will now accurately display the number of hours your vehicle has been in use. Whether you’re tracking maintenance on your personal vehicle or keeping track of work hours on a fleet of vehicles, connecting an hour meter is a simple but essential step.
Step Two: Connect the Hour Meter to the Ignition Wire
Connecting an hour meter to your ignition wire is a relatively straightforward process that requires just a few simple steps. First, locate the ignition wire in your vehicle or equipment and disconnect it from the ignition coil. Then, connect one end of the hour meter to the ignition wire and the other end to the ignition coil.
Once the connections are secure, you can turn on the engine and test the functionality of your hour meter. If you notice any issues with the display or accuracy of your meter, double-check your connections and wiring to ensure there are no loose connections or shorts. By following these simple steps, you can easily monitor the usage and maintenance of your equipment or vehicle over time.
With an hour meter installed, you’ll be able to track service intervals, fuel consumption, and more, allowing you to stay on top of maintenance to ensure the longevity and reliability of your machinery. So, if you’re looking for an easy way to keep track of usage and maintenance, consider installing an hour meter today.
Step Three: Ground the Hour Meter
After you have located the wires to the ignition system, the next step of connecting the hour meter is to ground it properly. Grounding is essential because it helps to ensure proper function and prevents electrical damage to the meter or other connected components. To ground the meter, you should find a suitable location on your machine’s frame that can provide a solid, stable connection.
It’s important to select a spot that is free of rust, paint, or other contaminants that could interfere with the grounding process. Once you have decided on a spot, clean the area thoroughly and then secure the ground wire to the frame using a screw or other suitable fastener. This will ensure that the hour meter is properly grounded and ready to accurately track the hours of operation.
By following this step-by-step procedure, you can easily connect the hour meter to your machine and keep track of its usage for maintenance purposes.
Testing and Troubleshooting
So, you’re looking to connect an hour meter to your diesel engine? Well, you’ve come to the right place. Connecting an hour meter is a simple process, but can be tricky if you’re not familiar with the workings of your engine. Firstly, it’s important to ensure that the hour meter you’re using is compatible with your engine.
Once you’ve verified this, you’ll need to identify the positive and negative terminals on your engine’s ignition system. Typically these are marked with a plus (+) and minus (-) sign. Once you’ve located these, simply connect the positive wire of the hour meter to the positive terminal and the negative wire to the negative terminal.
It’s important to ensure that all connections are tight and secure. Once connected, turn on your engine and verify that the hour meter is functioning correctly. And there you have it, connecting an hour meter to your diesel engine in just a few simple steps.
Test the Meter Readings
When it comes to meter readings, running tests is crucial to ensuring accuracy and identifying any issues that may be causing discrepancies. There are a number of methods for testing meter readings, including using secondary meters and comparing the results, running calibration tests to check for accuracy, and checking for any electrical issues that may be affecting the readings. Troubleshooting may involve following a systematic process to identify potential problems, such as checking for physical damage to the meter, examining the wiring and connections, and testing the accuracy of the meter.
While meter readings can sometimes be confusing or difficult to interpret, running tests and troubleshooting can help ensure that they are accurate and reliable. If you suspect an issue with your meter readings, don’t hesitate to reach out to a professional for assistance.
Troubleshooting for Connection Issues
Troubleshooting When you encounter connection issues, the first thing you need to do is to test your connection. Start by checking if there are any interruptions in your Wi-Fi or wired connection. You can check the strength of your connection by running a speed test or pinging a website.
If your connection is slow or not responding, restart your router or modem. This will refresh your connection and sometimes fix the issue. If the issue persists, try connecting to a different network or device to see if the issue is specific to your device or network.
If you are still experiencing connection issues, try updating your network drivers or contacting your internet service provider. With these troubleshooting steps, you can identify and resolve connection issues quickly and efficiently.
Final Thoughts
Connecting an hour meter to a diesel engine can be a simple process once you understand the steps involved. It’s important to ensure that you have the correct hour meter for your engine and that you understand how to correctly wire it. The first step is to locate the ignition wire, which is typically found near the key switch.
Once you have located this wire, you will need to connect it to the “IGN” terminal on the hour meter. Next, you will need to connect the ground wire to a metal surface on the engine. It’s important to make sure that this connection is secure so that the hour meter can accurately record the engine’s running time.
Finally, you will need to connect the power wire to a 12V source, so that the hour meter can function properly. Once all of the wires have been connected, you should test the hour meter to make sure that it is accurately recording the running time of your diesel engine. By following these simple steps, you can easily connect an hour meter to your diesel engine and keep track of its running time.
Conclusion
In conclusion, connecting an hour meter to your diesel engine is a simple and straightforward process that can help you keep track of important maintenance intervals and ensure the longevity of your engine. So whether you’re powering an industrial generator or navigating the high seas on your trusty yacht, don’t let the hours fly by unnoticed – hook up an hour meter and keep track of all those precious seconds, minutes, and hours spent making things happen!”
FAQs
What is an hour meter and what is its use in a diesel engine?
An hour meter is a device that records the running time of a diesel engine and is used to keep track of routine maintenance and servicing.
How can I connect an hour meter to my diesel engine?
You can connect an hour meter to your diesel engine by following the manufacturer’s instructions provided with the device. In general, most hour meters are connected to the engine’s ignition circuit or to a spark plug wire.
Do I need any special tools or equipment to install an hour meter on my diesel engine?
Most hour meters come with installation instructions that require basic hand tools such as screwdrivers, pliers, and crimpers. However, if you are not comfortable working with electrical systems, it is recommended that you seek professional assistance.
Can I use the hour meter data to estimate fuel consumption of my diesel engine?
Hour meters only record the running time of an engine, not fuel consumption. However, you can calculate the fuel consumption of your diesel engine by keeping track of the fuel used and the running time indicated by the hour meter.