Rev Up Your Ride: The Ultimate Guide to Installing a Cherry Bomb Glasspack Exhaust System
Are you looking to upgrade your car’s exhaust system but don’t want to break the bank? Well, installing a Cherry Bomb Glasspack might be just what you need! This budget-friendly option can give your vehicle a deeper and throatier sound, as well as better performance. It’s a simple yet effective upgrade that can be done in just a few hours with the right tools and some basic mechanical knowledge. So, if you’re ready to unleash the full potential of your car and turn heads on the road, keep reading to learn everything you need to know about installing a Cherry Bomb Glasspack!
Tools You Will Need
If you’re looking to install a cherry bomb glasspack on your vehicle, there are a few tools you’ll need to have on hand. First and foremost, you’ll need a saw or pipe cutter to remove the existing exhaust pipe. You’ll also need a wrench or pliers to loosen any bolts or clamps holding the old exhaust in place.
Once the old exhaust is removed, you’ll need a towel or cleaning rag to wipe down the area and ensure a clean fit for the new glasspack. To complete the installation, you’ll need a new exhaust clamps and/or hangers, and a torque wrench to ensure everything is securely fastened. The cherry bomb glasspack itself should come with all necessary mounting hardware, but it’s always a good idea to double check before beginning the installation process.
With these tools and a little bit of elbow grease, you’ll be able to give your vehicle a new sound and improve its performance with a cherry bomb glasspack.
Wrench set
If you are planning to do any type of mechanical work at home, having the right tools is crucial. One tool set that should be in every home mechanic’s toolbox is a good wrench set. Wrenches come in a variety of sizes and shapes, and they are designed to fit various types of bolts and nuts.
A good wrench set will include both standard and metric sizes, as well as different types of wrenches, such as open-end, box-end, and adjustable wrenches. The most common wrench sets include 6mm to 19mm wrenches, but larger sets may include up to 32mm wrenches. It’s important to invest in a high-quality wrench set that will last for years and withstand heavy use.
Look for sets that are made from durable materials, such as chrome vanadium steel, and that come with a sturdy case for easy storage and transport. With a good wrench set at your disposal, you’ll be able to tackle a wide variety of mechanical tasks with ease and confidence.
Jack and jack stands
When it comes to working on your vehicle, using jack and jack stands is essential for safety. But what tools will you need to get the job done? Firstly, you’ll need a good quality jack. Scissor jacks are typically provided with most cars, but for heavier vehicles, a hydraulic floor jack is necessary.
It’s also important to have jack stands that can fully support the weight of your car. Always ensure that the jack stands are placed on a level surface, and that the vehicle is securely resting on them before beginning work. A tire chock or wedge is also recommended to prevent the vehicle from rolling or sliding while it’s raised on the jack.
Don’t forget to wear gloves and eye protection, too, for added safety. By having the right tools on hand, you can safely and efficiently work on your car without any mishaps.
Cherry bomb glasspack
If you’re looking to upgrade your vehicle’s exhaust system, then you may want to consider installing a cherry bomb glasspack. This type of muffler is designed to improve your engine’s performance and create a satisfying exhaust note. However, before you start the installation process, there are a few tools that you’ll need to have on hand.
Firstly, you’ll need a set of wrenches to remove your old muffler and install the cherry bomb glasspack. Additionally, you’ll likely need a saw or pipe cutter to adjust the length of the pipes to fit your vehicle. A clamp can also be useful for securing the glasspack in place.
Lastly, it’s always a good idea to have a pair of gloves and safety goggles to protect yourself while handling the exhaust system. With all the necessary tools at your disposal, you’ll be able to easily install your new cherry bomb glasspack and enjoy the improved performance of your vehicle.
Clamps
When it comes to working with clamps, having the right tools is essential for any DIYer or professional. The first tool you will need is a pair of pliers to tighten and loosen the clamp. Needle-nose pliers are best for small clamps, while regular pliers work well with larger clamps.
It’s also important to have a variety of clamp sizes on hand to ensure a secure hold. C-clamps and spring clamps are versatile and popular options that can be used in a range of applications, while bar clamps are ideal for larger projects. Additionally, you may want to invest in specialized clamps for unique tasks, like corner clamps for mitered joints or pipe clamps for plumbing projects.
Overall, having a well-stocked collection of clamps and accompanying tools will ensure that you are ready for any project that comes your way.
Removing the Old Muffler
If you’re planning to install a Cherry Bomb Glasspack, removing the old muffler is the first step. Before beginning the process, make sure to wear gloves and safety glasses to protect yourself from any potential injury. First, start by locating the muffler and the bolts that are holding it in place.
Using a wrench, carefully loosen the bolts and keep them in a safe place. Once the bolts are removed, slowly pull the muffler away from the exhaust pipe until it is completely disconnected. Remember to be gentle during this process to avoid any damage to the pipes or other components.
Once the old muffler is removed, you’re ready to move on to the installation of your new Cherry Bomb Glasspack and enjoy the unique sound it offers.
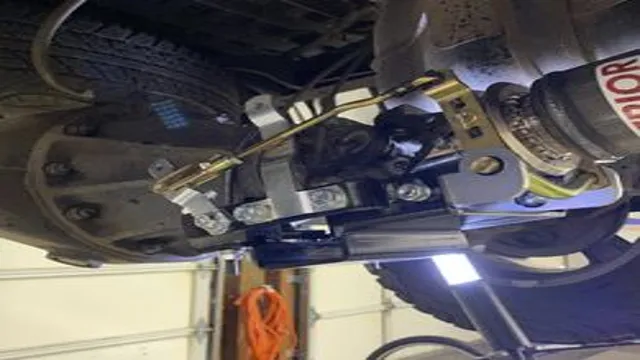
Safely lift and support the car
When it comes to replacing a muffler, the first step is to safely lift and support the car. This is crucial to ensure your safety and prevent any damage to the vehicle. Begin by finding a flat and level surface to work on.
Engage the emergency brake and chock the wheels to prevent any movement. Use a floor jack to raise the vehicle, making sure to place it in a sturdy location that can support the weight of the car. Next, use jack stands to securely hold the car in place and prevent it from falling.
Once you have safely lifted and supported the vehicle, you can move on to removing the old muffler. Remember to take your time and be cautious throughout the process to avoid any accidents or injuries.
Unbolt the old muffler from the exhaust system
When it’s time to replace your muffler, the first step is to remove the old one. This process requires some physical effort as well as a few basic tools like a socket wrench or pliers. Begin by disconnecting the muffler from the exhaust system.
Depending on the make and model of your vehicle, this may involve unbolting clamps or brackets or using penetrating oil to free up rusty bolts. Once the muffler is free, you’ll want to inspect the surrounding components for any damage or wear and tear. If there are any issues, it’s best to address them before installing the new muffler.
With the old muffler removed, you can move on to the next step in the process. By taking a step-by-step approach and being mindful of your vehicle’s unique needs, you can successfully replace your muffler and enjoy better performance and efficiency.
Disconnect the muffler hangers
When it’s time to swap out your old muffler, the first thing you need to do is disconnect the muffler hangers. These are the metal hooks that hold your muffler in place and keep it from bouncing around as you drive. To remove them, you’ll need a pair of pliers or a wrench.
Simply grip the hanger firmly and twist it until it pops free from its mount. Do this for each of the hangers on your old muffler. Once all of the hangers are free, you should be able to slide the muffler off of your vehicle’s exhaust system.
Keep in mind that, depending on your vehicle and the condition of your muffler, it may be more difficult to remove. Don’t be afraid to use a little elbow grease to get the job done. Once your old muffler is out of the way, you can move on to installing your new one.
Installing the Cherry Bomb Glasspack
If you’re looking to install a Cherry Bomb Glasspack, it’s a relatively simple process that can be done in a few steps. First, you’ll need to gather the necessary tools such as a jack, jack stands, a wrench, and the new glasspack. Next, locate the old muffler and remove it, either by cutting it off or using bolts to loosen it.
Once the old muffler is removed, slide the Cherry Bomb Glasspack into place and secure it with clamps or bolts, depending on your specific model. Finally, make sure everything is tightened securely and lower your car off the jack stands. With your new Cherry Bomb Glasspack installed, your car should produce a deeper, more aggressive exhaust note.
Overall, this process is a great way to improve your car’s exhaust sound and performance. So, go ahead and give it a try!
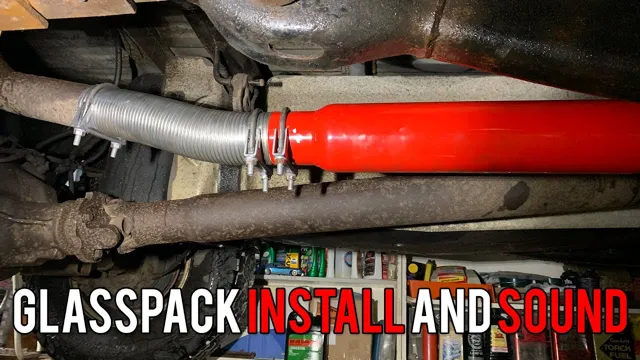
Slide the glasspack onto the exhaust pipe
If you’re looking to add some growl to your ride, installing a Cherry Bomb Glasspack is a great option. One of the most important parts of the installation process is sliding the glasspack onto the exhaust pipe. This can be a bit tricky, especially if you’re working with an older or rusted pipe, but with a little bit of patience and some elbow grease, it’s doable.
First, make sure the exhaust pipe is clean and free of debris so the glasspack can slide on smoothly. Next, apply a bit of lubricant around the edge of the glasspack to help it slide onto the pipe more easily. Gently wiggle and twist the glasspack onto the pipe, being careful not to force it or damage the glasspack in the process.
Once it’s on, use clamps to secure it in place. With the glasspack properly installed, you’ll be on your way to a more aggressive and powerful sound.
Adjust the position of the glasspack
When it comes to installing a Cherry Bomb Glasspack, one important step is to adjust its position correctly. This will ensure that it stays in place and doesn’t cause any unnecessary rattling or vibrations. Before anything else, it’s crucial to choose the correct size of glasspack for your vehicle’s exhaust system.
Once you’ve got the right one, you can start adjusting its position. The ideal spot is one where it’s not too close to any other parts of the vehicle, but also not too far away from the exhaust pipe. This will ensure that it works effectively in reducing noise while still allowing optimal airflow.
One useful tip is to use exhaust clamps to hold the glasspack in place – these will prevent any slippage or movement over time. Take your time to get the positioning just right, and enjoy the improved sound and performance of your vehicle.
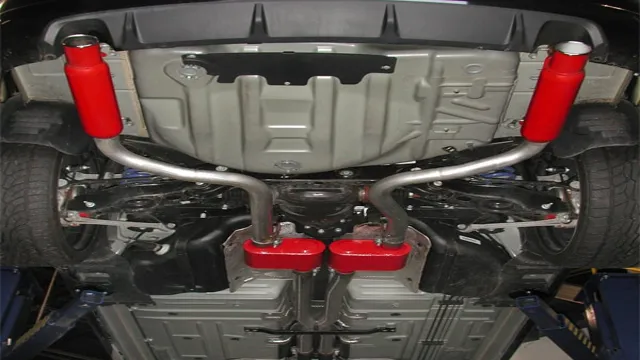
Secure the glasspack using clamps
Installing the Cherry Bomb Glasspack requires securing it in place with clamps to prevent any rattling or movement while driving. Begin by measuring the length of your glasspack and ensuring that it fits snugly in the desired location. Once you have confirmed that it is the right size, slide the glasspack into place and attach the clamps around the body of the muffler.
Tighten the clamps using a socket wrench to ensure a secure fit and make sure that they are evenly spaced for added stability. It is important to check the tightness of your clamps periodically to prevent any rattling or loosening over time. With these simple steps, you’ll be able to install your Cherry Bomb Glasspack with confidence and enjoy a powerful, smooth-sounding ride.
Test the Sound
When installing a Cherry Bomb glasspack, it’s important to test the sound before hitting the road. Once the Cherry Bomb is securely installed, start your vehicle and rev the engine a few times. Listen for any rattling or hissing sounds, as this could indicate a loose connection or a poorly installed exhaust system.
If the sound is too loud, make sure you have installed any mufflers or resonators before taking your car out for a spin. While a Cherry Bomb glasspack is designed to increase your vehicle’s horsepower and create a deeper exhaust note, it shouldn’t be so loud that it violates local noise ordinances. Strike a balance between enhanced performance and responsible driving, and enjoy the extra power and sound that a Cherry Bomb glasspack provides.
Start the engine
When it comes to starting your car’s engine, it’s important to take things one step at a time. First things first, it’s always a good idea to test the sound of your engine before pulling out of the driveway. This can help you catch any potential issues early on, such as a sluggish or rough engine.
To test the sound, simply turn your key to the “on” position without actually starting the car. You should be able to hear the sound of the fuel pump engaging, followed by a hum that indicates your car’s electronic systems are ready to go. Once you’re satisfied with the sound, it’s time to turn the key all the way to the start position and let the engine roar to life.
Remember, it’s always important to be attentive and alert when starting your car’s engine to ensure a safe and successful ride.
Check for any leaks or rattles
When checking for any leaks or rattles in your vehicle, one important aspect to consider is testing the sound. Start by turning off any music or noise and listen carefully as you drive. Do you hear any unusual sounds like high-pitched whining or grinding? These can indicate problems with the belts or bearings.
If you hear a low rumble or knocking, this could mean issues with the engine or suspension. When driving over bumps or rough roads, pay attention to any noises from the suspension or chassis that indicate loose parts or worn-out components. You should also check for any leaks under the vehicle or from the engine bay which could indicate a problem with the fluids or exhaust system.
By testing the sound carefully, you can identify any issues early and avoid costly repairs in the future.
Enjoy the new sound of your exhaust system!
If you’ve recently modified your car’s exhaust system, you’re likely eager to test out the new sound. It can be tempting to immediately rev your engine and listen to your vehicle’s roar, but it’s important to exercise caution and safety when testing out your exhaust system. Find a safe, open area where you won’t disturb anyone or break any noise ordinances.
Start your engine and gradually increase your speed, while also paying attention to your surroundings and any other drivers. As you drive, listen carefully to the sound of your exhaust and note any changes from before the modification. Try out different speeds, acceleration rates, and gears to fully test your new exhaust system.
With a bit of patience and safety, you can enjoy the new sound of your vehicle’s exhaust system and show it off to your friends and fellow car enthusiasts.
Conclusion
Congratulations! You are now officially a certified Cherry Bomb Glasspack installer. With your new skills, you can add a whole new level of sound and style to your ride. Just remember to follow the installation instructions carefully, and don’t forget to grab some earplugs for your neighbors.
With a bit of patience, you’ll have that signature Cherry Bomb rumble in no time. So rev up your engine and let the good times roll!”
FAQs
What is a cherry bomb glasspack?
A cherry bomb glasspack is a type of performance exhaust system that is designed to increase the power and sound of a vehicle’s engine.
What are the benefits of installing a cherry bomb glasspack?
Installing a cherry bomb glasspack can increase horsepower, improve fuel efficiency, and give your vehicle a more aggressive exhaust tone.
How difficult is it to install a cherry bomb glasspack?
The difficulty of installation can vary depending on the make and model of your vehicle, but typically it requires basic hand tools and some mechanical knowledge. It is recommended to have a professional install it if you are not confident in your abilities.
Can a cherry bomb glasspack be installed on any vehicle?
Cherry bomb glasspacks are compatible with most vehicles, but it is important to confirm compatibility before purchasing. Certain vehicles may require specific modifications or adapters for proper installation.