Stop Safely in Your Tracks: Step-by-Step Guide on how to Install Brake Pad Clips on Your F350 Truck
Changing your brake pads on your F350 is a crucial aspect of maintaining the safety of your vehicle. However, the installation process of the brake pad clips can often be quite confusing. Brake pad clips are a small but essential component that holds your brake pads securely in place, ensuring optimal brake performance.
Installing these clips can often seem like a daunting task, especially for first-time mechanics. But fear not, in this blog post, we will guide you through the step-by-step process of how to install F350 brake pad clips with great ease. We’ll provide you with straightforward instructions that anyone can follow, ensuring that you can complete the job efficiently and without any hassle.
So sit back, relax, and read on to learn how to install F350 brake pad clips like a pro!
What You’ll Need
If you’re in need of a brake pad clip replacement on your F350, fear not! The process may seem daunting, but with the right tools and a little know-how, you’ll have those clips installed in no time. First and foremost, you’ll need a set of replacement brake pad clips that match the year and model of your F350. You’ll also need a set of pliers, a screwdriver, and some brake grease to ensure proper installation and function.
When beginning the installation process, make sure to remove the old clips and clean any residue left behind. Then, use the pliers to gently bend the new clips into place, ensuring they fit snugly into the caliper bracket. Lastly, apply a small amount of brake grease to the clips and the pad backing plates before installing the new brake pads.
By following these steps, you can ensure your F350’s braking system will function properly and keep you safe on the road.
New Brake Pad Clips
Are you planning to change your brake pads soon? If so, you might want to consider replacing your brake pad clips as well. Brake pad clips are small metal clips that hold the brake pads in place, and they play a crucial role in ensuring your brakes function smoothly. Without them, your brake pads can rattle around and decrease braking performance.
To replace them, you’ll need a few tools, such as pliers, a wrench, and a flathead screwdriver. Additionally, you’ll need new brake pad clips that match the make and model of your vehicle. Once you have everything you need, it’s a straightforward process, and you’ll be back on the road with improved braking performance in no time.
Socket Wrench Set
If you’re looking to work on some DIY projects around the house or car, investing in a socket wrench set can be a game-changer. However, with so many options available on the market, it can be overwhelming to figure out what exactly you’ll need. The first thing you’ll want to consider is the size range of the set.
Depending on the tasks you’ll be tackling, you may need a set that includes both metric and standard sizes. Additionally, it’s important to think about the quality of the set you’re purchasing. Having a set made from durable materials will ensure that it lasts for years to come.
Finally, pay attention to any additional features such as a wide range of socket sizes or a sturdy case for easy storage and transportation. By keeping all of these factors in mind, you’ll be able to select the right socket wrench set that fits your needs and budget.
C-Clamp
If you’re looking to secure an object in place, a C-clamp is an essential tool. But what exactly do you need for your C-clamp setup? First and foremost, you’ll need the C-clamp itself- make sure to select a size that’s appropriate for the job you’re tackling. It’s also important to have a sturdy, flat surface to clamp your object onto- this will help prevent damage to both the object and the clamp itself.
Some additional items that can come in handy when using a C-clamp include protective padding to place between the clamp and the object you’re securing, as well as a pair of pliers or a wrench to help tighten and loosen the clamp. With these items in hand, you’ll be ready to tackle any task that requires the use of a C-clamp.
Removing the Old Clips
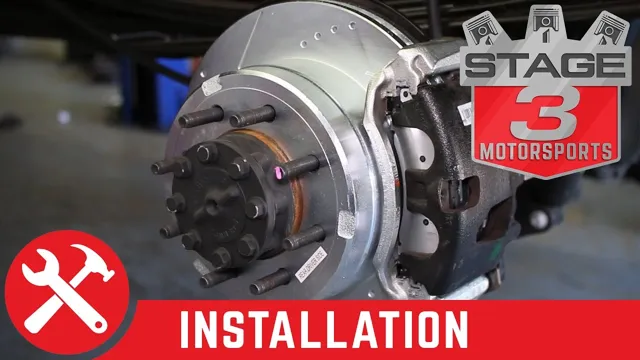
When it comes to installing new brake pad clips on your F350, the first step is to remove the old ones. This may seem like a simple task, but it’s important to do it correctly to avoid damaging the brake system. Start by loosening the lug nuts on the wheel that you’re working on, but don’t remove them just yet.
Then, use a jack to lift the truck and place jack stands underneath for safety. Once the wheel is off the ground, go ahead and remove the lug nuts and take the wheel off. You should now have clear access to the brake caliper and the old clips.
Use a flathead screwdriver or pliers to carefully pry the clips off and set them aside. Make sure to inspect the area for any signs of damage or wear before installing the new clips. This process may take some patience, but it’s important to do it right to ensure proper brake function and safety on the road.
Loosen Lug Nuts
When preparing to remove your old lug nuts, it’s important to begin by loosening them up. To do this, you’ll need a lug wrench that fits your vehicle’s lug nuts. Place the wrench over one of the nuts and turn counterclockwise to break the seal.
Do this for all of the nuts, but don’t remove any just yet. With the nuts loosened, you can now move on to removing the old clips that are holding the wheel in place. These clips can be tricky to remove, so it’s important to be patient and gentle.
Use a pry bar or flathead screwdriver to carefully work the clips off, being careful not to scratch your rims. Once the clips are off, you should be able to remove the wheel. Remember to keep all of your lug nuts and clips in a safe place so that you don’t lose them.
By following these simple steps, you’ll be one step closer to successfully replacing your old wheels with new ones.
Remove Wheel
When it comes to removing the wheel from your vehicle, the first step is to remove the old clips. These clips hold the hubcap or wheel cover in place, and they can be a little tricky to remove if you don’t know what you’re doing. One option is to use a flathead screwdriver or small pry bar to gently pry the clips away from the wheel.
Be careful not to damage the clips or scratch the wheel in the process. Another option is to use a special tool called a clip removal tool, which is designed specifically for this task. This tool can help you remove the clips quickly and easily, without risking damage to your wheel or clips.
Overall, taking the time to properly remove the old clips can make the wheel removal process much smoother and safer. So, whether you opt for the trusty flathead screwdriver or the specialized clip removal tool, be sure to take your time and approach the task with care.
Remove Brake Caliper
When it comes to removing brake calipers, one of the first steps is to remove the old clips that hold the brake pads in place. These clips can be tricky to remove, so be sure to have the right tools on hand, such as pliers or a pry bar. First, locate the clips on the caliper and carefully pry them off using your tool of choice.
Be sure to apply even pressure and avoid bending the clips, as they may need to be reused later. Once the clips have been removed, you can then proceed with removing the brake pads themselves. By taking your time and being careful with the clips, you can ensure that your brake caliper removal goes smoothly and you can get back on the road in no time.
Remove Old Clips
If you’re looking to ensure that your project remains organized and clutter-free, removing old clips should be a regular practice. These are clips that you may no longer need, or that are outdated and irrelevant to your current needs. Not only can holding onto old clips hinder your workflow, but it can also lead to confusion and wasted time.
To avoid this, take the time to regularly sort through your clips and delete any that are no longer necessary. Think of it like cleaning out your closet – you want to keep only what you need and what brings you joy. By removing old clips, you can make your workflow smoother and much more efficient.
Installing the New Clips
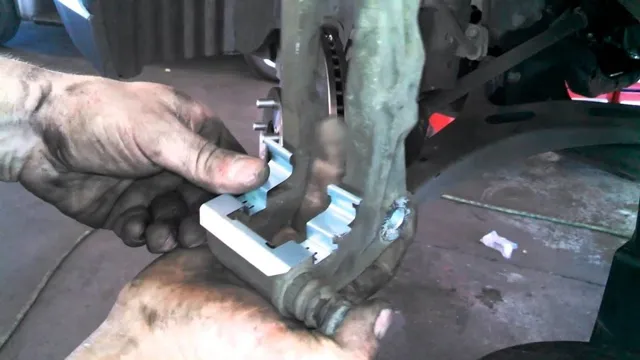
Are you looking to install new brake pad clips on your F350? Well, it’s not as difficult as it may seem. First, you want to remove the old clips from the brake pads by prying them off with a flathead screwdriver. Once that’s done, you can install the new clips by pressing them into place on the brake pad bracket.
Make sure to line up the clips with the holes on the bracket and secure them by sliding them into place. It’s important to note that the clips should fit snugly, but not be too tight or else they could impede the proper movement of the brake pads. With these new clips in place, your brake pads should operate smoothly and quietly.
Attach New Clips
When it comes to attaching new clips, it may seem like a daunting task, but it’s actually quite simple with a few easy steps. First, identify the location where the new clips are needed, making sure that the area is clean and dry. Next, gently push the clip into place with your fingers, making sure that it’s securely fastened.
If you encounter resistance, don’t force it, as this may damage the clip or surrounding area. Instead, try adjusting the angle or position of the clip until it fits snugly. Remember, the key to successfully installing new clips is to take your time and be patient.
By following these simple steps, you can easily attach new clips and keep your equipment functioning at its best. So, whether you’re a professional or a DIY enthusiast, don’t hesitate to take on the challenge of installing new clips – you’ve got this!
Reinstall Brake Caliper
When it comes to reinstalling brake calipers, installing the new clips is an incredibly crucial step in the process. These clips ensure that the caliper is properly secured in place, preventing it from wobbling or coming loose while driving. To install the new clips, start by cleaning the caliper bracket thoroughly.
Make sure there isn’t any grime or debris that could interfere with the clip’s placement. Next, line up the new clips with the bracket correctly, ensuring that they’re positioned in the same way the old clips were before removal. When you’re ready, gently slide the clips into place, ensuring they lock securely into the bracket.
This simple step will guarantee a smooth and safe ride, where you can enjoy driving confidently knowing that your brakes are secure.
Replace Wheel & Tighten Lug Nuts
When it comes to replacing a wheel and tightening the lug nuts, one of the most important steps is installing the new clips. These clips are crucial in keeping the wheel securely fastened to the axle, preventing any wobbling or shifting while driving. To install the new clips, first, make sure the axle is clean and free of debris.
Then, slide the new clips onto the axle, ensuring that they are seated properly and aligned with the holes in the wheel. After that, carefully lift the wheel onto the axle and thread the lug nuts onto the studs by hand. Once the lug nuts are hand-tight, use a torque wrench to tighten them to the manufacturer’s recommended specs.
Remember, too loose or too tight can cause serious issues down the road. By properly installing new clips and tightening the lug nuts to the appropriate torque, you can drive with confidence knowing your wheel is securely fastened.
Conclusion
In conclusion, installing brake pad clips on an F350 may seem daunting at first, but with a little bit of elbow grease and some know-how, it can be a breeze. Just remember to take your time, use the right tools, and follow the manufacturer’s instructions, and you’ll have those clips installed like a pro in no time. And who knows, maybe you’ll even impress your mechanic with your newfound brake pad clip installation skills.
Happy wrenching!”
FAQs
What are brake pad clips and why are they important in an F350?
Brake pad clips are metal or plastic pieces that sit at the ends of brake pads and provide a tight hold on the caliper. They are important because they ensure that the brake pads are securely in place, preventing movement or vibrations that can compromise braking performance.
How often should brake pad clips be checked and replaced in an F350?
It is recommended to check brake pad clips during every brake pad replacement and replace them if they show signs of wear and tear, such as cracks or deformation. It is also a good idea to inspect them regularly for any damage that could result in brake failure.
Is it easy to install brake pad clips on an F350?
Installing brake pad clips on an F350 is a relatively straightforward process that involves removing the caliper, sliding the old clips out, and sliding the new ones in. However, it is important to follow the instructions carefully and ensure that the clips are seated properly to prevent brake noise and other issues.
Can using low-quality brake pad clips cause problems in an F350?
Yes, using low-quality or improperly fitting brake pad clips can lead to a range of problems, such as decreased braking performance, increased noise and vibration, uneven wear on the brake pads, and premature failure of the caliper or other braking components. It is recommended to always use high-quality, OEM-approved brake pad clips to ensure optimal safety and performance.

