Clamp Conundrum? Unlock the Solutions with These Easy Fixing Tips!
Clamps are versatile tools that are used to secure objects firmly in place. They are widely used in metalworking, woodworking, and other industrial applications. However, clamps can sometimes malfunction or become damaged, causing frustration and delay in work.
Don’t worry, though. In this blog post, we will guide you on fixing a clamp that is not working correctly. Whether it is a broken handle, a stuck screw, or a malfunctioning spring, we will provide you with the necessary steps to repair your clamp quickly and efficiently.
So, if you’re struggling with a faulty clamp, sit back, relax, and let us guide you through the process of fixing it.
Identifying the Issue
Clamps are essential tools for any workshop or DIY project, but what do you do when they aren’t working properly? Fortunately, fixing a clamp can be a simple process with the right steps. First, identify what’s causing the issue: is the clamp slipping, jammed shut, or not exerting enough pressure? Once you’ve identified the problem, you can start looking for a solution. Often, the fix can be as simple as adjusting the pressure screw or cleaning and lubricating the clamp.
If the issue is more severe, you may need to replace a part or two or consider purchasing a new clamp altogether. By taking the time to identify the problem and find the right solution, you can ensure that your clamp is working properly and that your projects are a success.
Loose or Broken Parts
Loose or broken parts are common issues that can happen to any machine or equipment, including vehicles, electronics, and furniture. These issues can be caused by wear and tear, improper use, or accidents. Identifying the issue of loose or broken parts is crucial to prevent further damage or accidents.
It is important to inspect the machine or equipment thoroughly, check for any visible damage or missing parts, and make sure all screws, bolts, and hinges are securely fastened. If the issue is not visible, it may require disassembling the equipment to inspect internal parts. It is also important to ensure that replacement parts are compatible and of high quality to avoid any future issues.
By identifying and addressing loose or broken parts early on, it can save time, money, and prevent potential hazards.
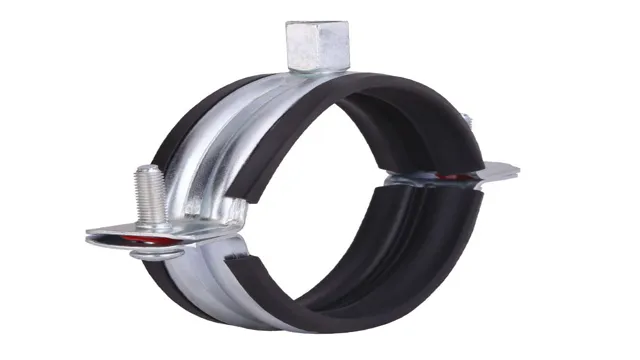
Misaligned Clamping Surface
When it comes to woodworking, one of the most frustrating issues you can encounter is a misaligned clamping surface. This can cause your project to slip and slide, ruining your hard work in an instant. The good news is that identifying the issue is relatively easy.
First, take a close look at your clamps to ensure they are in good condition and tightened properly. Next, inspect your workpiece to make sure any uneven areas are sanded down or filled in. Finally, double-check that your clamps are positioned correctly and aligned with the grain of your wood.
By following these steps, you can avoid the headache of a misaligned clamping surface and ensure a successful project every time.
Tools and Materials
If you own a clamp, it’s important to know how to fix it when something goes wrong. One of the most common issues is a loose clamp head that won’t stay in place. To fix this, you’ll need a few tools and materials.
First, make sure you have a screwdriver that fits the screws on your clamp. You’ll also need a flat surface to work on, like a table or workbench. Once you have these things, start by loosening the screws that hold the clamp head in place.
Don’t remove them completely – just loosen them enough so you can adjust the position of the head. Move it to the desired position and then tighten the screws back up. If the head still won’t stay in place, you may need to replace the screws or adjust the tension on the clamp.
With a little patience and the right tools, you can fix a loose clamp head and get back to your project in no time!
Wrenches
Wrenches are an essential tool for any DIY or professional project that involves tightening or loosening nuts and bolts. There are various types of wrenches available, including adjustable wrenches, pipe wrenches, torque wrenches, and socket wrenches. Each type of wrench has a specific purpose and is designed to handle different sizes of nuts and bolts.
Adjustable wrenches are versatile and can be used to fit different sizes of nuts and bolts, while socket wrenches are commonly used in automotive repairs. It is important to choose the right size of wrench for the job to avoid damaging the nut or bolt or the wrench itself. Additionally, it is recommended to invest in high-quality wrenches that are durable and able to withstand heavy use.
Overall, having a set of reliable wrenches in your tool kit can make any project easier and more efficient.
Screwdrivers
Screwdrivers may seem like a simple and straightforward tool at first glance, but they are a vital component of any toolkit. Whether you’re a professional technician or just someone who likes to tackle home repairs on your own, screwdrivers are essential for removing screws and completing various tasks. But not all screwdrivers are created equal – there are different types and sizes for different purposes.
Some are designed for precision work, while others are meant for heavier duty jobs. The key is to have a variety of them on hand so that you can match the right screwdriver to the task at hand. Additionally, investing in high-quality screwdrivers will save you time and money in the long run since they are less likely to strip or damage screws.
Overall, while screwdrivers may seem deceptively simple, they are an essential tool that no toolbox should be without.
Replacement Parts
When it comes to DIY projects, having the right tools and materials is essential. Whether you’re fixing a leaky faucet or installing a new light fixture, having the proper replacement parts can save you time and money in the long run. One of the most important things you can do is to make sure you have a variety of common tools on hand, such as screwdrivers, pliers, and wrenches.
Additionally, it’s always a good idea to keep a supply of basic materials like screws, nails, and wire. If you’re not sure which replacement parts you need, don’t hesitate to ask for help at your local hardware or home improvement store. By having the right tools and materials on hand, you’ll be able to tackle any DIY project with confidence and ease, ensuring that your home repairs are done right the first time.
Fixing the Clamp
If you’re dealing with a clamp that won’t tighten or is slipping, there are a few easy fixes you can try before giving up on it. First, make sure the clamp is clean and free of debris. If there’s dirt or dust on the surfaces that are supposed to grip your workpiece, this can cause the clamp to slip.
You can use a soft cloth to wipe down the surfaces and remove any debris, then try tightening the clamp again. If the clamp is still slipping, check to make sure the threads are clean and in good condition. If they’re damaged or stripped, the clamp won’t be able to tighten properly.
In this case, you may need to replace the clamp entirely. However, if the threads are in good shape, you can try lubricating them with a small amount of oil or grease. This can help the clamp turn more smoothly and tighten more effectively, preventing slippage.
With these simple fixes, you can keep your clamps in good working order and avoid frustration when trying to hold your workpiece in place.
Tightening Loose Parts
If you have a clamp that’s coming loose, it’s essential to fix it before it causes any further damage. Luckily, fixing a loose clamp is a relatively simple process. First, you’ll want to loosen the clamp completely so that you can assess the damage.
Look for any signs of wear and tear, such as stripped threads or bent parts. If you notice any damage, you’ll need to replace the damaged parts. If the clamp is still in good condition, you can re-tighten it using a wrench or pliers.
It’s important to make sure the clamp is tightened enough to hold the parts together but not so tight that it damages them. Once you’ve tightened the clamp, check it regularly to make sure it’s holding strong. Remember that regular maintenance is key to keeping your tools in good working condition.
Replacing Broken Parts
If you’re experiencing problems with your clamp, you may not necessarily have to shell out for a new one. Fixing the clamp is a feasible option, and it’s a cost-saving one at that. But where do you start? Firstly, identify the issue by checking whether all the parts are working properly.
If the issue is with the screw, replace it with a new one. If it’s the grip pads that are worn down, these can be easily replaced too. Alternatively, if the lever that locks and releases the clamp isn’t functioning as it should, you can disassemble the lever to see where the problem lies.
Fortunately, most clamp parts are easily sourced and affordable, meaning that fixing a broken clamp shouldn’t break the bank. By replacing the broken parts and ensuring that everything is tightened in place, your clamp will be as good as new!
Realignment of Clamping Surface
Realignment of Clamping Surface When it comes to woodworking, nothing is more frustrating than dealing with a clamp that just won’t hold your piece in place. Before you give up and toss it aside in frustration, try realigning the clamping surface. Over time, the constant wear and tear on the clamp can cause the clamping pads to become misaligned, resulting in a weak grip.
To fix this issue, simply loosen the screws holding the pads in place and adjust them so they line up perfectly. This will ensure that the clamp provides a strong hold, keeping your workpiece in place while you work. Don’t let a misaligned clamp ruin your next project – take a few minutes to realign the clamping surface and get back to creating beautiful woodwork masterpieces.
Conclusion
So, there you have it folks – the foolproof guide to fixing your clamp! It’s not rocket science, but following these simple steps will have you clamping like a pro in no time. Remember to check the tension, inspect the jaws, lubricate the screw, and if all else fails, don’t be afraid to replace the whole darn thing. Just don’t go clamping your fingers together like a rookie – we don’t want to have to write a guide on fixing broken thumbs!”
FAQs
What is a clamp and when is it used?
A clamp is a tool used to secure or hold objects together. It can be used in woodworking, metalworking, and other applications where objects need to be held in place.
How do I fix a loose clamp?
To fix a loose clamp, first, remove the object being clamped. Then adjust the clamp by tightening the screws or bolts. Finally, reposition the object and re-apply the clamp.
What should I do if the clamp is stuck?
If the clamp is stuck, try applying some lubricant such as WD-40 to the screw or bolt. Then use pliers or a wrench to turn the screw or bolt to release the clamp.
How do I choose the right clamp for my project?
When choosing a clamp, consider the size and shape of the objects being clamped, the amount of pressure needed, and the type of material the clamp is made of. It’s also important to choose a clamp that can be easily adjusted and positioned.

