Breathe New Life into Your Chevy Brakes: A Step-by-Step Guide on How to Bleed Hydroboost Brakes like a Pro
If you’re a Chevy driver, you know that your brakes are essential to keep you safe on the road. However, if you notice your brake pedal feeling spongy or unresponsive, it’s time to investigate the problem. One possible cause could be a hydroboost brake system that needs bleeding.
Bleeding your hydroboost brakes is a vital part of routine maintenance and can improve your braking performance and safety on the road. In this blog post, we’ll delve into the specifics of how to bleed hydroboost brakes on your Chevy and offer some tips to help you complete the process quickly and easily. So buckle up, and let’s get started!
Introduction
If you’re wondering how to bleed hydroboost brakes in your Chevy, it’s actually not too difficult of a process. Hydroboost brakes use a power steering pump to provide hydraulic pressure to the brake system, which means that bleeding the brakes is similar to bleeding a regular brake system. However, it’s important to note that bleeding the hydroboost brakes requires a specific order, so be sure to follow the steps carefully.
Firstly, fill the brake fluid reservoir and ensure it’s at the proper level. Then, get a friend to help you with the bleeding process. Start by bleeding the brake furthest from the master cylinder, followed by the one closest to it.
Next, move to the furthest rear brake, followed by the one closest to it. Finally, repeat the process for the hydroboost brake system itself, ensuring all air is removed. Be sure to check the fluid levels frequently throughout the process to avoid introducing more air into the system.
By following these steps, you’ll have properly bled your hydroboost brakes and should be good to go!
Understanding Hydroboost Brakes
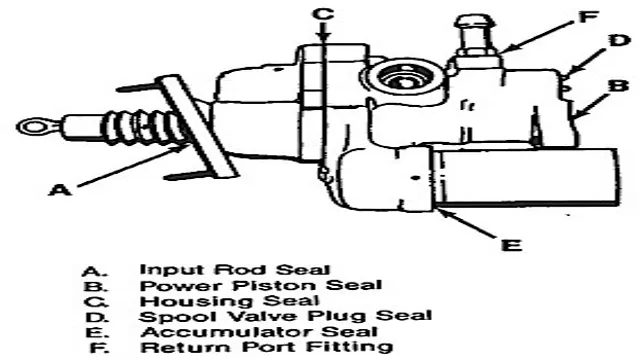
Hydroboost brakes are a type of power brake system that has become increasingly popular in modern vehicles. The hydroboost brake system is a hydraulic setup that uses the power steering pump to create pressure in the brake lines. This unique system allows for increased stopping power with less pedal effort, making for a more efficient and responsive braking experience.
Hydroboost brakes are commonly found in heavy-duty trucks and SUVs, but can also be installed in other types of vehicles. Overall, hydroboost brakes are a great option for those looking for a reliable and effective braking system.
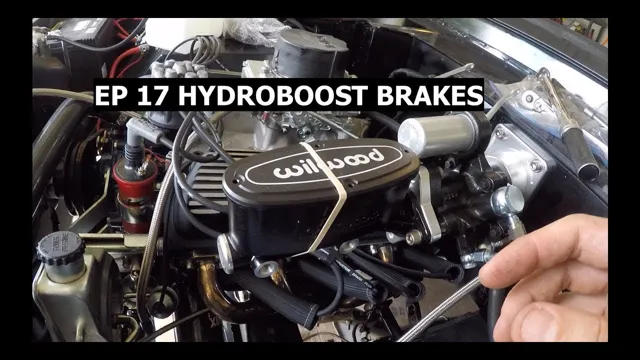
Why Bleed Hydroboost Brakes?
Bleed Hydroboost Brakes Have you ever heard of hydroboost brakes? They are a type of power brake system that uses hydraulic pressure instead of vacuum to amplify the force applied to the brake pedal. Hydroboost brakes can be found in many modern vehicles, particularly those with diesel engines or heavy loads. Bleeding the hydroboost brakes is a critical maintenance task that helps remove any air bubbles and ensure that the brakes function as intended.
Without proper bleeding, the brakes may feel spongy or unresponsive, which can compromise safety on the road. So, it’s essential to understand why bleeding hydroboost brakes is necessary and how to do it correctly.
Tools and Supplies Needed
Bleeding the hydroboost brakes on your Chevy is a crucial maintenance task that ensures your brakes work effectively. Before you begin the process, you need to gather some tools and supplies. You’ll need a wrench, a clear plastic hose, a container to catch the brake fluid, and a can of brake fluid.
It’s important to use the right brake fluid for your vehicle, so consult your owner’s manual or ask your mechanic for guidance. Once you have your tools and supplies, start by locating the hydroboost brake unit, which is usually located near the steering column. Disconnect the brake lines from the hydroboost unit and attach the plastic hose to the outlet valve.
Have a helper press the brake pedal while you open the valve to release the air and fluid. Repeat this process until you see clear brake fluid flowing through the hose. Tighten the valve and continue bleeding the other brake lines in the same way.
Once you’ve completed the process, refill the master cylinder with fresh brake fluid and test your brakes to ensure they’re working correctly. By following these steps, you can keep your Chevy’s brakes in top condition and avoid any potential safety hazards on the road.
Brake Fluid
When it comes to brake fluid maintenance, having the right tools and supplies can make all the difference. First and foremost, you’ll need a brake fluid tester to determine the condition of your current fluid. If you need to top off or replace your fluid, you’ll need a funnel to avoid spills and a turkey baster or syringe to remove the old fluid.
It’s also important to have a catch pan or rag handy to catch any drips or spills. When purchasing new brake fluid, make sure to check the specifications in your car’s owner manual and choose the right type for your vehicle. Additionally, it’s crucial to wear gloves and eye protection to protect yourself from the corrosive properties of the fluid.
By having these tools and supplies on hand, you can ensure a quick and safe brake fluid maintenance process for your vehicle.
Bleeder Wrench
If you’re planning to do some brake work on your car, a bleeder wrench is an essential tool that you’ll need. This tool is used to open and close the bleeder screw, which is located at the brake caliper or wheel cylinder. It’s important to properly bleed your brakes to remove any trapped air, as this can compromise the effectiveness of your brakes.
To use a bleeder wrench, you’ll need a few other supplies as well. First, you’ll need a brake fluid reservoir cap, which is used to prevent air from entering the brake lines while you bleed the system. You’ll also need a tube that fits snugly onto the bleeder screw and allows the brake fluid to drain out into a container.
Finally, you’ll need some fresh brake fluid to refill the system once the brake bleeding process is complete. It’s important to have all these tools and supplies on hand before you begin working on your brakes. By doing so, you’ll be able to complete the job efficiently and effectively, ensuring that your brakes are working properly and keeping you safe on the road.
So if you don’t already have a bleeder wrench, be sure to pick one up before you start your next brake job!
Clear Plastic Tubing
If you plan on using clear plastic tubing for your DIY project, there are some tools and supplies that you will need to have on hand. Firstly, you’ll need a cutter that can cleanly slice through the tubing without causing it to crack or deform. A hacksaw or a tubing cutter would work perfectly.
You’ll also want to have a file or sandpaper nearby to smooth the edges of the cut tubing. Additionally, you’ll need the right size fittings to join the tubing lengths together and create angles and curves. These fittings can come in a variety of materials (e.
g., plastic, brass, stainless steel), so make sure to choose the right one depending on the type of fluid or gas that will flow through the tubing. Lastly, take precautions when handling the tubing, especially when working with high-pressure fluids or gases – always wear protective gear such as gloves and eye protection to avoid any injury.
Empty Container
When starting a new project of converting an empty container into a living space, it’s important to have all the necessary tools and supplies ready. Here’s a list of items you’ll need to get started on your DIY container project: Measuring Tape: This is essential to accurately measure the space you have to work with so you can plan out your design.
Power Tools: You’ll need a drill, saw, and other power tools to make cuts and create openings for windows and doors.
Insulation: The container will need insulation to regulate temperature and prevent moisture buildup. Electrical Supplies: This will include wiring, outlets, and switches for your lighting and appliances.
Plumbing Supplies: Depending on your design plans, you may need to install plumbing for a kitchen and bathroom.
Flooring Materials: You’ll want to choose durable and waterproof materials for your floors, such as vinyl or tile. Paint and Sealant: Once the container is insulated and any holes are patched, you’ll want to paint and seal the interior to provide a clean and finished look.
Having all of these supplies on hand will make the process of converting an empty container into a livable space much smoother. With a little bit of creativity and elbow grease, you’ll have a one-of-a-kind home that’s both functional and stylish.
Bleeding the Hydroboost Brakes
If you’re unsure of how to bleed hydroboost brakes on your Chevy, you’re not alone. Many people mistakenly believe that bleeding the brakes on a hydroboost-equipped vehicle is a complex and difficult process. However, with a little bit of knowledge and the right tools, it’s actually quite straightforward.
The first step is to identify the bleed screws, which are located on the calipers or wheel cylinders. Next, attach a clear plastic hose to the bleed screw and place the other end in a container of brake fluid. Have a helper pump the brakes slowly and hold the pedal down while you open the bleed screw.
Keep repeating this process until there are no more bubbles in the hose, and make sure to keep an eye on the brake fluid levels throughout the process. By taking your time and being diligent, you can easily bleed your hydroboost brakes and ensure that your Chevy is safe and reliable on the road.
Step 1: Add Brake Fluid
If you’re experiencing a spongy brake pedal or your brakes aren’t as responsive as they should be, it may be time to bleed the hydroboost brakes. This process involves removing air bubbles from the brake lines, which can cause the brake pedal to feel soft or reduce stopping power. The first step to bleeding the hydroboost brakes is to add brake fluid to the reservoir.
This ensures that the fluid level doesn’t drop too low during the bleeding process, which could introduce more air into the system. Make sure to use the recommended type of brake fluid for your vehicle, and don’t overfill the reservoir. Once the fluid level is correct, you can move on to the next step in the bleeding process.
By taking the time to properly bleed your brakes, you can help ensure that your vehicle stops safely and reliably when you need it to.
Step 2: Locate Bleeder Valve
When it comes to bleeding the hydroboost brakes, the second step is to locate the bleeder valve. The bleeder valve is located on each wheel cylinder, typically located near the top and on the driver’s side of the cylinder. It’s important to locate the valve before beginning the bleeding process, as it will need to be opened and closed throughout the process.
Make sure to refer to the vehicle’s manual or do some research online to confirm the location of the bleeder valve. Once you’ve located it, ensure that the valve is easily accessible and not rusted or damaged. A good tip is to spray some rust penetrant on the valve and leave it there for a couple of hours before beginning the bleeding process.
This will help to loosen any rust and make it easier to open and close the valve. By taking the time to locate the bleeder valve, you’ll be able to proceed with the hydroboost brake bleeding process with confidence and ease.
Step 3: Connect Tubing and Container
Bleeding the Hydroboost Brakes can seem like a daunting task, but with the right tools and steps, it can be a relatively simple process. First, connect the tubing to the container and ensure that the container is properly secured to prevent any spills or leaks. Next, locate the bleed valve and attach the other end of the tubing to it.
Once the tubing is securely connected, open the valve and press the brake pedal multiple times. This will allow the brake fluid to move through the tubing and into the container. Keep an eye on the container and ensure that it doesn’t overflow.
After completing this step, you may need to repeat the process a few times before all of the air bubbles are removed from the system. Remember, always follow the manufacturer’s instructions and take precautions such as wearing gloves and eye protection when working with brake fluid. By following these steps, you’ll be able to bleed your Hydroboost brakes with ease and safety.
Step 4: Open Bleeder Valve
Bleeding the hydroboost brakes can seem like a daunting task, but it’s an essential step in maintaining your vehicle’s braking system. Once you’ve connected the hydraulic lines and filled the power steering pump, it’s time to open the bleeder valve. This process is crucial for removing any air that may have entered the system during the installation process.
To open the bleeder valve, you’ll need to use a wrench to turn the valve counterclockwise. As you do this, brake fluid will begin to flow out of the valve and into a drain container. It’s essential to keep an eye on the brake fluid reservoir level and to add more as needed to prevent air from being introduced into the system.
Once you’ve opened the valve and brake fluid is flowing freely, continue to hold the valve open until all air bubbles are eliminated from the fluid stream. Once the fluid is running smoothly, you can tighten the bleeder valve and move on to the next step in the process. By taking the time to bleed your hydroboost brakes, you’ll help ensure that your vehicle’s braking system works as it should and keeps you safe on the road.
Step 5: Pump Brake Pedal
After completing the bleeding process for your hydroboost brakes by opening the bleeder valve and waiting for the fluid to flow out without bubbles, it is time to move onto the final step. This involves pumping the brake pedal to create pressure within the system. Apply pressure to the pedal slowly with your foot until you feel resistance.
Hold this pressure to allow the fluid to fill the chamber, then release the pedal. Repeat this process several times until you feel the pedal become firm and responsive. This indicates that there is no air left in the system.
Finally, check the brake fluid level in the reservoir and top it up if necessary. By following these steps, you can ensure that your hydroboost brake system is correctly bled and functioning safely.
Step 6: Close Bleeder Valve
After successfully bleeding the brakes of your hydroboost system, it’s time to close the bleeder valve. This is a crucial step in completing the process, as leaving the valve open will result in air re-entering the brake lines. You can use your wrench to tighten the valve, but take care not to over-tighten it.
Once the valve is closed, you should test the brakes by stepping on the pedal. A properly bled brake system should give you a firm, responsive pedal feel. Remember to top off your brake fluid as needed, and monitor the system for any signs of leakage or abnormal behavior.
With this final step, you can rest assured that your hydroboost brakes are ready for safe and reliable operation.
Conclusion
In conclusion, bleeding hydroboost brakes on a Chevy is the automotive equivalent of performing open-heart surgery on your car. It requires a steady hand, precision and patience, but the end result is a vehicle that stops on a dime. So if you’re up for the challenge, grab some tools, a friend (or a few) and get ready to become intimately acquainted with your brakes.
And remember, always double-check your work, because as any experienced mechanic will tell you, brakes are one area where you don’t want to cut corners.”
Test Brake Pedal Pressure
Bleeding the Hydroboost brakes is an essential task when it comes to maintaining your vehicle’s brakes. The process may seem daunting, but with the right tools and some basic knowledge, it can be quite simple. The first step is to prepare the brake system by checking the brake fluid level and making sure it’s topped up.
Then, you need to locate the bleed screws on each wheel and attach a clear tubing to the bleed screw to collect the fluid. Start the car and pump the brake pedal until you feel some resistance. This will activate the pressure in the brake system.
Open the bleed screw and wait until the fluid starts to run through the tube. Close the screw and repeat the process for each wheel in the recommended sequence. Finally, test brake pedal pressure to ensure that it is firm and consistent.
This process ensures that any air bubbles within the brake system are removed, and the pressure is balanced for maximum braking efficiency and safety. So, make sure you bleed your Hydroboost brakes for a safe and comfortable driving experience.
Take to Mechanic If Needed.
If you’re experiencing difficulty with your brakes, it may be time to take your vehicle to a mechanic. They’ll be able to diagnose any issues and fix them before they become more severe. One common problem that may require a mechanic’s assistance is bleeding the hydroboost brakes.
This process involves removing air from the brake lines and can be complex to do correctly. If it isn’t done correctly, the brakes won’t work as they should, which could be very dangerous. A skilled mechanic will have the knowledge and tools to complete the job safely and efficiently, ensuring that your brakes are in good condition.
Don’t hesitate to take your vehicle to the pros if you need assistance with bleeding your hydroboost brakes. It’s always better to be safe than sorry when it comes to the safety of you and your passengers.
FAQs
What is hydroboost brake system in Chevy and how does it work?
Hydroboost brake system is a power braking system that uses pressurized fluid to assist brake operation. It works by using pressurized fluid from the power steering pump to apply force to the master cylinder and brake calipers, increasing braking power and control.
How do I know if my Chevy’s hydroboost brakes need bleeding?
Signs that your Chevy’s hydroboost brakes need bleeding include spongy or soft brake pedal, reduced braking power, or a brake pedal that goes to the floor. These symptoms indicate air in the system that needs to be bled out for proper brake operation.
How do I bleed the hydroboost brakes on my Chevy?
To bleed the hydroboost brakes on your Chevy, you will need to follow these steps:
1. Connect a brake bleeder kit to the brake caliper bleeder valve.
2. Start the engine and have an assistant pump the brake pedal several times.
3. Open the bleeder valve and let the fluid flow out until no air bubbles are present.
4. Repeat on all calipers until all air is removed.
5. Check the brake fluid level and add more if necessary to avoid running dry.
Can I bleed the hydroboost brakes on my Chevy by myself, or do I need a professional mechanic?
While it is possible to bleed the hydroboost brakes on your Chevy by yourself, it is recommended that you have a professional mechanic do it for you. Bleeding brakes can be a tricky and potentially dangerous process if not done correctly, and a professional can ensure that the job is done safely and correctly.

