Master the Art of Smooth Ride: A Comprehensive Guide on How to Adjust Fox Reservoir Shocks
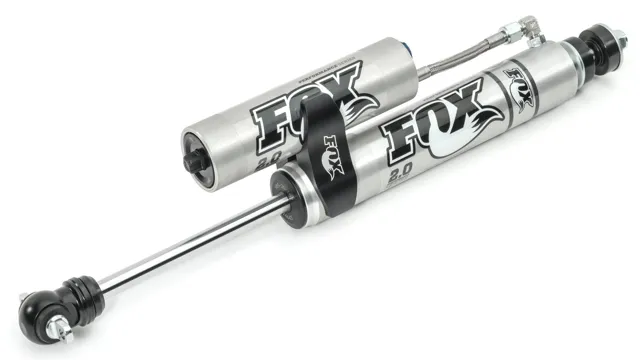
Are you tired of experiencing jolts and jerks while riding your off-road vehicle? Adjusting your Fox reservoir shocks might be the solution you need. These types of shocks are designed for heavy-duty usage and require a specific tuning process to match the terrain and the weight of your vehicle. In this blog post, we will guide you through the necessary steps to adjust your shocks and ensure a comfortable and safe ride.
Think of it as tuning the strings of a guitar, except this time you’ll be tuning them to the rough and rugged trails you love to conquer. So, get ready to take your off-road experience to the next level with our expert tips on adjusting your Fox reservoir shocks.
What You’ll Need
If you’re looking to get the most out of your off-road vehicle, adjusting the suspension is key. Fox reservoir shocks are a popular option among enthusiasts due to their high performance and customizable settings. To adjust these shocks, you’ll need a few key tools.
First and foremost, a shock pump is necessary to adjust the pressure in the reservoir. Additionally, a spanner wrench is required to adjust the spring preload and compression damping. A hex wrench is also necessary to adjust the rebound damping.
It’s important to note that the specific tools required may vary based on the model of your Fox reservoir shocks. Additionally, it’s recommended to refer to the manufacturer’s instructions for proper procedures and settings. With the right tools and knowledge, adjusting your Fox reservoir shocks can greatly improve your off-road experience.
Fox reservoir shock manual
If you’re planning to work on your mountain bike’s suspension system, it is crucial to have the necessary tools and knowledge about the process. One tool that can come in handy is the Fox reservoir shock manual. This manual contains all the information you’ll need to service and tune your shock yourself, without the need for costly professional help.
The manual provides detailed instructions on how to set up your shock for optimal performance and how to troubleshoot issues that may arise. Some of the things you’ll need to have ready before diving into the manual include an understanding of the type of suspension your bike has, the right tools for the job, and a willingness to learn and experiment with your shock’s settings. With the Fox reservoir shock manual on hand and these prerequisites in place, you’ll be able to make tweaks and adjustments to your suspension system to improve ride quality and performance.

Shock pump
A shock pump is a valuable tool for efficient and precise suspension tuning. You’ll need a few things to effectively use a shock pump, including the pump itself, a gauge, and a valve core tool. The pump is specifically designed for suspensions and has a high-pressure rating, usually around 300 psi, which is critical for accurate measurements.
You’ll also need a gauge to read the pressure and ensure you’re within the manufacturer’s recommended range. Additionally, you’ll need a valve core tool to remove and reattach the valve core when adding or releasing air pressure. Some shock pump models come with a built-in valve core tool, so be sure to check before purchasing.
Overall, owning a shock pump can greatly improve your suspension performance and ensure a smoother ride, so it’s a worthwhile investment for any serious rider.
Wrench
When it comes to fixing things around the house, a good wrench is often essential. Whether you’re repairing a leaky faucet or replacing a corroded pipe, having the right tools can make all the difference. When choosing a wrench, there are a few things you’ll need to consider.
First and foremost, you’ll want to think about the size of the work you’ll be doing. Different wrenches are designed for different types of jobs, so be sure to choose one that fits your needs. Next, you’ll want to think about the quality of the wrench itself.
Look for a sturdy, well-made tool that will last for years to come. And finally, make sure you have a good grip on the wrench so you can apply enough torque to get the job done. With these things in mind, you’ll be well on your way to a successful DIY project.
So go ahead and grab that wrench – you’ve got this!
Setting the Sag
Adjusting your Fox reservoir shocks is essential to setting up your bike for optimal performance. One of the critical steps in this process is setting the sag, which is the amount of compression on your shock when your weight is applied to the bike. To do this, you’ll need a shock pump and someone to help you measure the sag.
First, measure the distance between your rear axle and the frame with your weight on the bike. This measurement is called your ‘active’ measurement. Next, subtract your ‘static’ measurement (the distance between the rear axle and the frame when the bike is unweighted) from your active measurement.
This difference is your sag. Adjusting your sag is simple; add or remove air pressure from your shock until the sag measurement is where you want it. Pro tip: always double-check your measurements, and don’t be afraid to experiment with different sag setups to find the perfect balance between comfort and performance.
Remember, proper suspension settings can make all the difference in your riding experience.
Measuring sag for your weight
Setting the sag on your bike is crucial for achieving the optimal suspension performance. One important factor to consider when setting your sag is your weight. If the sag is too high, your bike may feel sluggish and difficult to handle.
On the other hand, if your sag is too low, your bike may bottom out too easily. To measure your sag for your weight, you will need a friend or a bike mechanic to assist you. Sit on your bike in your normal riding position, with your weight distributed evenly across the bike.
Next, measure the distance between the o-ring on your shock and the seal or dust wiper on your fork. This measurement is your total suspension travel. Using the recommended sag percentage for your bike, adjust the preload on your shock until the o-ring is at the correct sag position.
It may take some trial and error to find the right setting, but once you do, you’ll notice a significant improvement in your bike’s handling and overall performance. Don’t hesitate to ask for help if you’re unsure about how to set your sag – having properly adjusted suspension can make all the difference in your ride.
Adjusting pressure with shock pump
When it comes to adjusting the pressure on your bike’s shock absorbers, a shock pump is a handy tool to have. One of the primary settings that you’ll need to consider is the sag. Sag refers to the amount of suspension compression when you sit on your bike.
Ideally, you want the sag to be around 25-30% of the total travel of the suspension. To set the sag, first, adjust the pressure to the manufacturer’s recommended level. Then, sit on your bike in your riding gear and bounce up and down to level out your suspension.
Have someone measure the distance between the o-ring on the shock absorber and its seal. This distance is the sag. If the sag is less than the recommended range, increase the pressure a little and measure again.
If it’s more than the recommended range, decrease the pressure slightly and measure again. Repeat until you achieve the recommended sag percentage. With a little practice, you’ll be able to set the sag quickly and easily using your shock pump, and enjoy a smoother, more comfortable ride.
Compression Damping
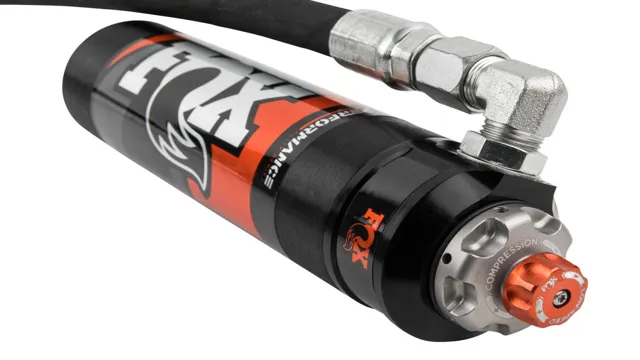
Adjusting the compression damping on your Fox reservoir shocks can make a significant difference in how your bike handles on a variety of terrains. To begin, locate the compression dial on your shock and turn it counterclockwise to decrease compression and clockwise to increase compression. Generally, increasing compression provides better support and prevents the shock from bottoming out on rough trails, while decreasing compression allows for better sensitivity and a smoother ride on smoother terrain.
It’s crucial to adjust the compression damping to your riding style and preferred terrain conditions to optimize your ride experience. Don’t be afraid to experiment with different settings to find the perfect balance for your specific needs. With these adjustments, you can significantly enhance your riding comfort and improve your overall performance on the trails.
Adjusting compression damping for terrain
Compression damping is a key factor in adjusting your mountain bike’s suspension for different types of terrain. It refers to the resistance in the suspension system when it compresses under the weight of the rider and bike. By adjusting the compression damping, you can fine-tune how much resistance is provided, allowing for better control and stability.
For smoother trails, less compression damping may be needed, whereas for rougher terrain with bigger bumps and drops, more compression damping may be necessary. It’s important to find the right balance, as too little compression damping can result in a bouncy ride, while too much can result in a harsh and jarring experience. With the right compression damping setting, you’ll be able to tackle any terrain with confidence and efficiency.
Fine-tuning compression damping with clicks
Compression damping is all about finding the right balance between not enough and too much. One way to fine-tune compression damping on your bike is through clicks. Clicks refer to the number of turns you make on the adjuster knob.
Each click corresponds to a specific level of damping force. If you find that your suspension is too soft, try increasing the compression damping by turning the knob clockwise to add more clicks. On the other hand, if your suspension is too stiff, try decreasing the compression damping by turning the knob counterclockwise to reduce the number of clicks.
By experimenting with different click settings, you can achieve the perfect balance of comfort and control. Remember to test out your adjustments on different terrains and riding conditions to ensure that they work well for your particular style of riding.
Rebound Damping
If you’re wondering how to adjust your Fox reservoir shocks, one important factor to consider is rebound damping. This refers to the rate at which the shock extends after it compresses. Essentially, it helps control how quickly the shock returns to its original position.
To adjust the rebound damping on your Fox reservoir shocks, it’s important to have the right tools and to take things slowly. First, locate the rebound adjuster on your shock and turn it clockwise or counterclockwise to adjust the damping. It’s important to test your shocks after every adjustment to ensure they’re working correctly and to make small adjustments until you find the right setting for your specific riding style and terrain.
By properly adjusting your rebound damping, you can experience better handling and a more comfortable ride on your bike.
Adjusting rebound damping for terrain
Rebound damping is an essential feature that helps adjust your bike’s suspension to different terrains. This aspect of damping is responsible for controlling how fast the shock absorber expands back to its regular position after being compressed. Therefore, adjusting rebound damping can help you ride more smoothly and handle different terrains effectively.
For instance, if you are riding on bumpy terrains, you will need to slow down the rebound damping to absorb the shock more effectively. On the other hand, if you are on a smooth surface, you will need to increase the rebound damping to prevent your bike from bouncing and losing traction. Striking the perfect balance is crucial, and experimenting with different settings according to the terrain will go a long way in ensuring you enjoy smooth, comfortable, and safe rides.
So, go ahead and explore different rebound damping settings to make your ride more enjoyable!
Fine-tuning rebound damping with clicks
Rebound damping is an essential aspect of bike suspension, and it’s crucial to fine-tune it to maximize your ride quality and safety. In simple terms, rebound damping refers to the speed at which your suspension extends after compressing from a hit or impact. By adjusting the rebound damping, you can improve your bike’s handling, stability, and overall comfort.
Clicks are the most commonly used method for fine-tuning rebound damping. Each click on your suspension’s rebound adjustment knob (usually found at the bottom of your fork) alters the damping’s flow through the suspension’s circuits. A few clicks in either direction can make a significant difference in your bike’s feel, so it’s crucial to experiment with different settings to find your ideal balance.
Remember, your rebound damping settings will vary depending on your weight, style of riding, terrain, and other factors, so don’t be afraid to experiment until you find the perfect setting for your needs.
Conclusion
In conclusion, adjusting your Fox reservoir shocks is a like a delicate dance between precision and intuition. It takes patience, skill, and a little bit of luck to find that sweet spot of optimal performance. But fear not, with a little bit of knowledge and a lot of elbow grease, you can tweak that suspension and leave your competition in the dust.
Or, if you’re like me and just like the feeling of a smooth ride, then adjust away and enjoy the smoothest ride of your life! So go ahead and get your hands dirty, and remember, in the words of the famous philosopher Aristotle, “Excellence is never an accident; it is the result of high intention, sincere effort, intelligent direction, skillful execution, and the vision to see obstacles as opportunities.”
FAQs
Why should I adjust my Fox reservoir shocks?
Adjusting your Fox reservoir shocks can improve your vehicle’s performance and handling, as well as provide a smoother ride over rough terrain.
What tools do I need to adjust my Fox reservoir shocks?
You will need a spanner wrench, rubber mallet, and a shock pump to adjust your Fox reservoir shocks.
How do I adjust the compression and rebound on my Fox reservoir shocks?
Use the spanner wrench to adjust the compression and rebound settings on your Fox reservoir shocks. Turn the adjustment knobs clockwise to increase damping and counterclockwise to decrease damping.
How often should I adjust my Fox reservoir shocks?
It is recommended to adjust your Fox reservoir shocks every 6 months or after any significant changes to your vehicle or riding conditions.
Can I adjust my Fox reservoir shocks myself or do I need a professional?
With the right tools and knowledge, you can adjust your Fox reservoir shocks yourself. However, if you are unsure or uncomfortable with the process, it is recommended to have a professional do it for you.


